- ©2026 Teri Hanson Miniatures / PERSONAL USE ONLY
My first full-scale, 1:12, size dollhouse, and the second miniature I ever worked on was the Lighthouse from Real Good Toys. Sometimes, the space allotted in a dollhouse room can be smaller than what you would like, and you will need to find a creative way to make use of the space. This is exactly what I had to do in the top room of the lighthouse when using it as the bedroom. To this day, this is still one of my favorite ideas. I hope you find this tutorial helpful, and maybe it can be a solution for you one day!
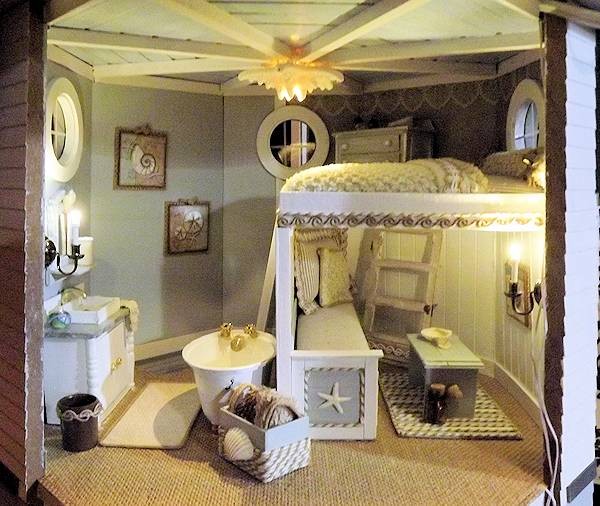
Here is a look at the full room . . .
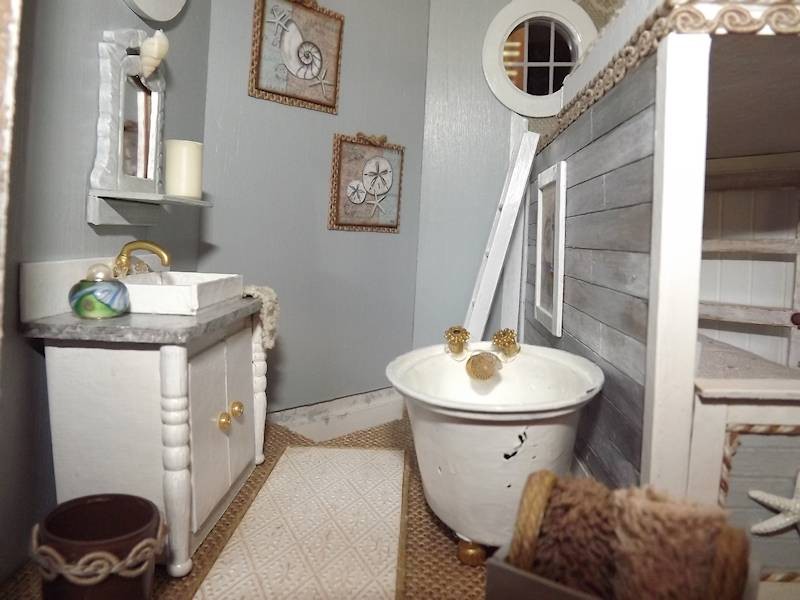
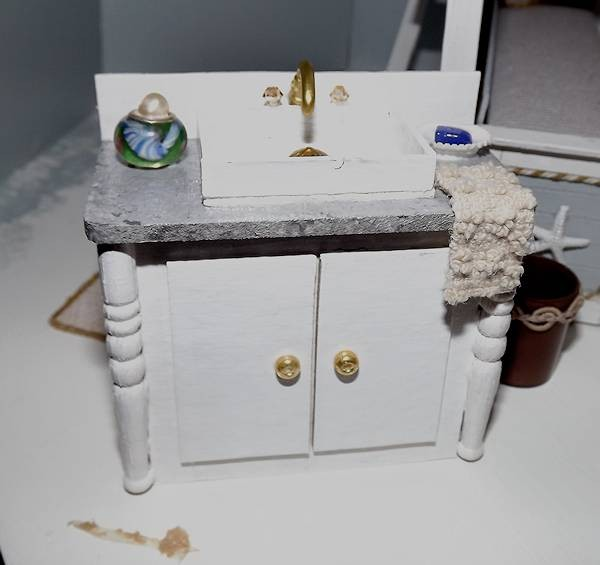
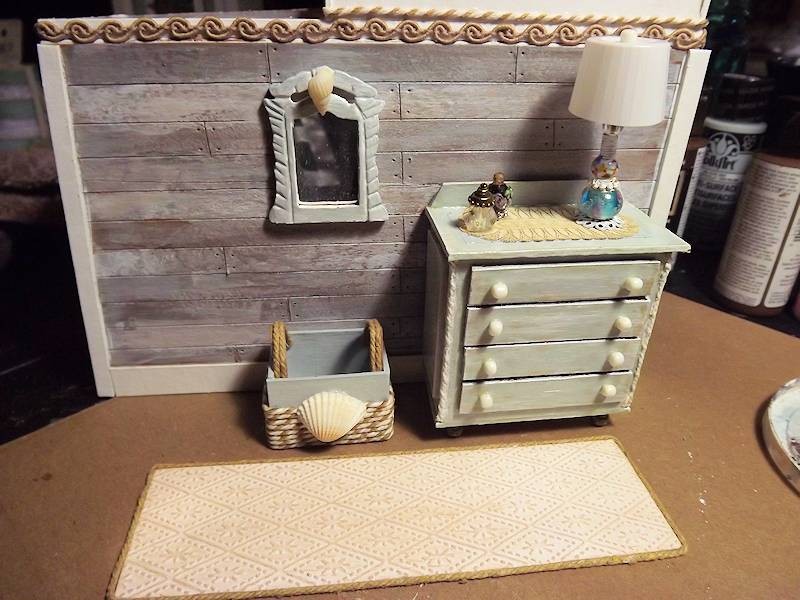
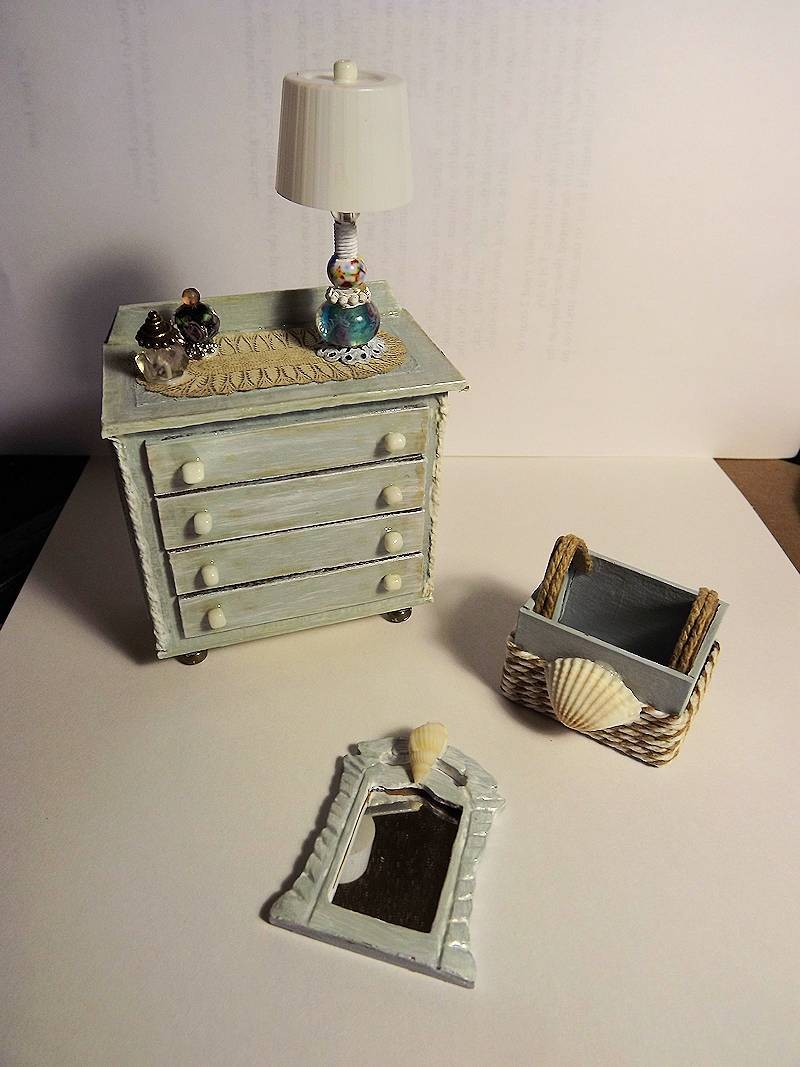
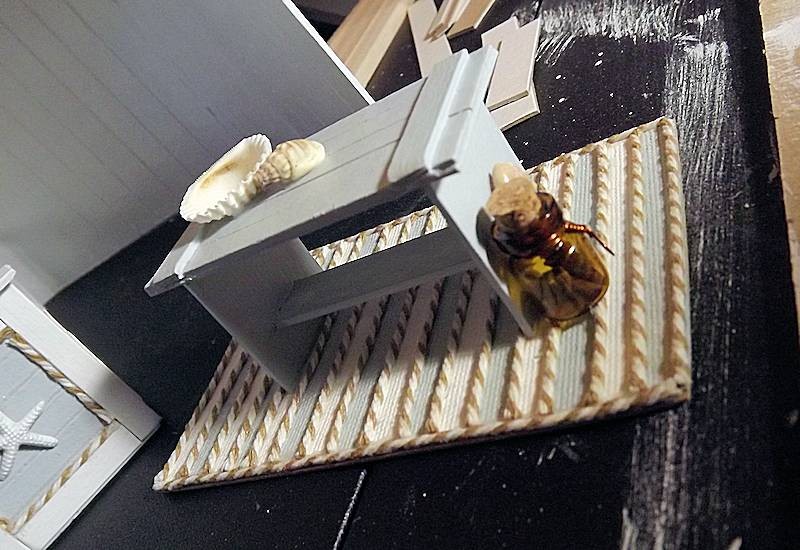
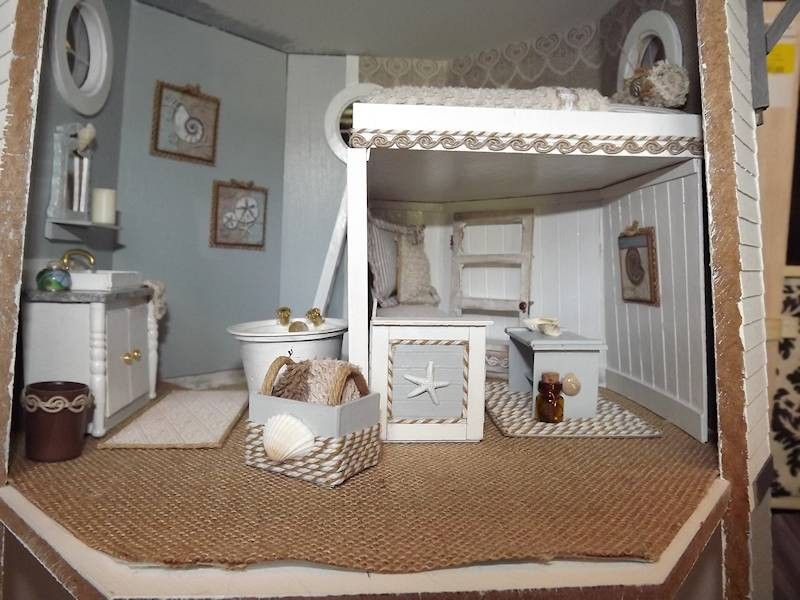
What I did was to create a loft bed with a sitting area underneath and a bath area on one side. In the first photo you can see a repurposed bought miniature cabinet, a little mirror I created from scraps, and a bathtub made from a food container. I love the faux wood wall and the ladder taking you up to the sleeping area.
Most of the items within the room has simple furnishings that were created with mat board and are non-functional. Beads make great furniture knobs, and bakers twine can add a nice accent to any miniature piece. Old washcloths were used as mini towels, while various beads and a paper butter cup were used to create a lamp.
The sitting area featured a long couch, bookshelf, coffee table, and wall sconce lighting. Added later but not shown here were a few books for the bookshelf and magazines for the coffee table.
The entire loft bed section was created with white mat board. The bed needs to be high enough so that a person can actually walk underneath comfortably, but low enough from the ceiling that they can sit upright in the bed. Keep that in mind for your own space and measure accordingly. Once you have these dimensions, you can decide on the size of the couch. I suggest making the couch as deep as possible so that it can be used as a second sleeping area for a guest. You could also make it like a trundle bed with a pull-out mattress underneath.
You can use post-it notes, printer paper, or cardstock to create a template for the shape of the area where the bed will rest against the walls. Keep in mind that these walls slant inward as they rise upward, so you need to take that into account when deciding on the height of the sleeping area. Once you have a template made, cut a single piece that will fit against the walls and come outward to the side and forward towards the room opening for a double-size bed. You can’t see it in the photos, but I left a space towards the back wall side of the bed for a small nightstand and an area where a person would be when they climbed the ladder.
There are so many options you could do with this space. You could add railings on the side of the bed that are viewed from the front, or add a higher wall on the same side with a board/shelf across the top for use as a nightstand. Let your imagination run wild and have fun!
Last but not least, in case you are wondering, the ceiling light was created with a large starfish shell. I carefully drilled a hole in the center to run the light wires through and secure the bulb. I love how it turned out.
Thanks for stopping by, and till next time, happy mini making!
Teri