- ©BHM Fireplace Room 1:24 Kit
- ©Teri Hanson Miniatures – room extensions
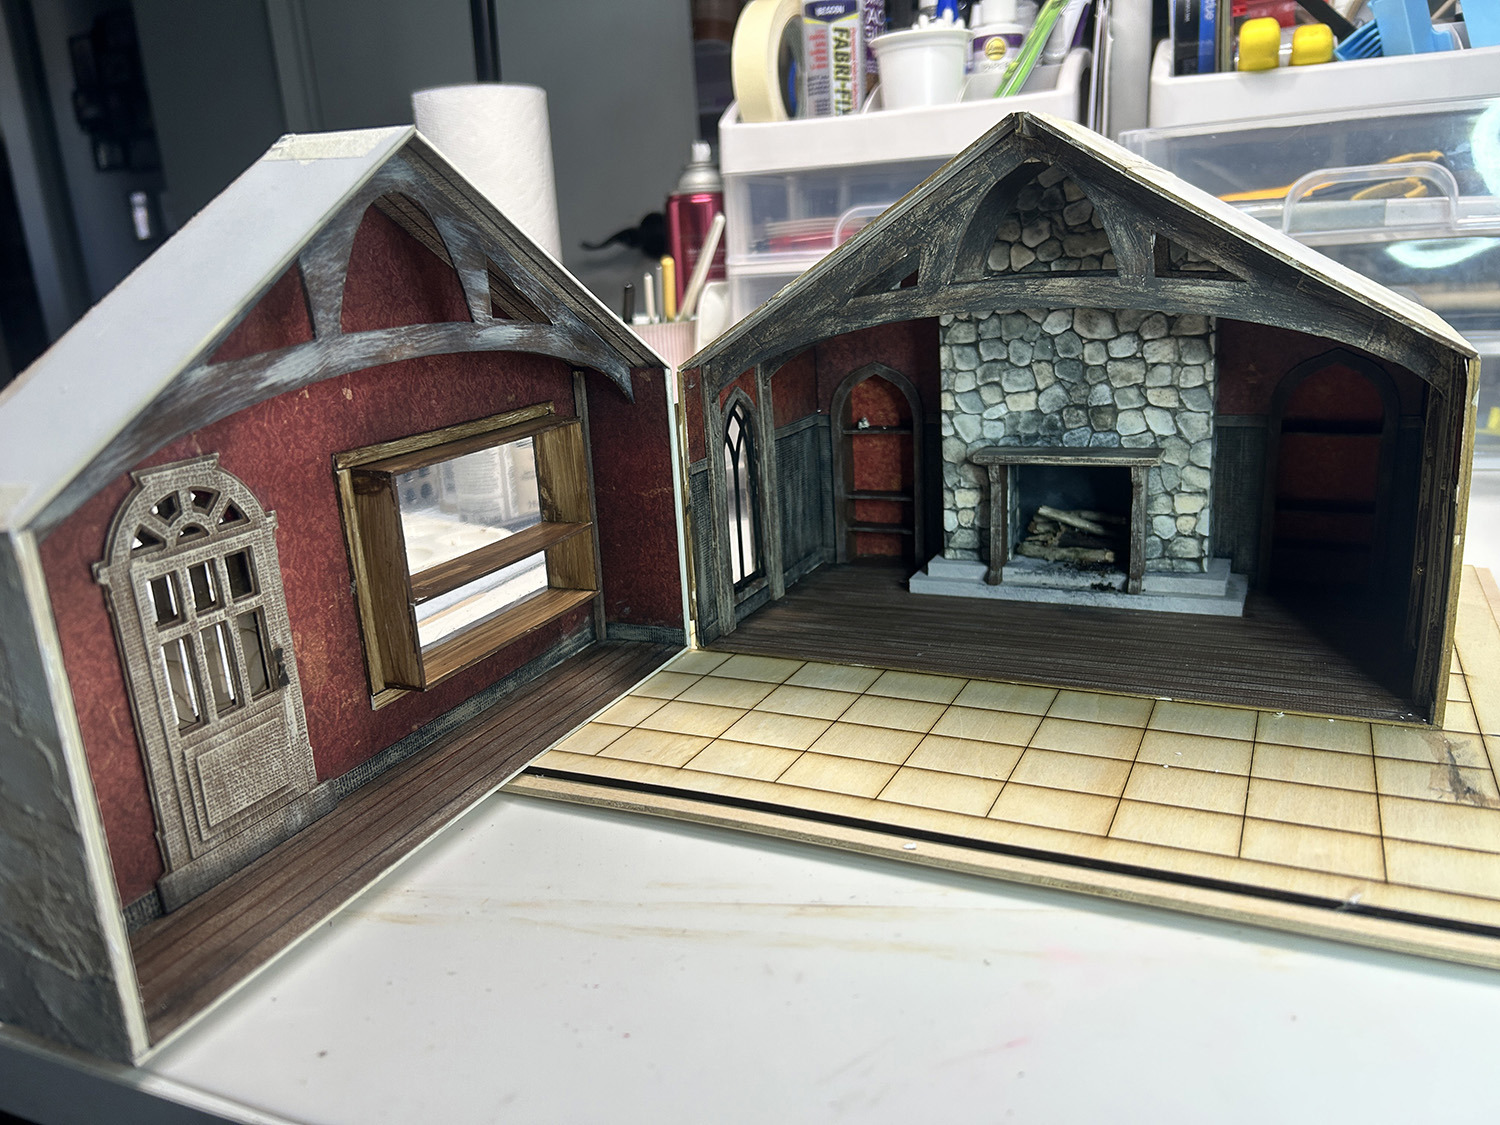
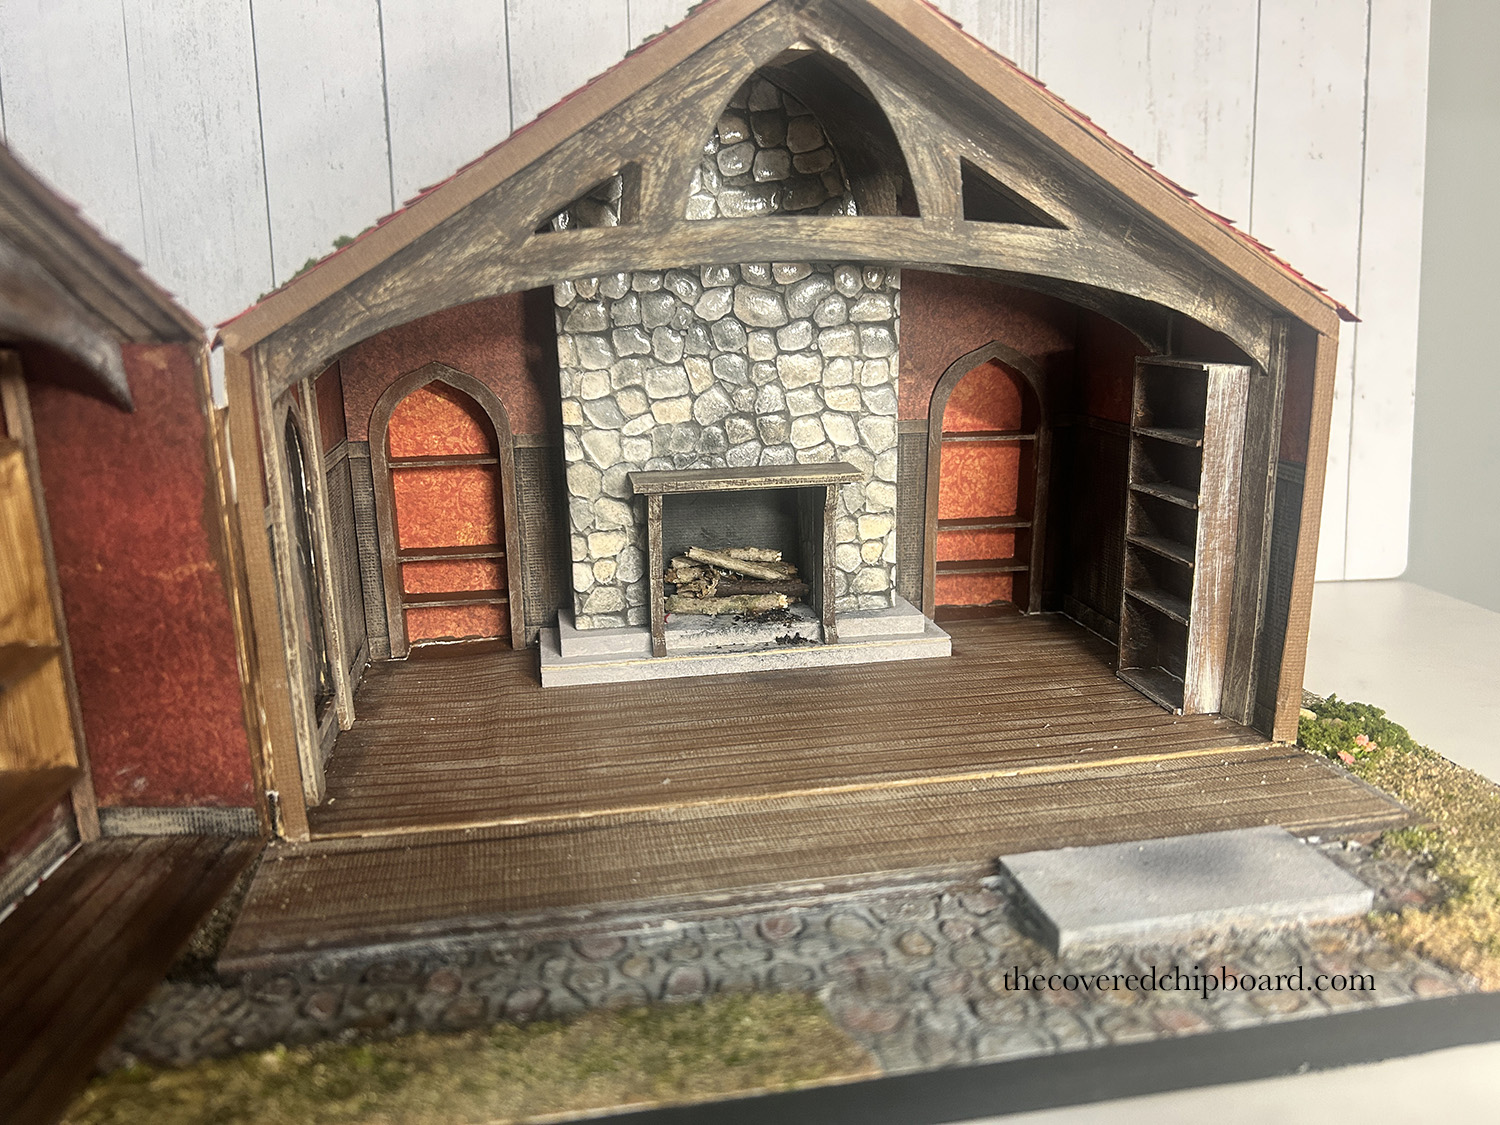
Welcome back to my build of the Fireplace Room by Bentley House Minis! I do hope you are finding the process interesting and maybe learning a new thing or two. When we last left off, the entire outside of the structure was finished. However, as it usually goes, I’ve decided that I do need a door of some kind on that back section, so that will show up here in a bit.
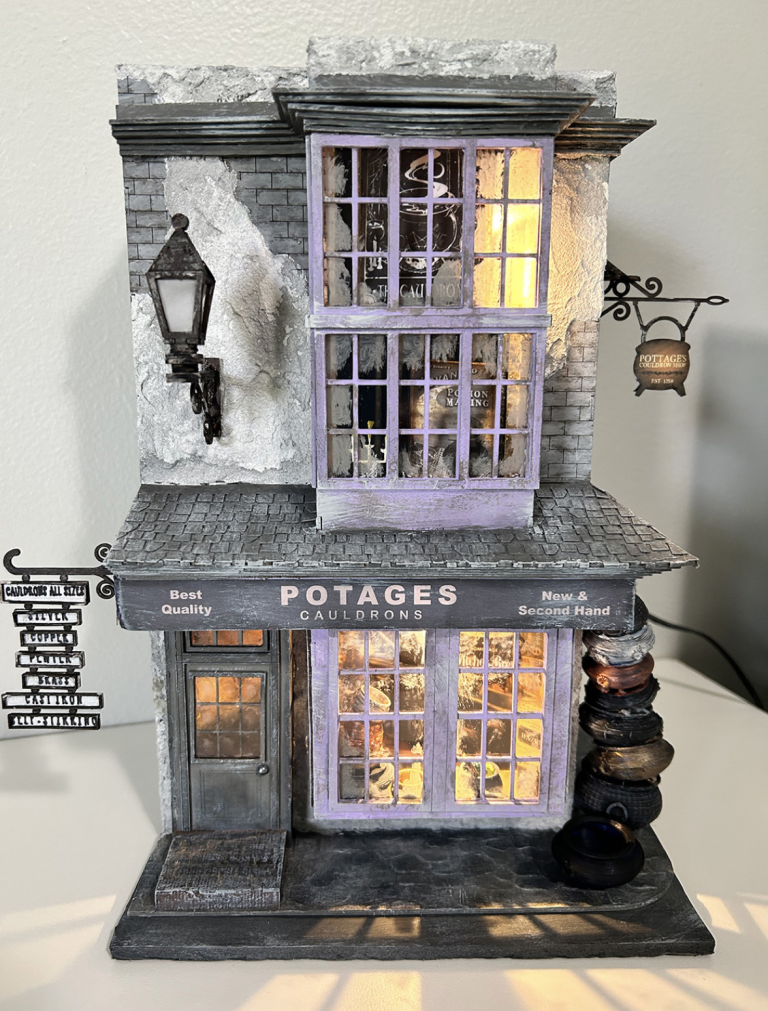
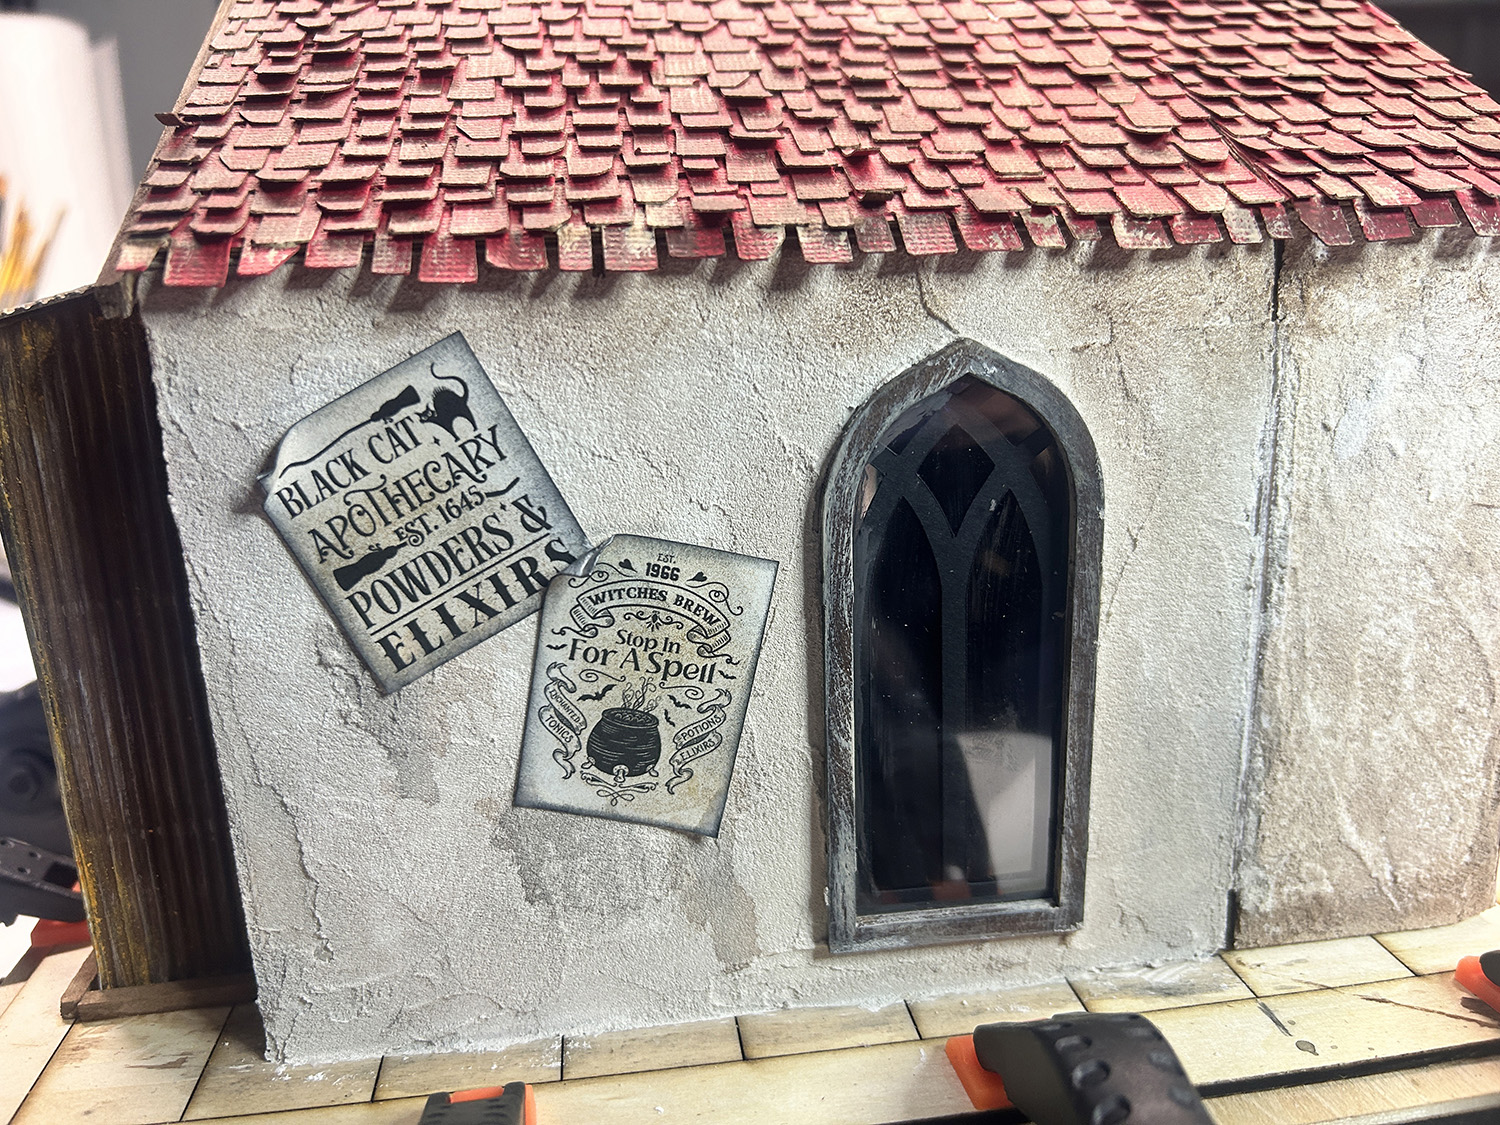
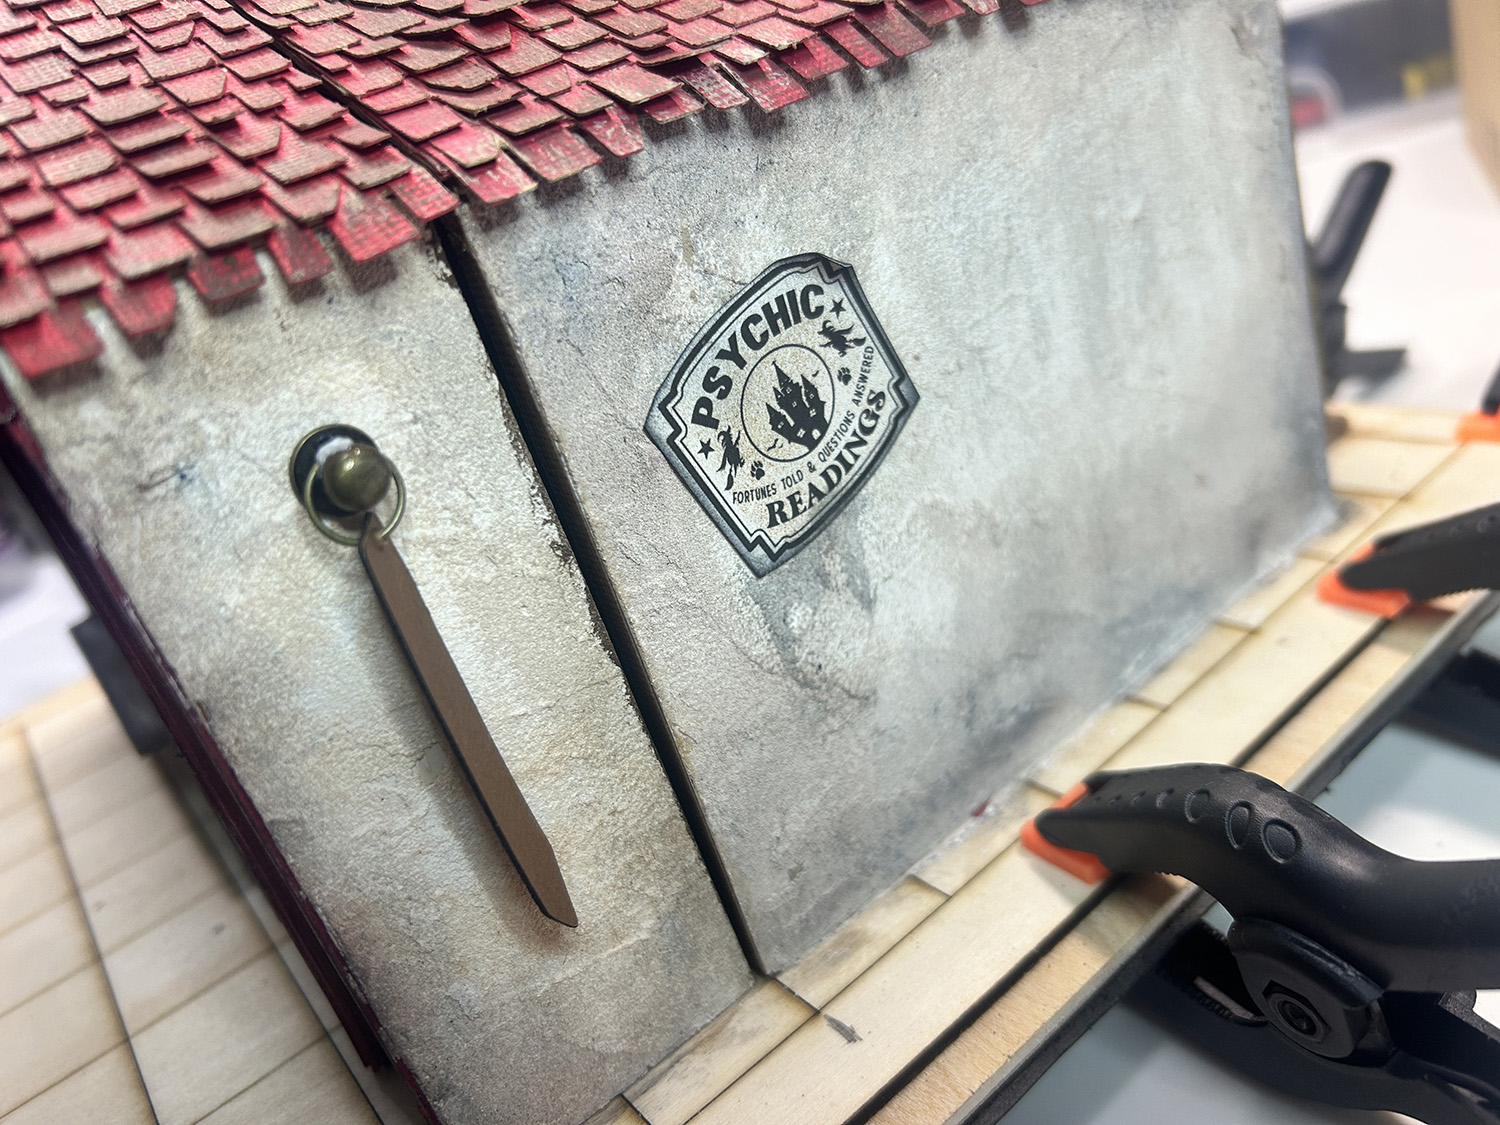
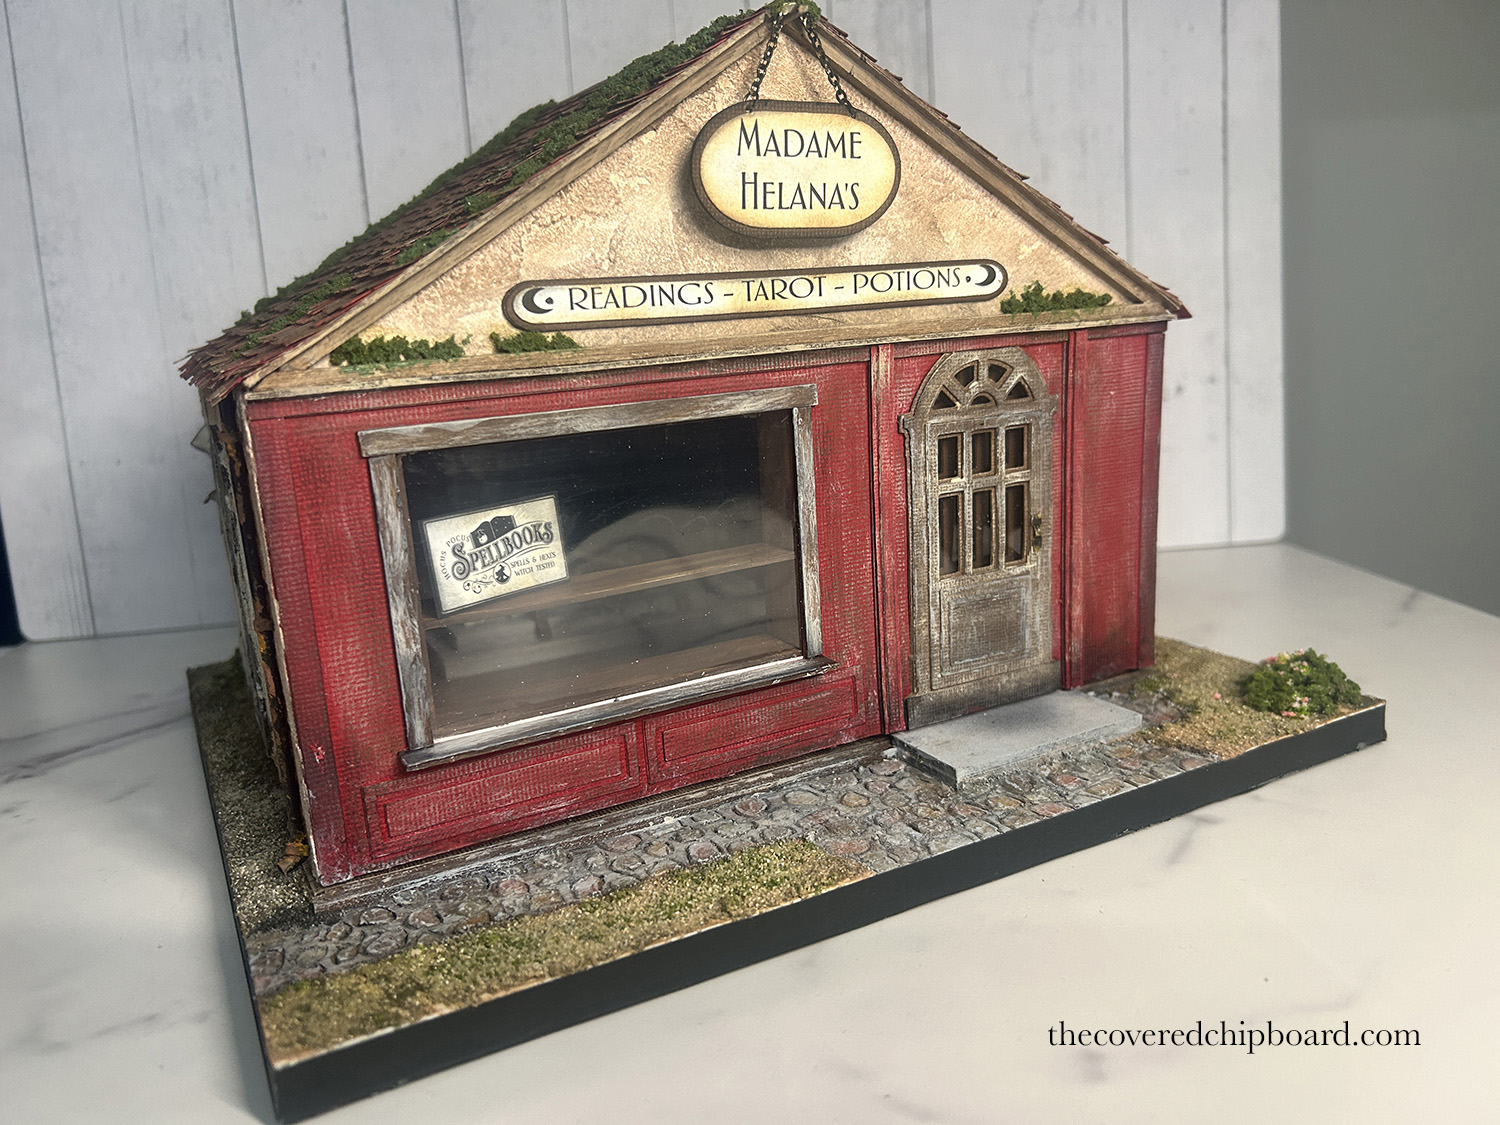
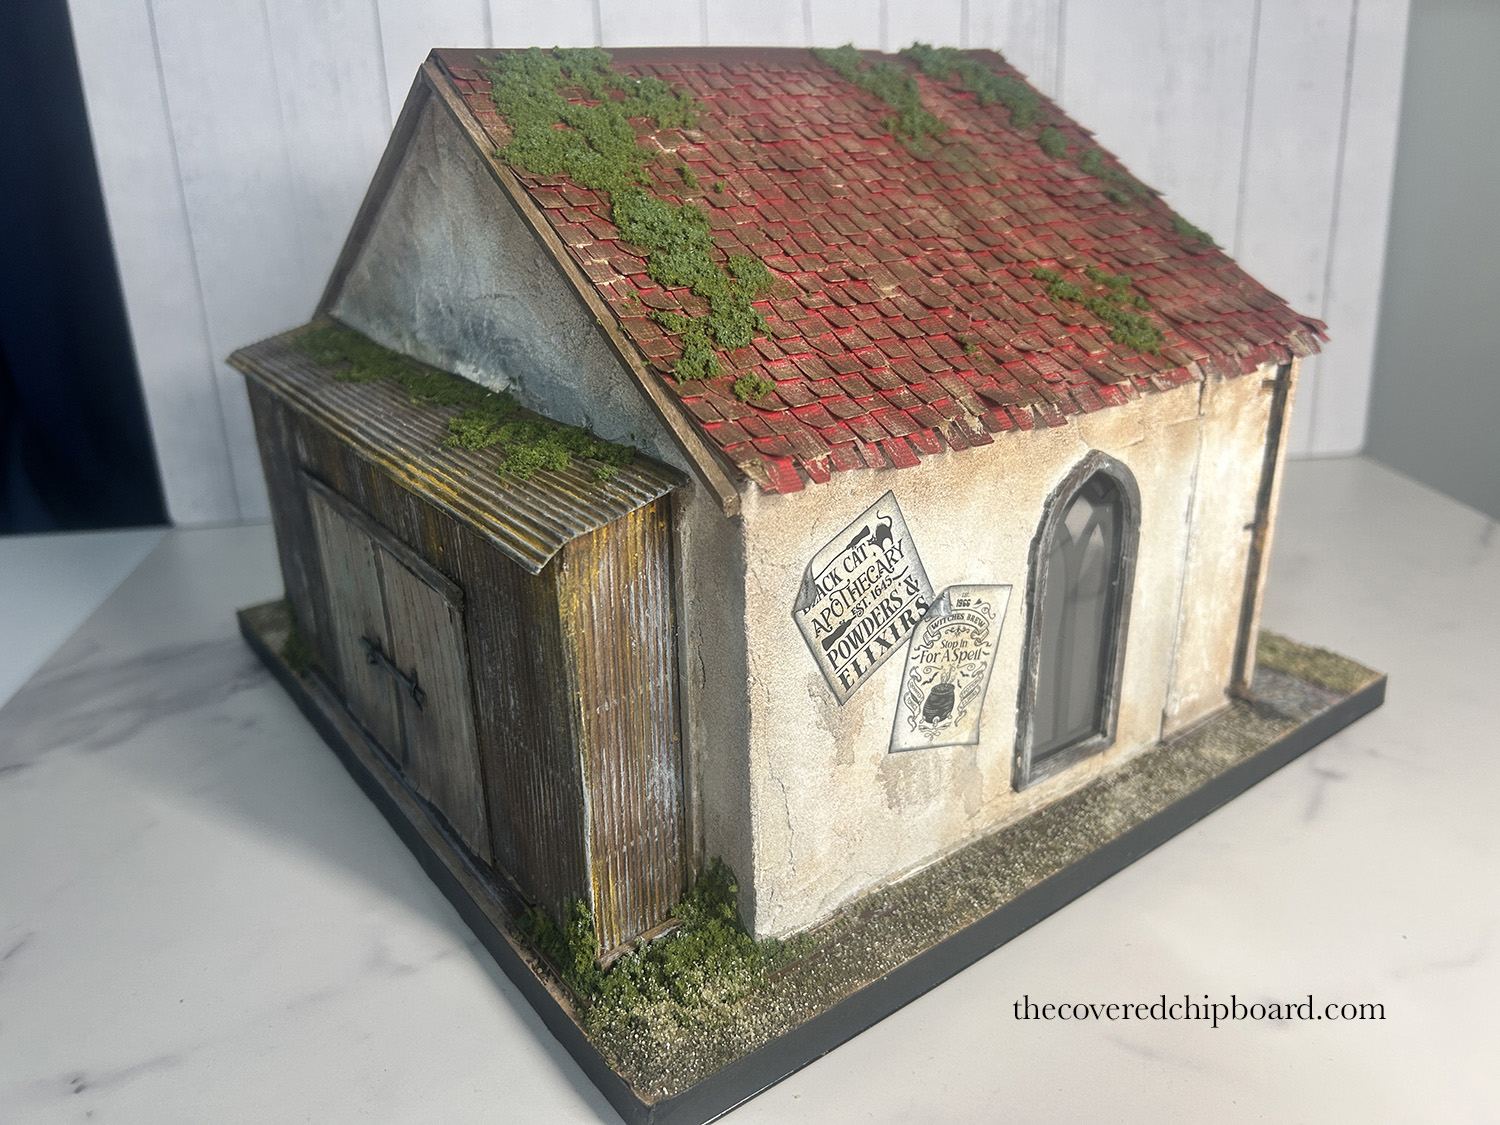
I’ve worked on the signs this morning using images from Creative Fabrica, my own images, and a Cricut machine to cut the signs out. All were distressed with both Black Soot and Vintage Photo distress inks. Other than the signs on the outside, you will find two additional signs inside. I’ve also decided to add a piece of black, cheap foam core to the base for more thickness.
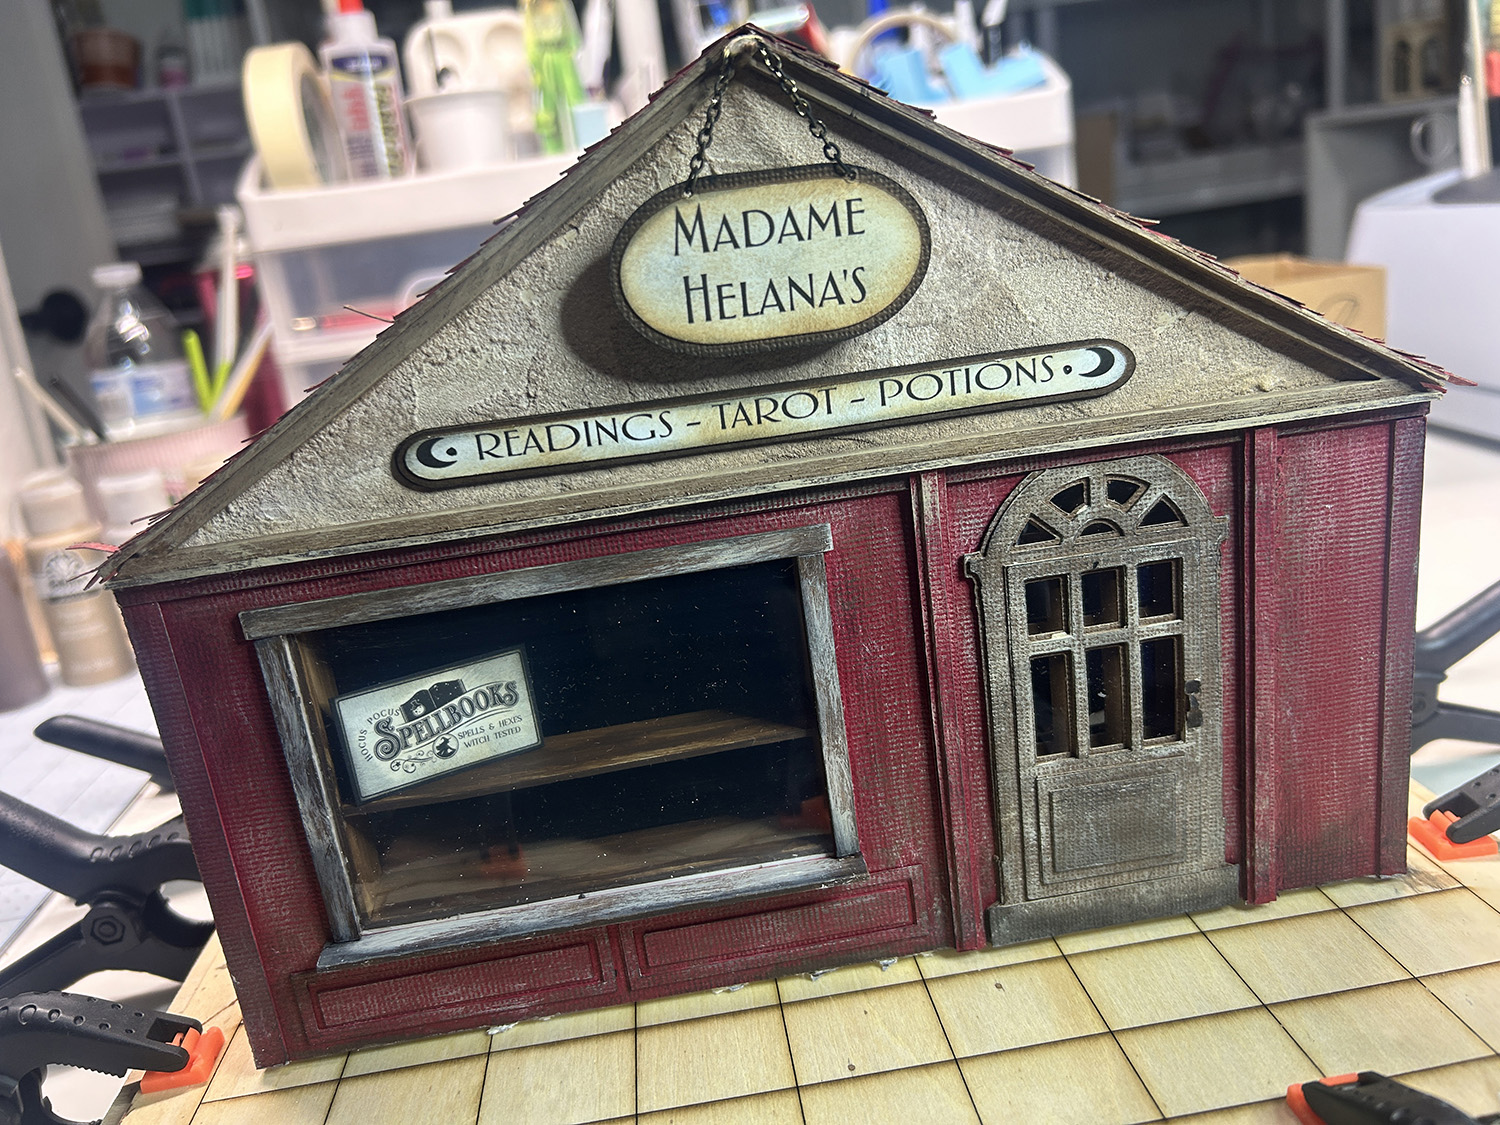
All of the signs were distressed with both Black Soot and Vintage Photo distress inks. Other than the signs on the outside, you will find two additional signs inside. I’ve also decided to add a piece of black, cheap foam core to the base for more thickness.
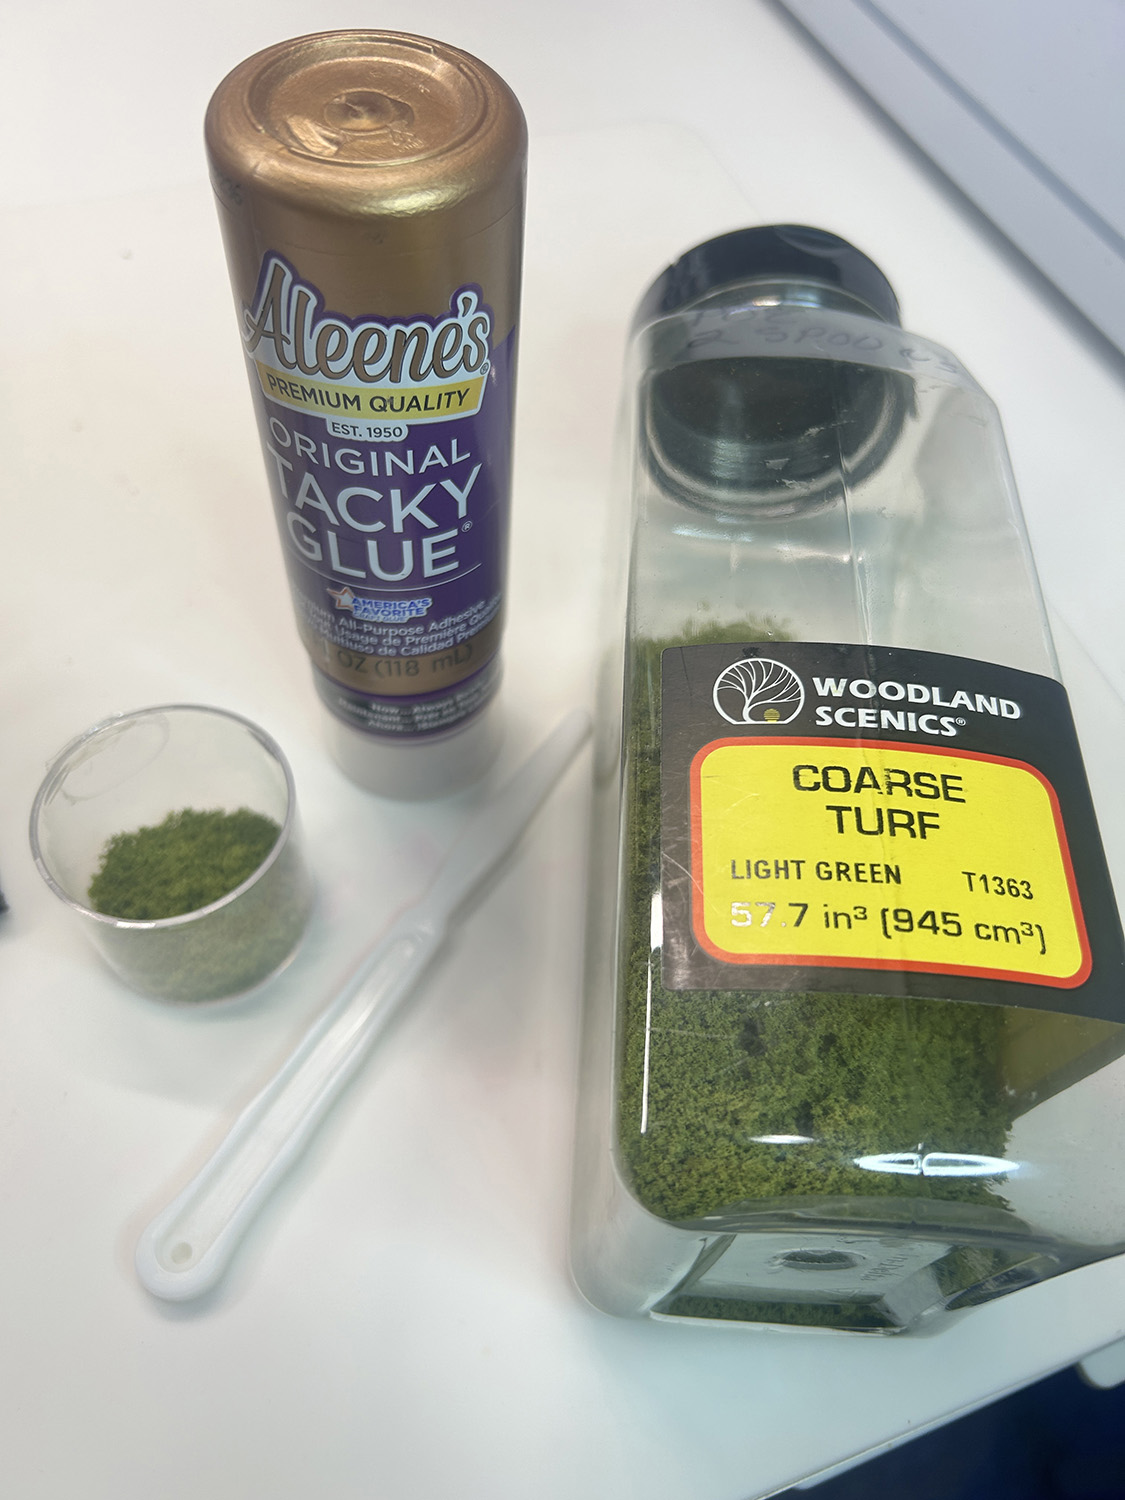
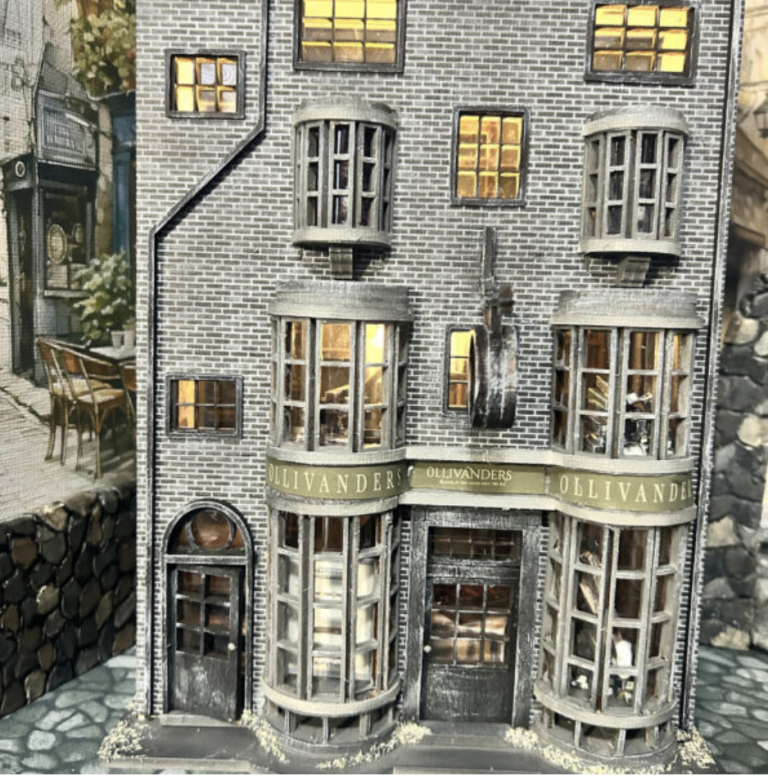
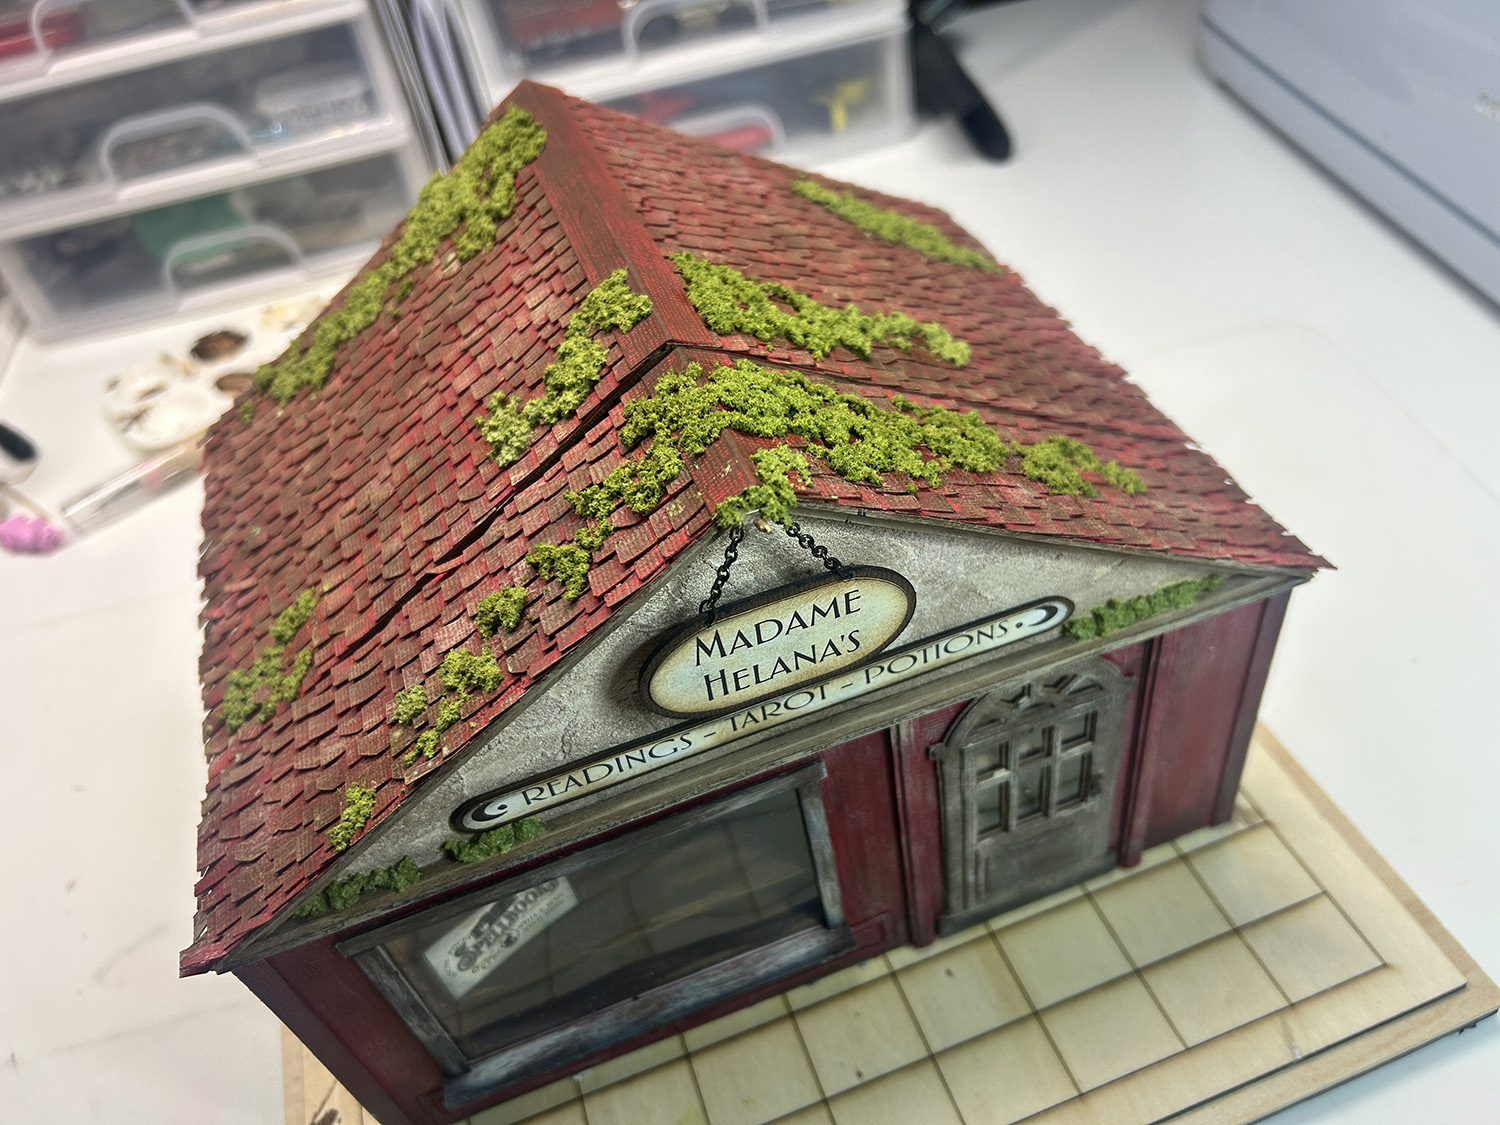
My favorite way of creating moss is to use coarse turf, tacky glue, and a pinch of water mixed together.
The moss is then applied to areas in small amounts with a palette knife. You could also use a flat piece of wood, cardboard or any other such item.
You want a mushy consistency but not watery. This will take a while to dry – probably overnight. Once it’s dry, you can spray it with a matte sealer to further adhere it to the project.
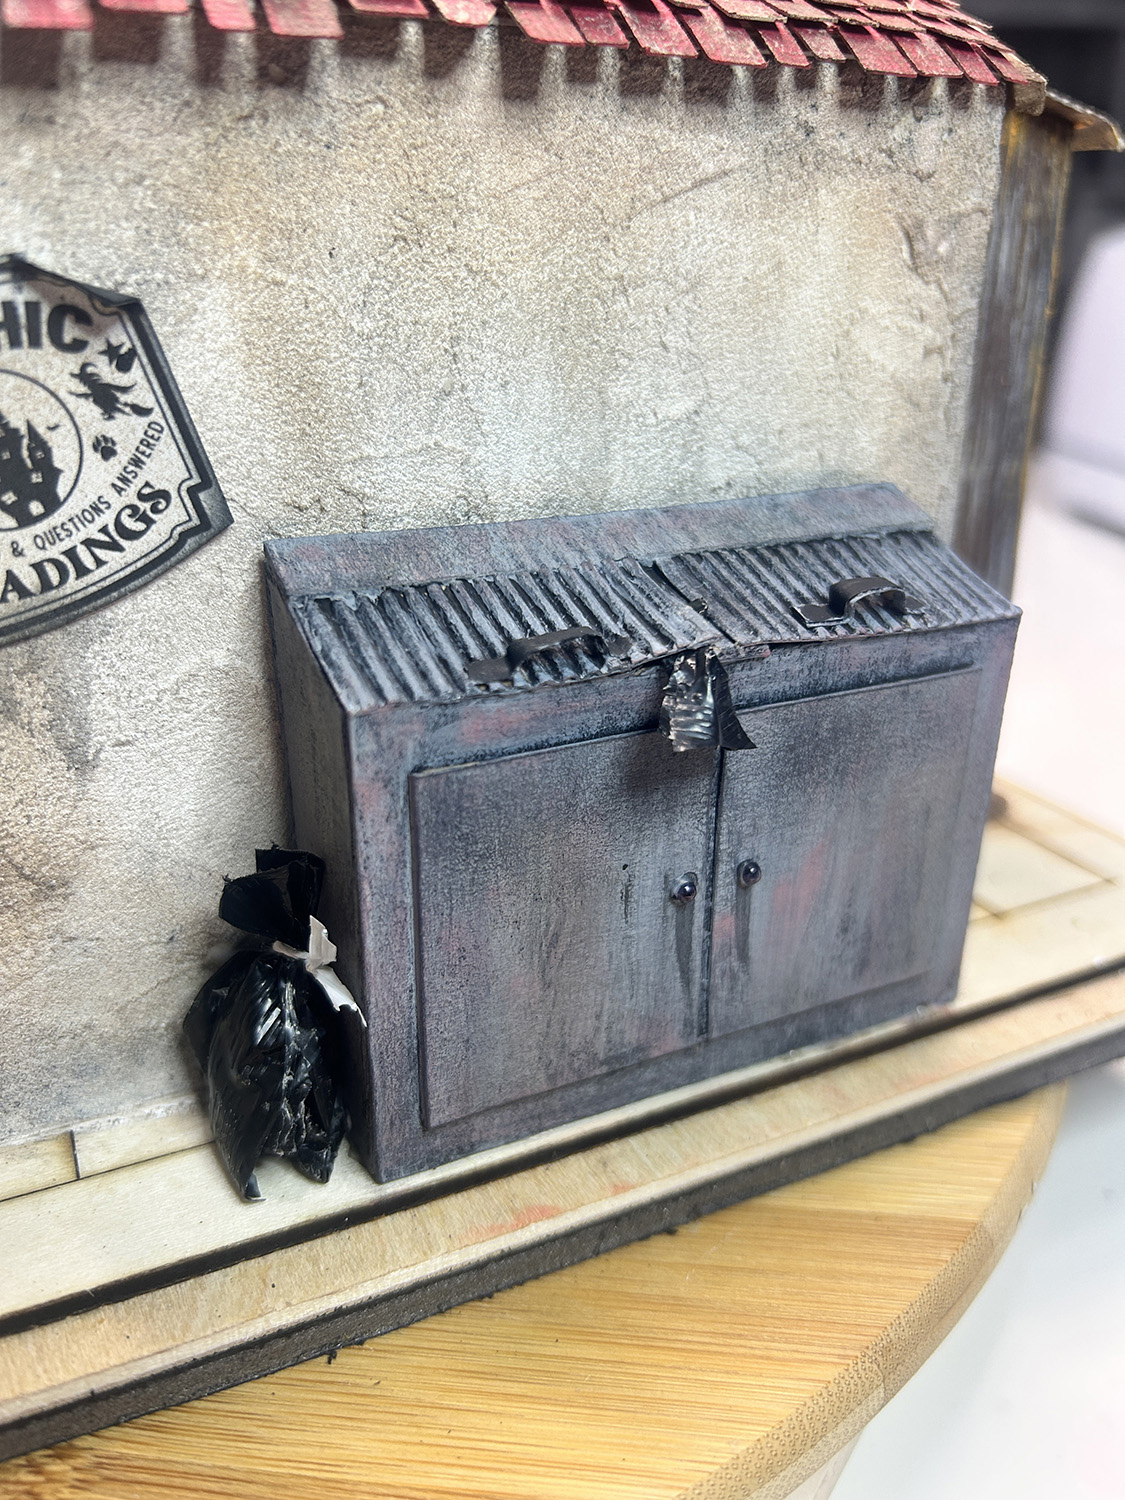
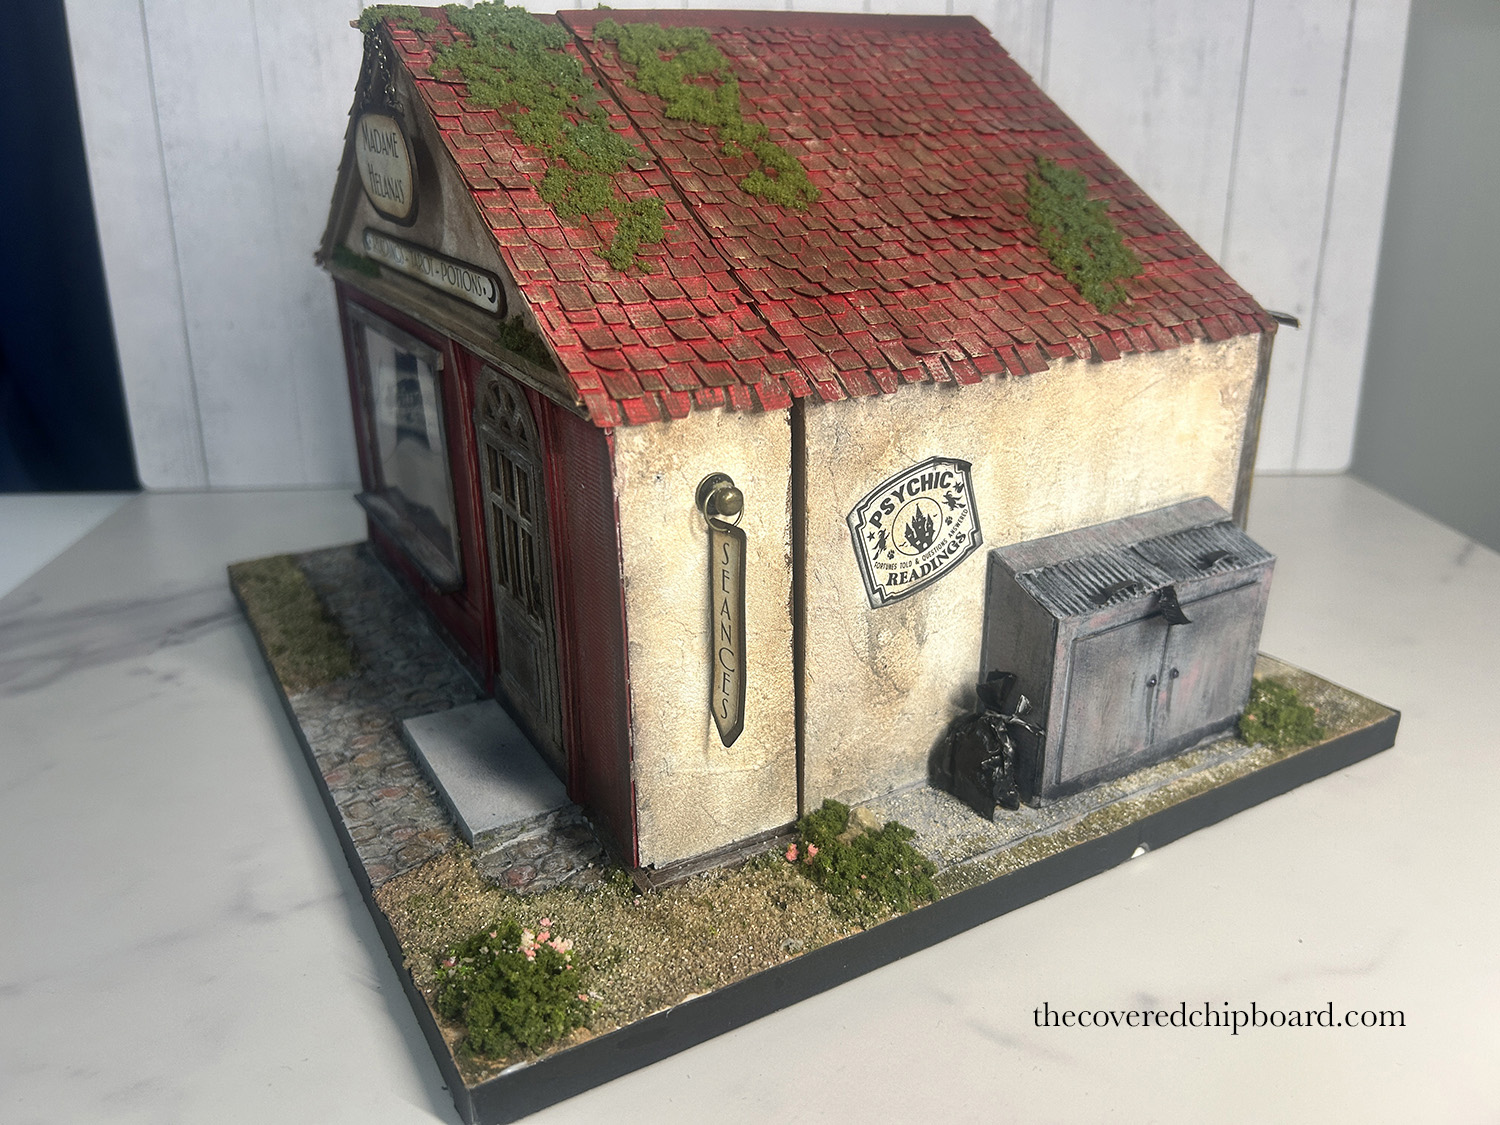
I then moved on to some extras for the exterior like . . . well YES, every shop needs a trash bin! However, Helena isn’t too neat about hers.
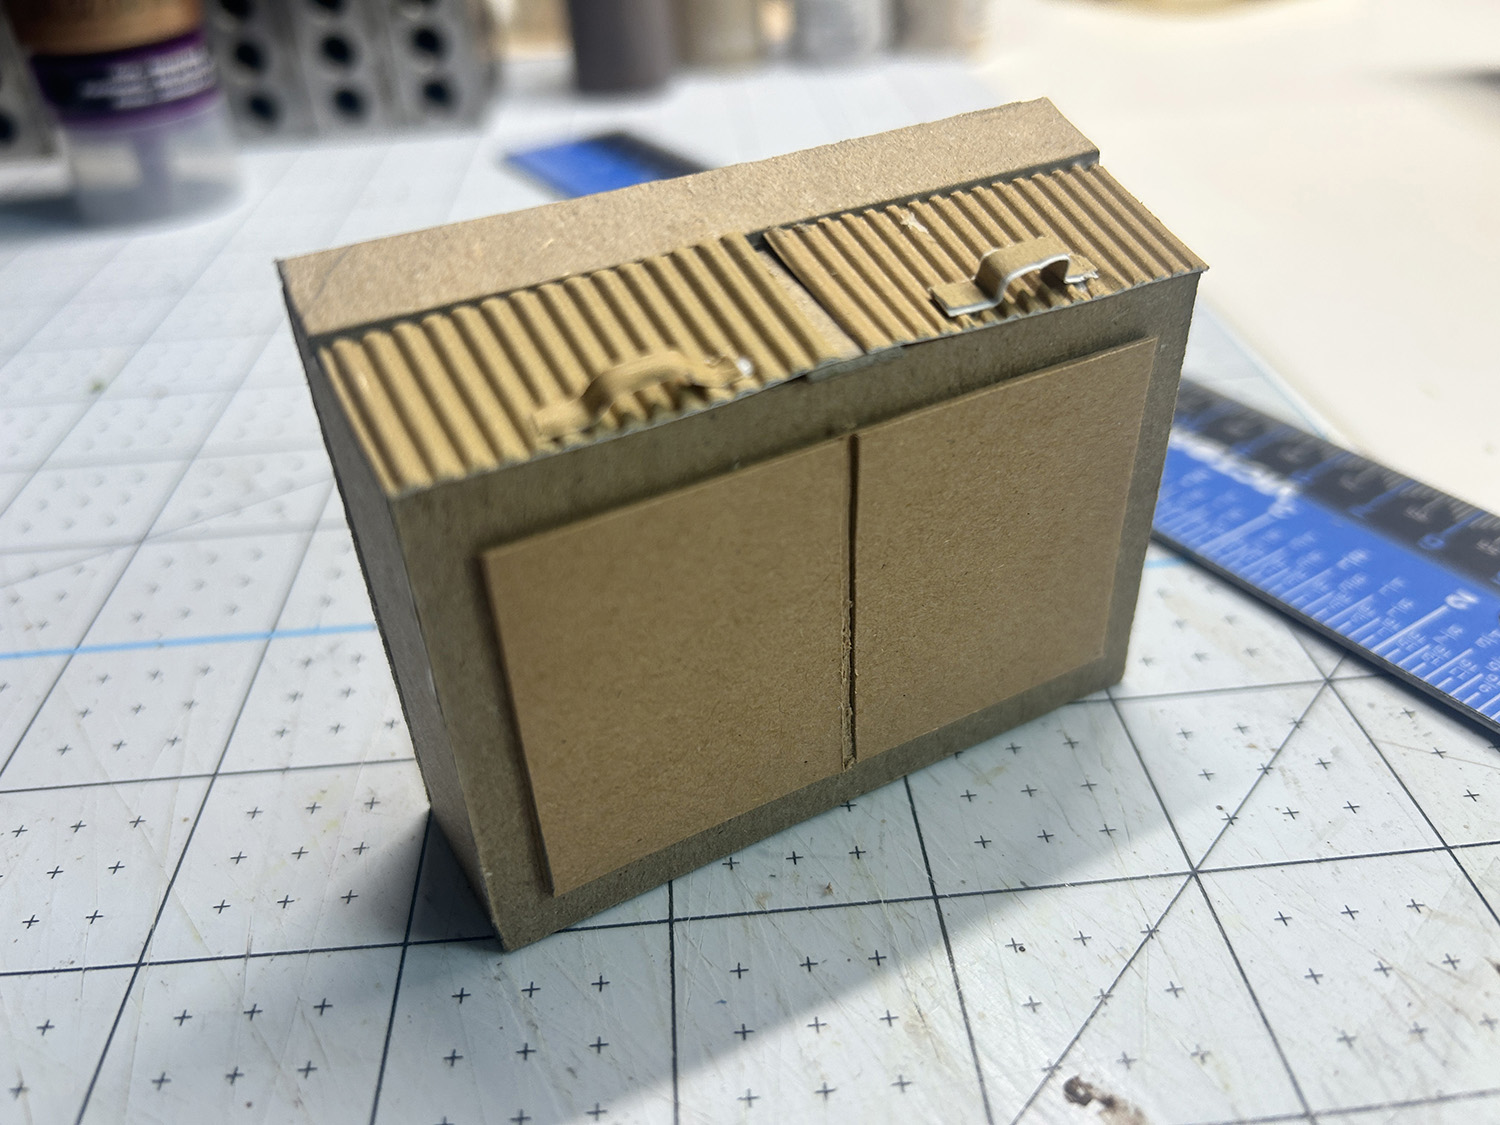
The trash bin was created with thin cardboard and corrugated cardstock.
Acrylic paint in black, light grey, and a touch of white was applied first. A distress ink in red was lightly added here and there to hint that the trash bin may have been red at one time.
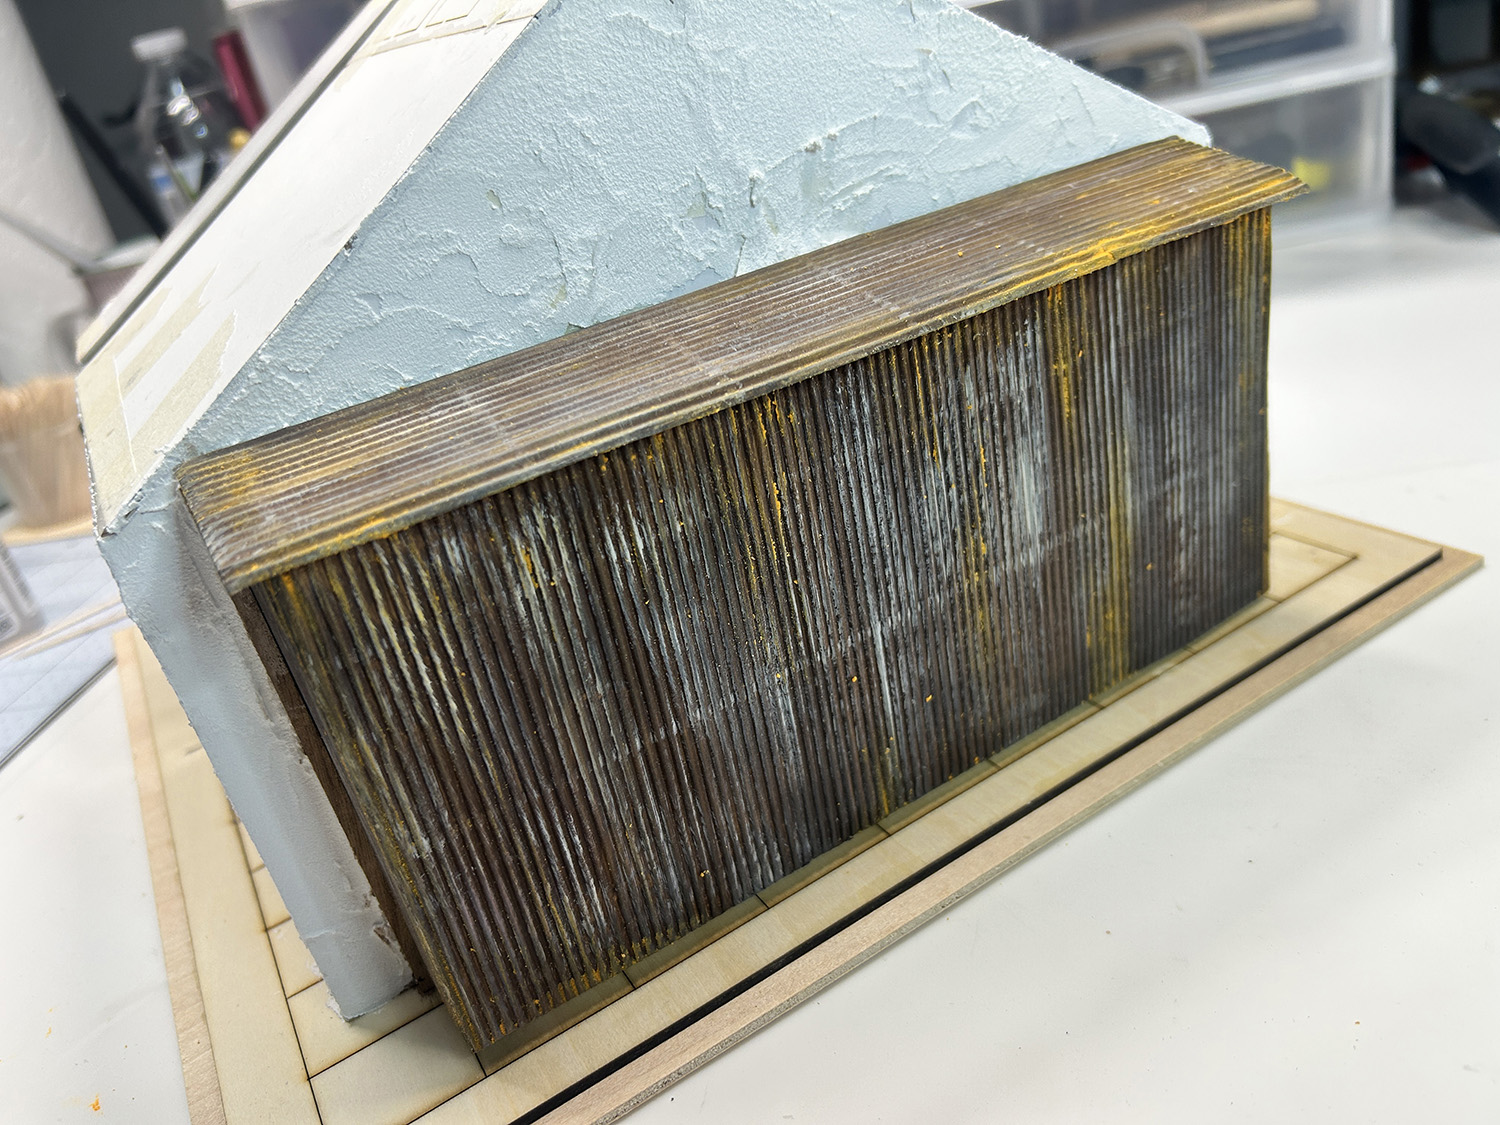
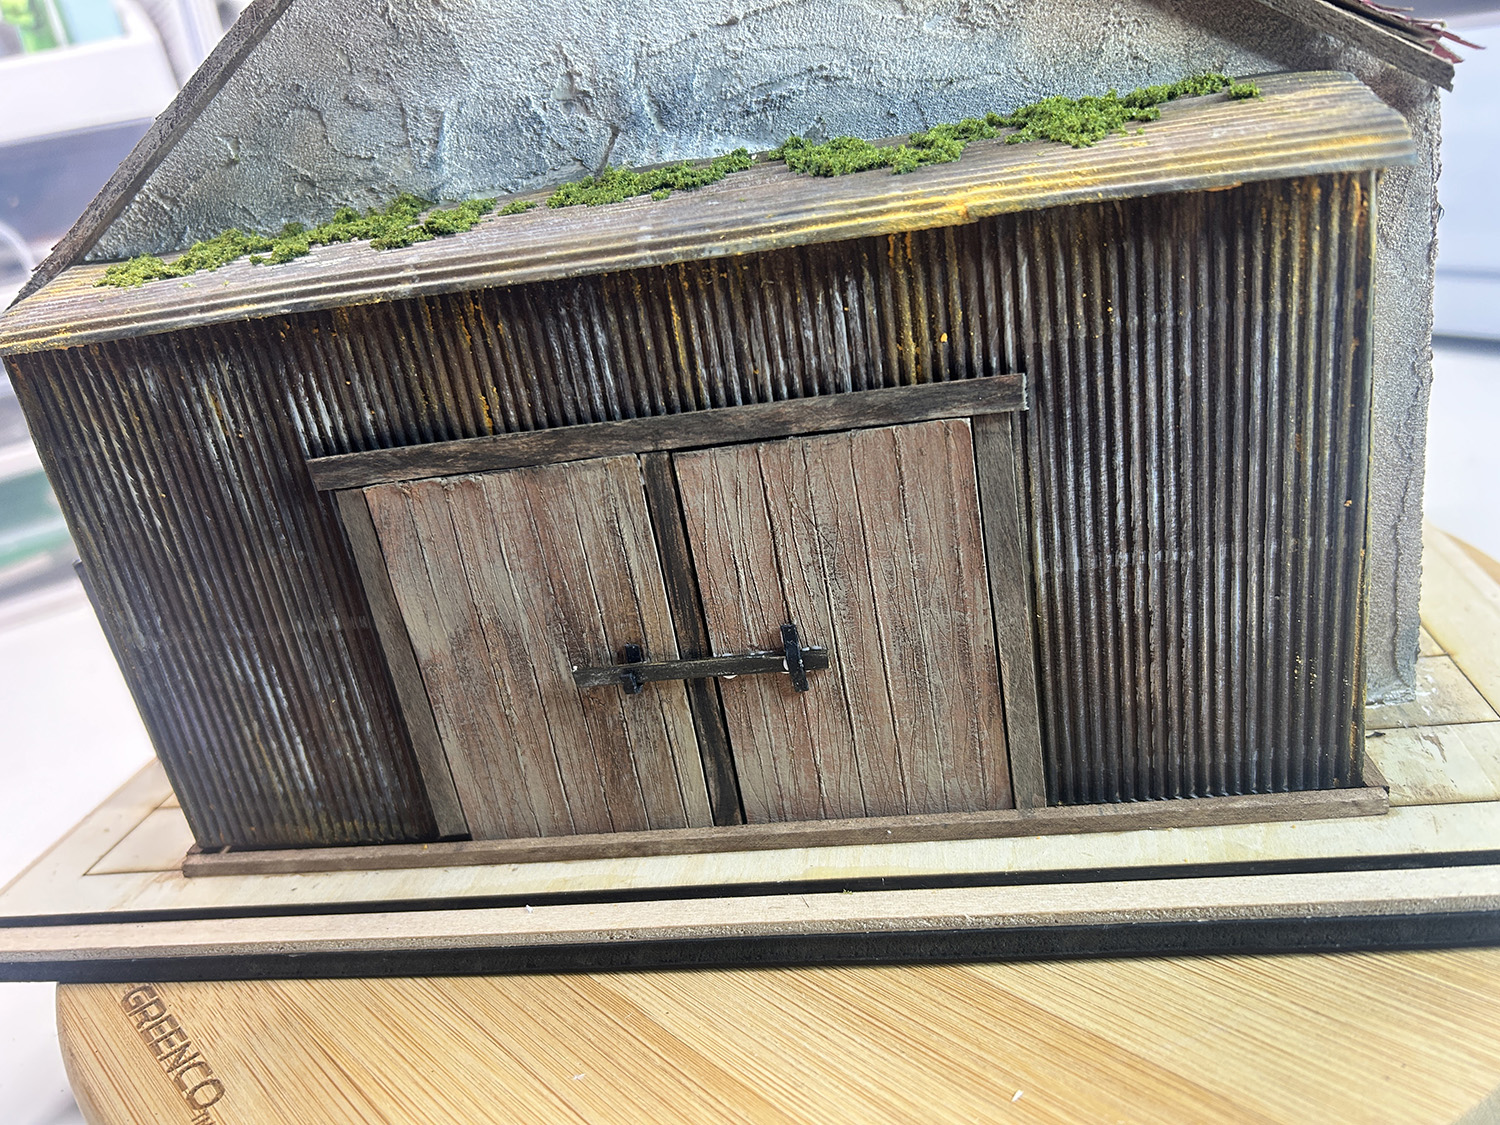
Last but not least, I felt that the back section, where the lighting wires are hidden, needed a set of doors to make sense. These were created with the same thin cardboard I used on the trash bin. The door frames were made with 1/16″ wood.
And now . . . on to the base!
It was at this point that I realized there was going to be an issue with the base I had the structure sitting on and the swinging front section. Any materials put under the front section was going to interfere with how it opened and closed! Back to square one on the base and trying to remove it from the two bases so that I could cut away the thinner top piece of wood. Oh boy …. sometimes wood glue is NOT your friend. Thank goodness for my hubby!!!
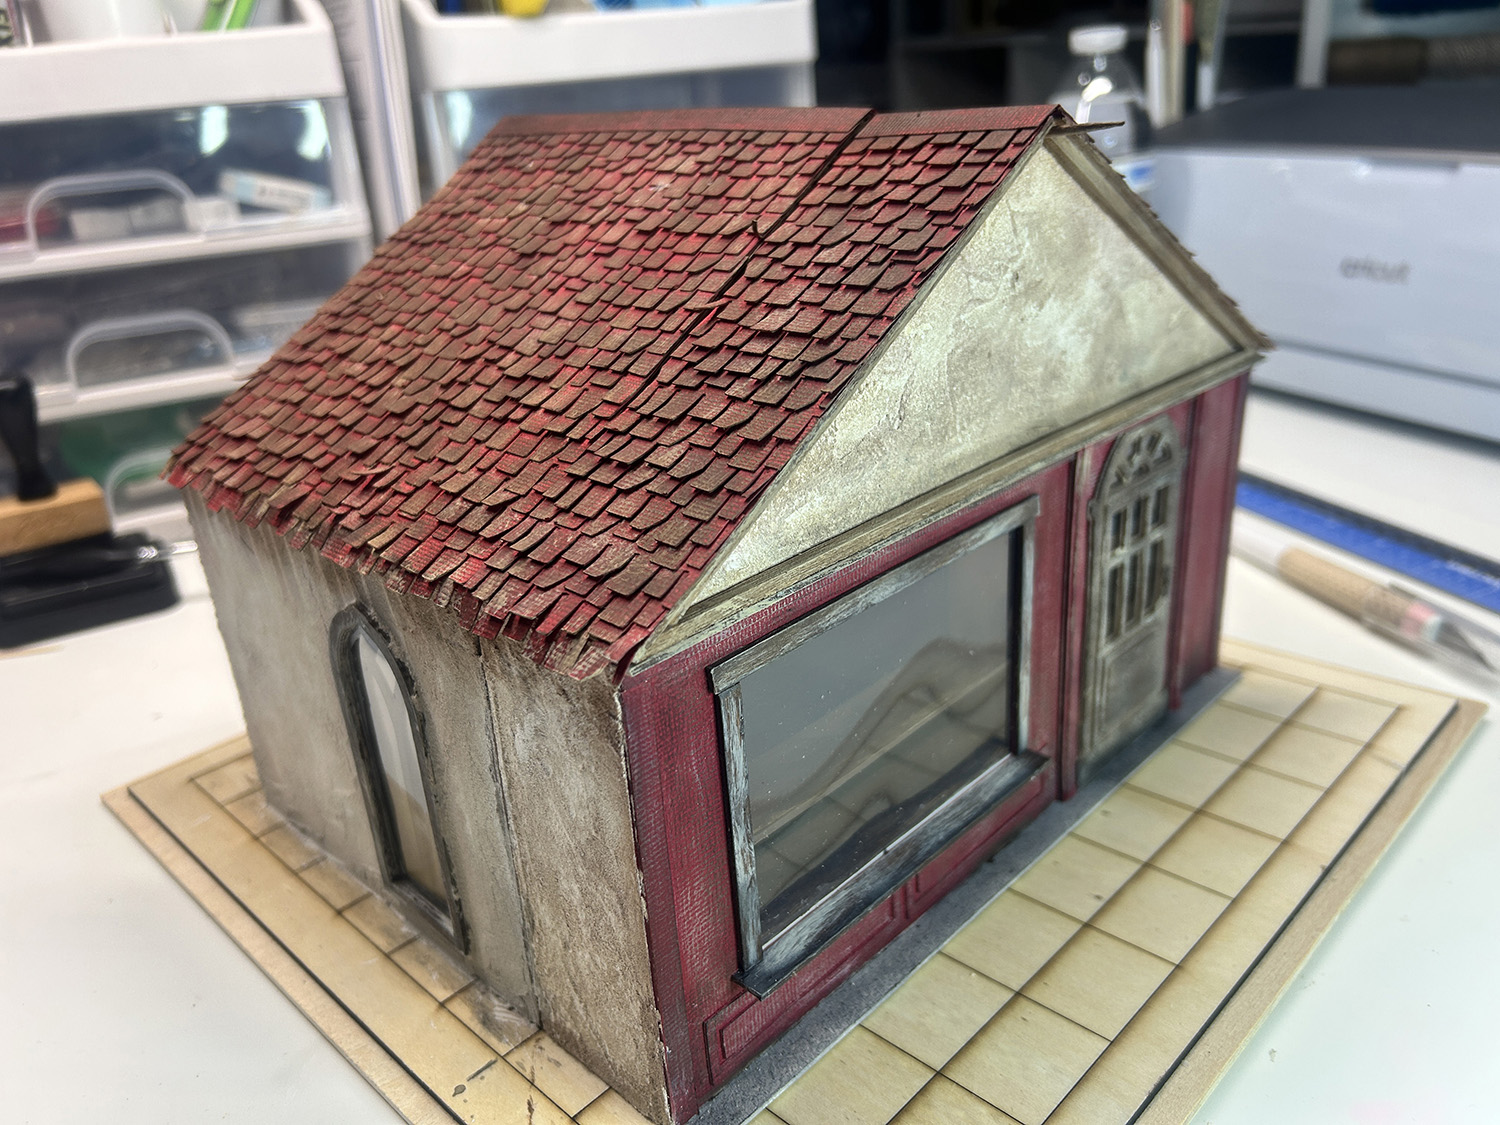
Here are some images of the finished project, just the outside. You can see that the original wood base has been replaced with a smaller one that is a sheet of XPS foam. Stones were drawn into the foam base with a pencil, then painted with various acrylic paints, some chalk pastels, a black wash, and lastly some dry-brushed highlights. All of the ground cover was created with Woodland Scenics turf materials and some fine sand.
I love how the trash bin turned out with the bit of black trash bag hanging out and the trash bag on the ground. I think this might be one of my new mini kits in the future!
So that’s it for this time. I do plan to work on the inside and create some furniture for the project, but it will be next year before I get to that.

I hope you have enjoyed the journey with this project and that you will keep an eye out for additional posts when I get to the inside!
Happy mini making . . .
Teri