- Inspired by Seashore Lighthouse from Craft Knife Chronicles
- Papercraft reproduction by Teri Hanson

When I first ran across this project, I fell in love with it and envisioned a very run-down haunted Lighthouse. If it grabs you as well, click the link below the title above and watch her construction videos. There is also a FREE PDF file with a cutting guide on her blog.
The original project was created with chipboard and scrapbook paper. Unable to cut straight lines with thick chipboard anymore, I choose to use Cricut Kraft Board and cardstock. So far, it’s worked well, but I did need to double up on the walls by adding kraft board liners inside. The same with the base as well as a support square in the center of the larger base.
As you can see from the images below, I’ve gotten pretty far in a weeks. Using Cricut Design Space, I’ve recreated all of the pieces based on April’s dimensions in the cutting guide. You can also see that an extra base has been added. This will become a graveyard.
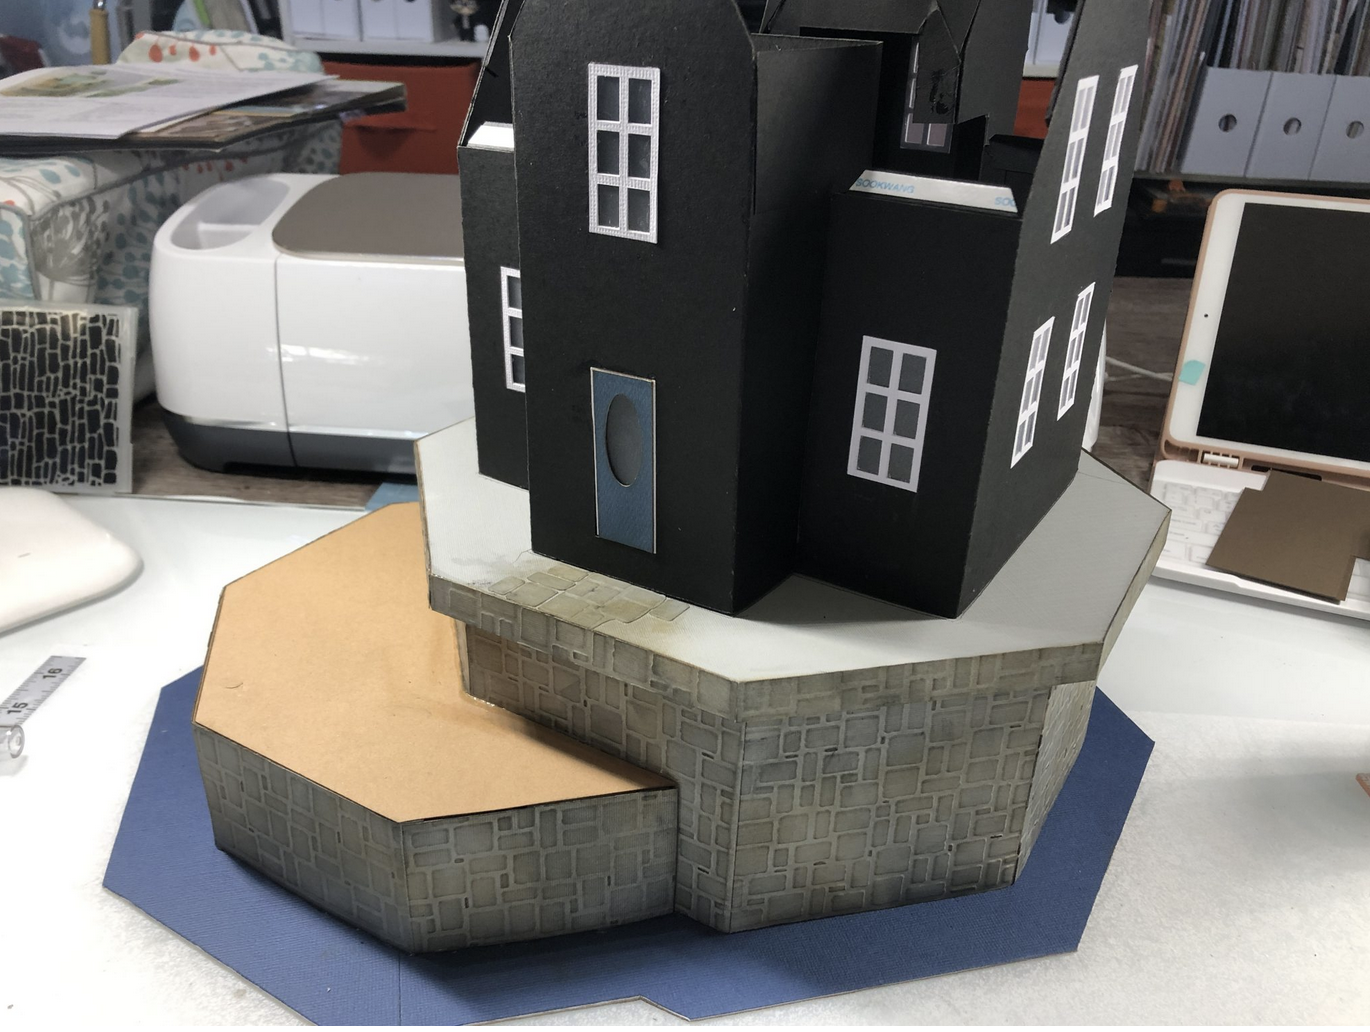
The final thin base was created with 2mm chipboard, then covered in blue cardstock. I had to create this base in two pieces because of the size: 12″ wide by 15 1/2″ long.
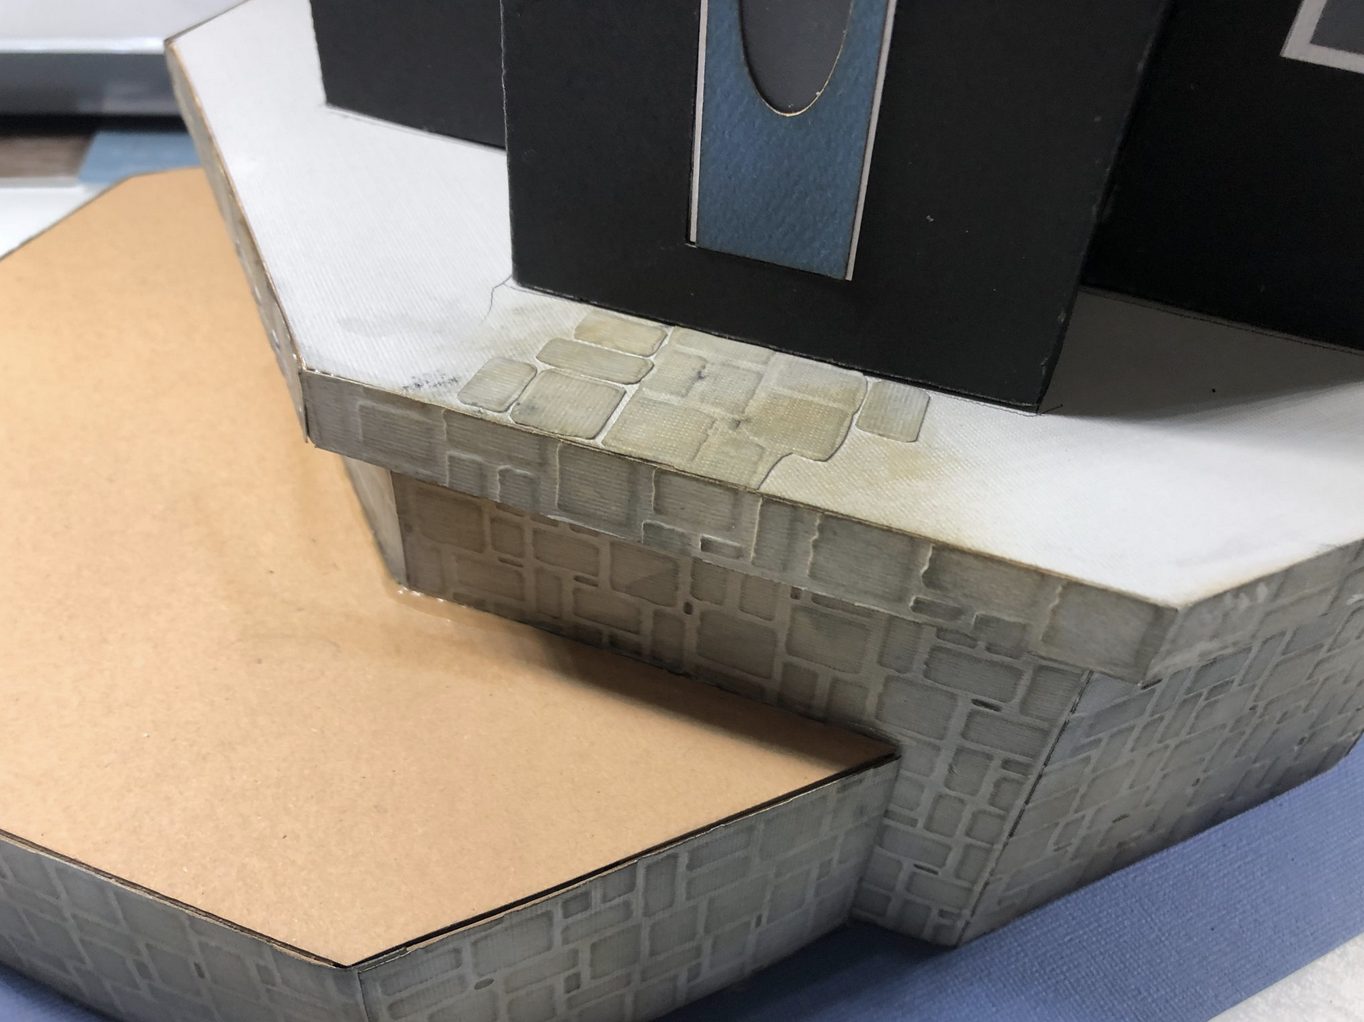
The two bases were covered in cardstock that was embossed with a bricks folder from Darice, then inked with Ranger Distressing Inks in Black Soot and Vintage Photo.


I’ll be using the folder on the left for the tower section. I’m sorry, but there is no name or brand listed on the folder, but most likely it was purchased on Amazon.
To finish the top base, I’ve used the house to draw around so I will know where ground cover can be placed. You can see that pavers have been added from the front door at this point. These are cut pieces from the embossed sheets.
That’s it for this time, but stay tuned as I add new pics and info while I work more next week!
Week Two
This week, I’ve finished up the graveyard and top base area. Fence and headstones are all images from Cricut Design Space. Cardstock in black, grey, and white was used, then white pigment ink was applied for a distressed look.
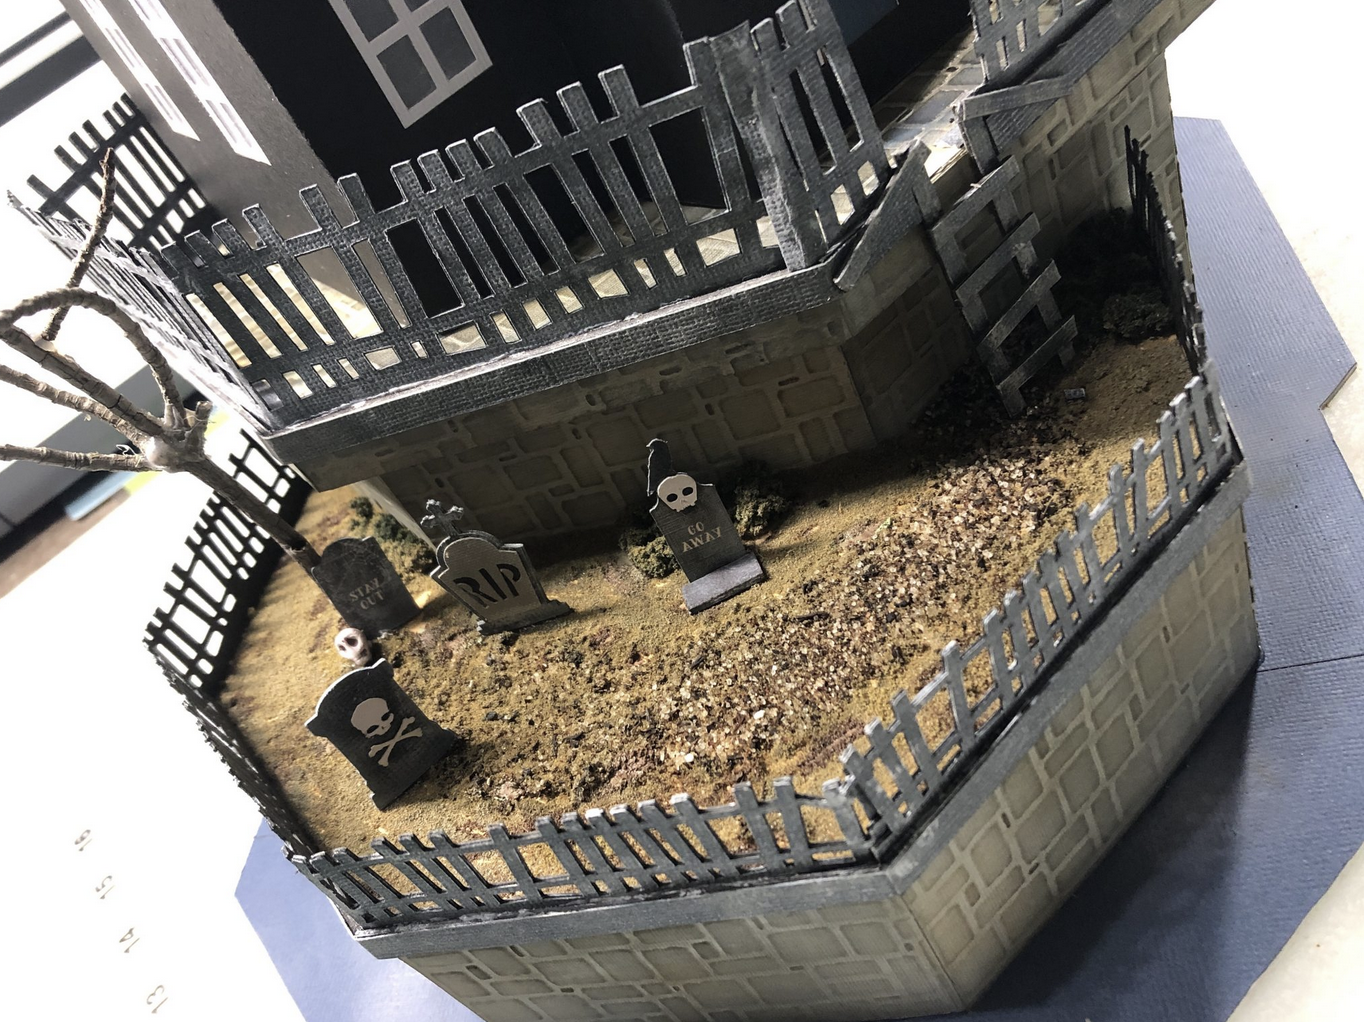
The ground was created using old black tea grounds and salt crystals. Woodland Scenics fine turf and coarse turf were sprinkled on the base as well.
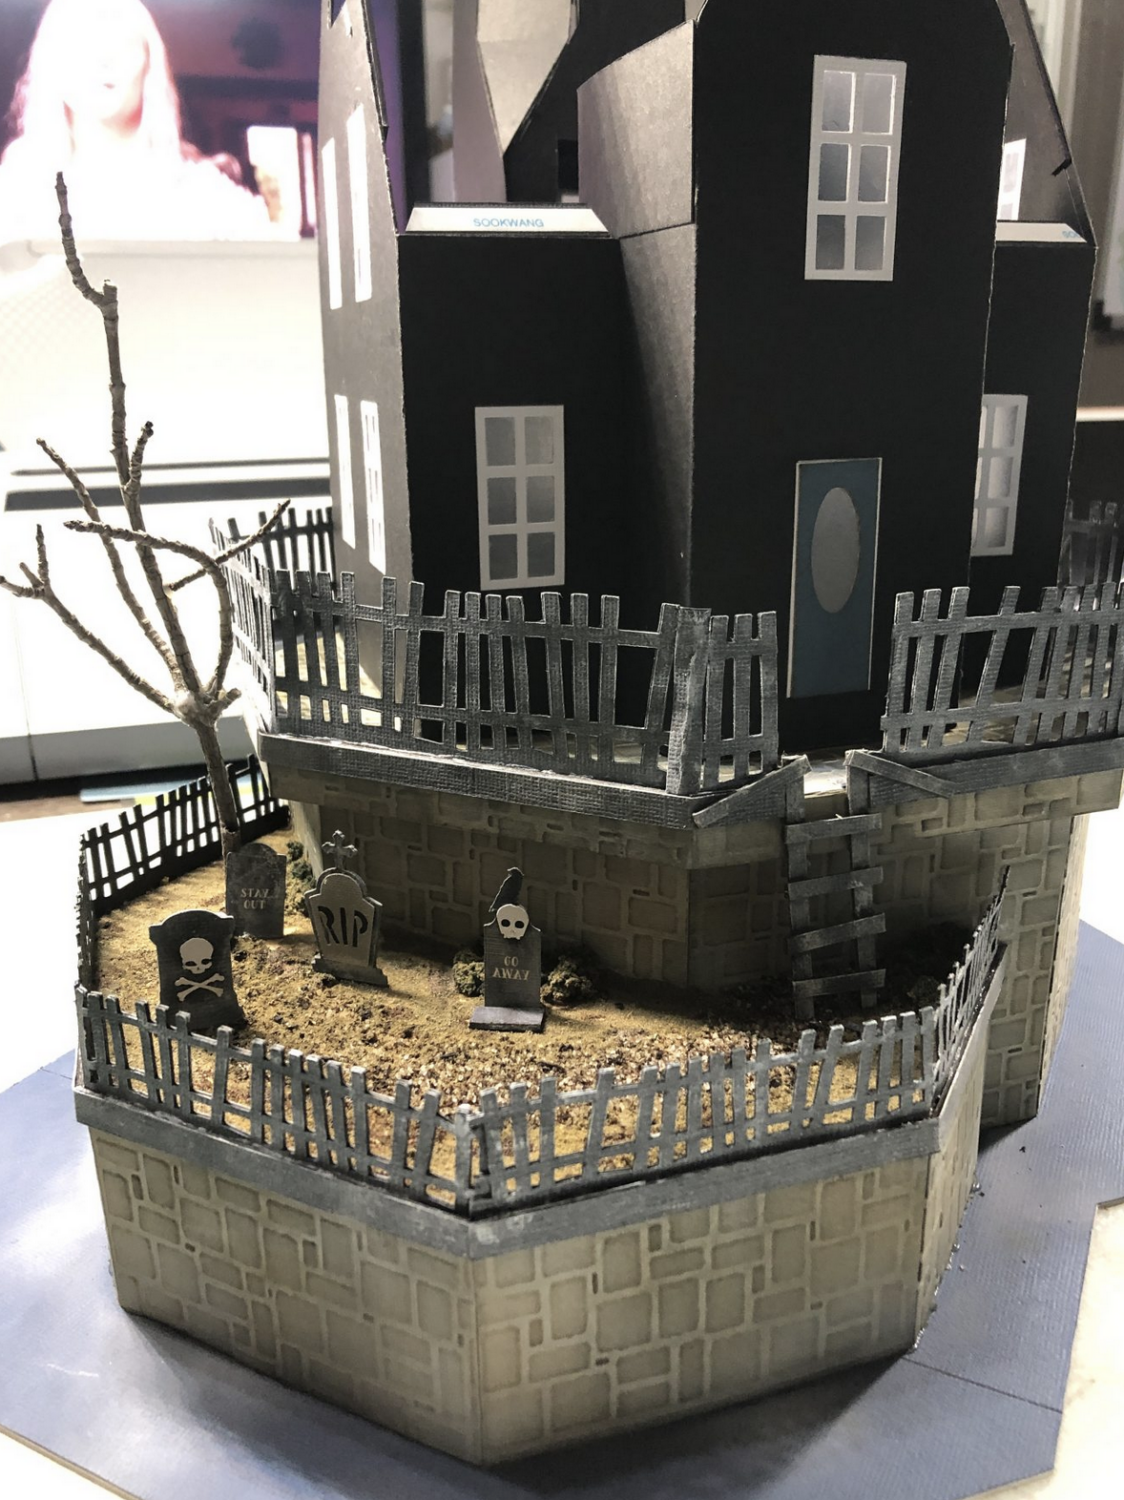
Fence sections were welded together in Design Space, cut twice, then glued together. The double thickness is needed to keep the fence firm.
Lastly, the brickwork from the sides of the base was repeated for the top base floor. The house will not be attached to the base but instead rest on top, giving access to the light.
UPDATE . . .
As you can see below, I’ve begun to add the siding strips. These are 5/16″ high by 11.50 long and cut on the Cricut Maker. Add scor-tape to the backside and apply to the house with each additional strip overlapping the preceding strip just a tad. On the corner,s use 1/2″ strips folded in half for trim.
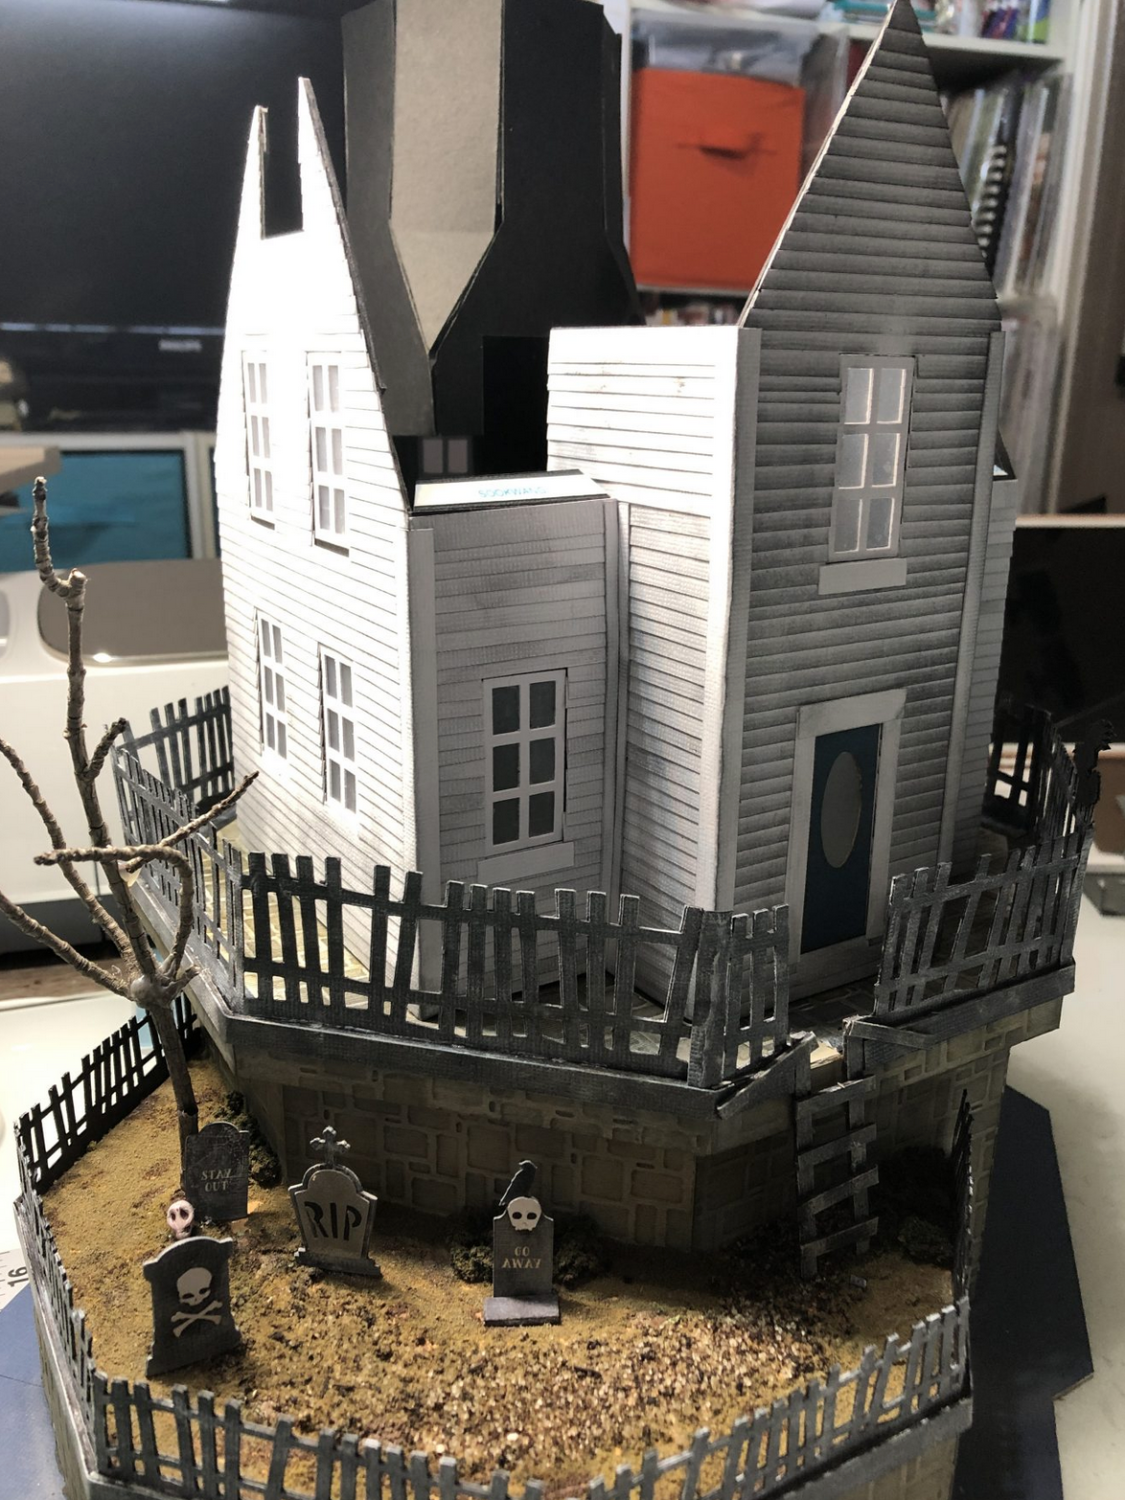
did find that I had to make changes to the lighthouse part of the project. The original way was not working well for me, most likely due to the thinner materials. Instead, I created a hexagon shape, added stonework to the bottom, and different windows on three sides.
I’ll be using another embossing folder for a different type of brick on the lighthouse section.

THURSDAY UPDATE
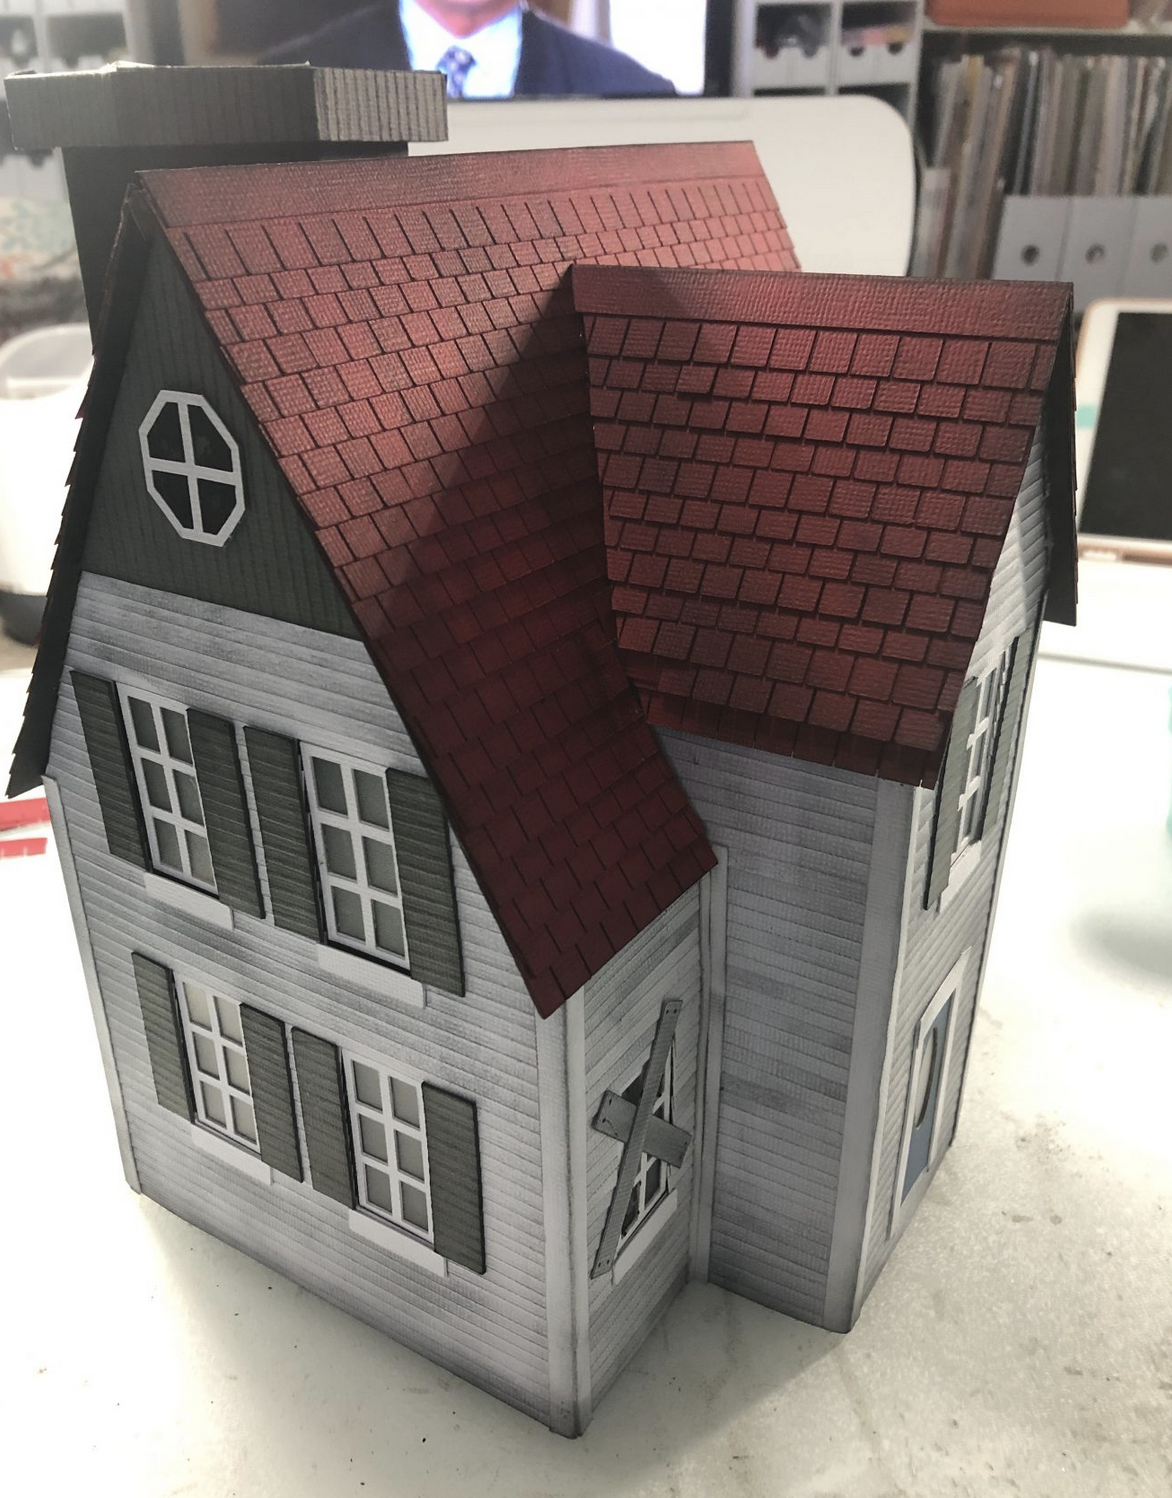
There’s something about making shingles and siding, then applying the strips that I find so relaxing. Call me crazy, but it’s always my favorite part of a build. Today I’ve added both the entrance and main roof, then covered them with shingle strips and a cap on top.
You can also see that I’ve changed the original design once more by omitting the chimneys and adding an accent piece with an octagonal window. These were added to both the left and right sides.
Also, notice that all of the shingles are now glued on. You can see that they were left off one of the windows that has been boarded up.
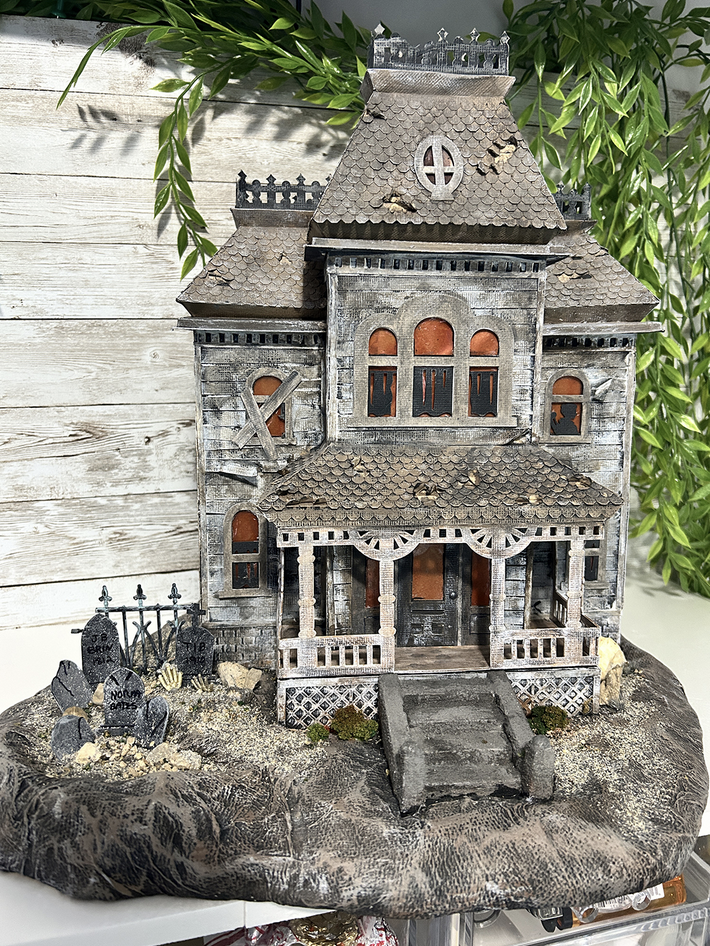
FINAL UPDATE!
I managed to finish up the Haunted Lighthouse today!!! Well, the base still needs something, but I’m not sure what yet. The house, however, is now finished and has lights. Check it out . . .
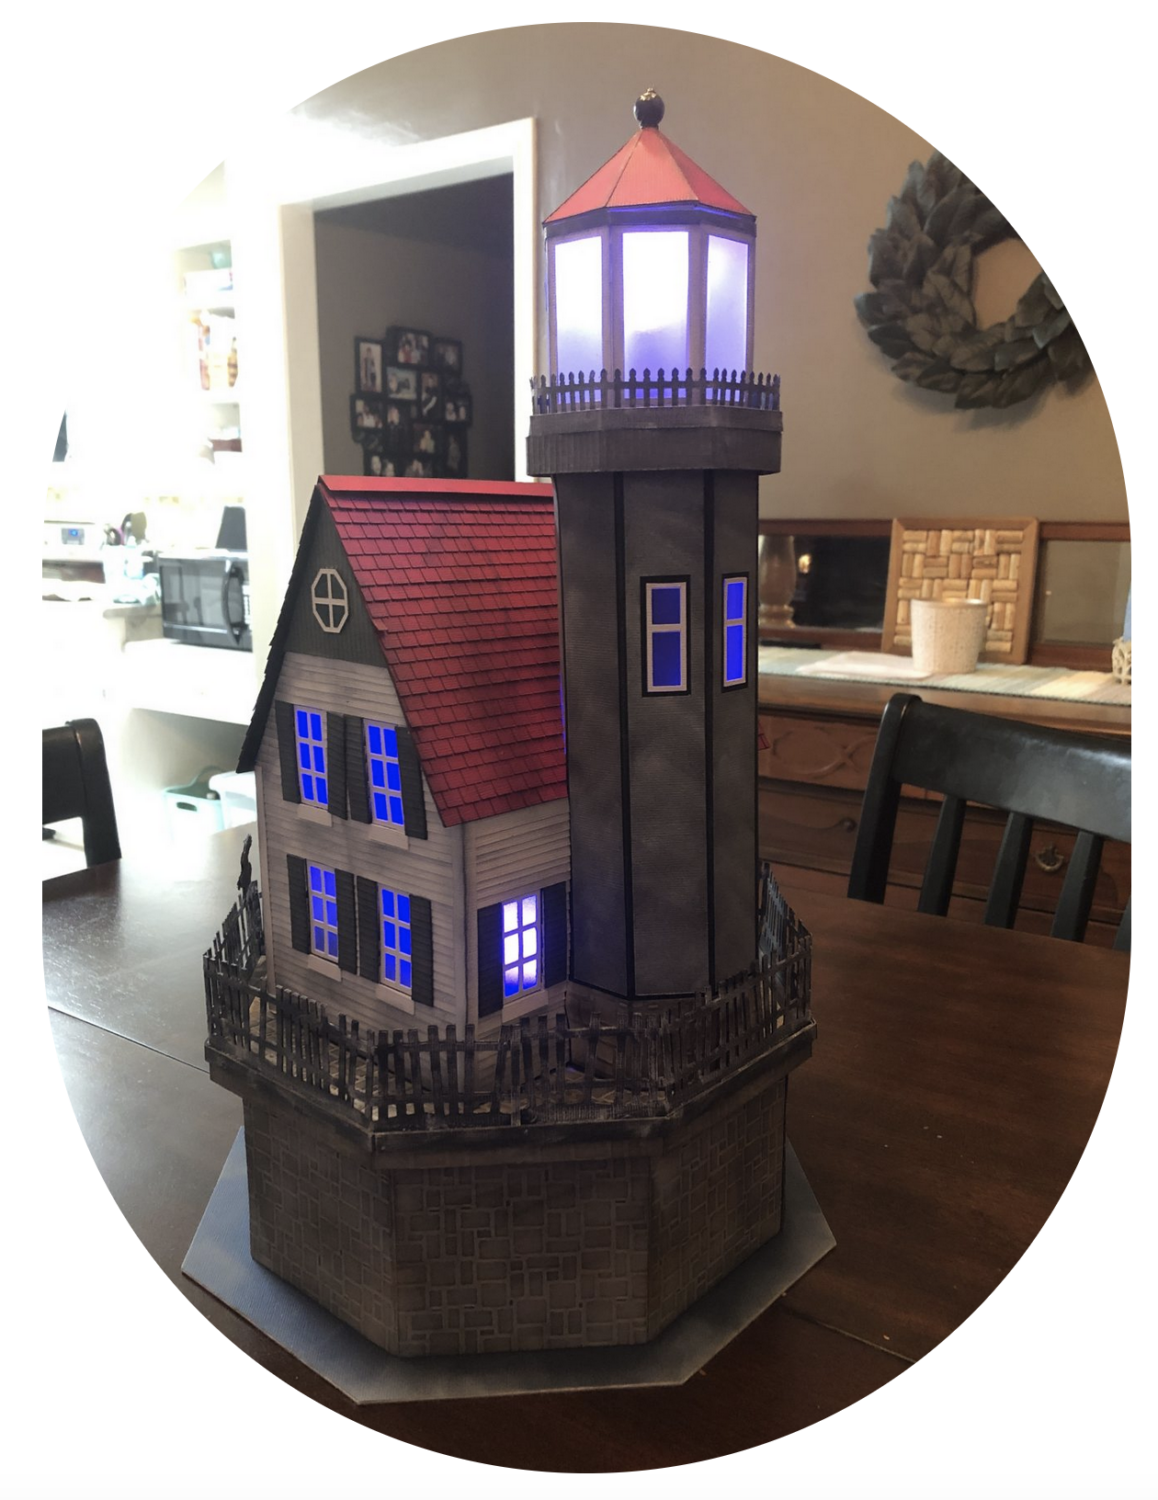
The tower light is one of those bottle lights that has a USB charger inside it. I painted the light cover purple with alcohol inks. An LED round light has been used inside the house. It has several colors and can be changed with a remote.
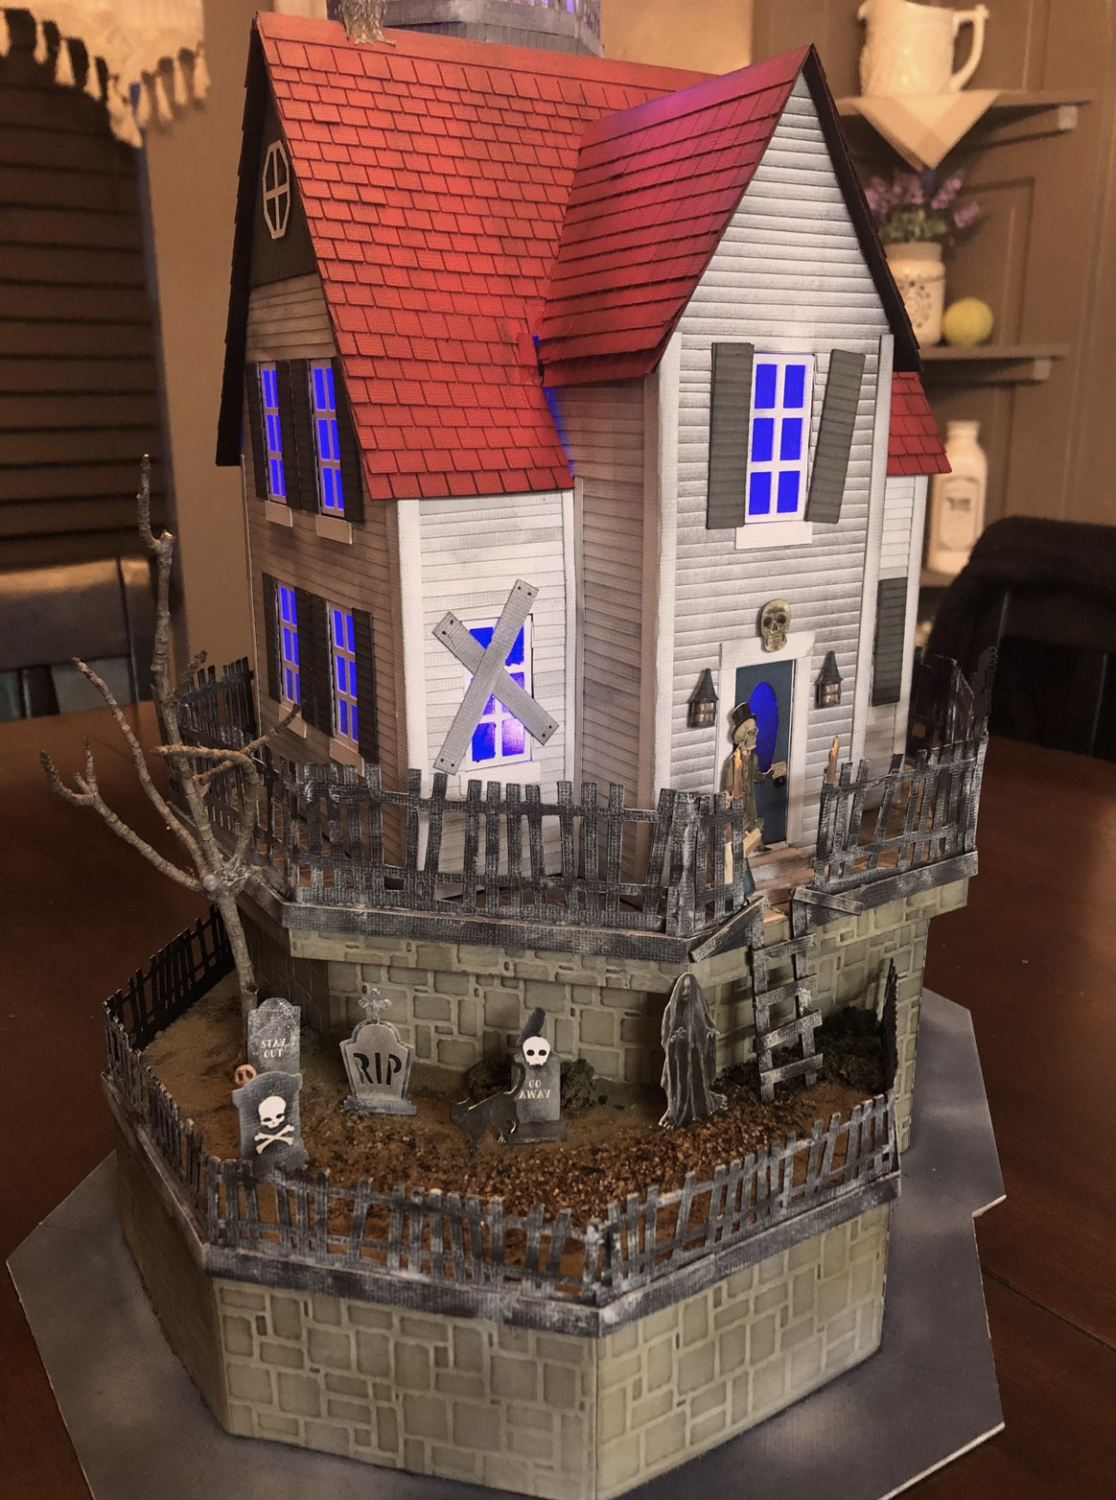
A few paper cut-outs from Artfully Musing were added. I may add some spider webs at some point, but for no,w I’m done.
Hope you are inspired to try this project, and do visit Craft Knife Chronicles website as well as the YouTube channel for lots of fun projects!!!
Teri