- © Bentley House Minis – Fireplace Room Kit
- © Teri Hanson Miniatures – Front and back extension sections
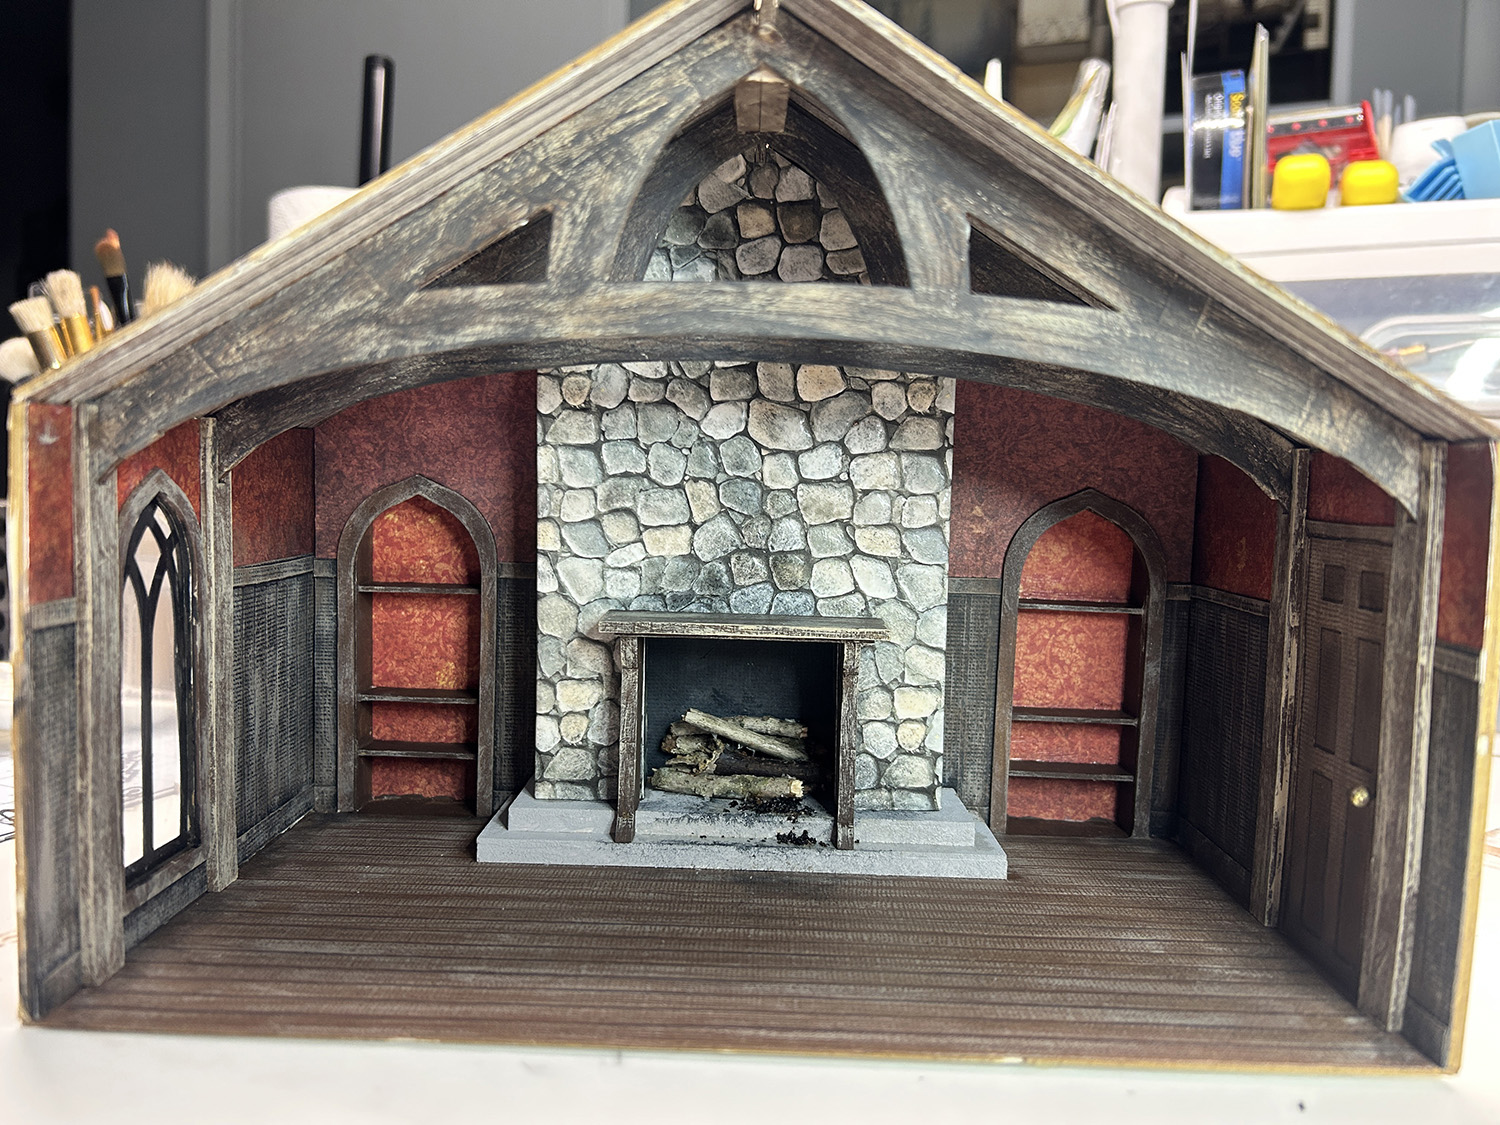
If you have been following me on Facebook, you most likely have seen my post about working on this very fun project from Bentley House Minis. Ara offers the kit in 1:12 Full Scale – cut from cardboard and a 1:24 Half Scale version – cut from matboard. I’m working with the Half Scale matboard version. What you see above is the completed kit as it comes in the kit with one exception. On the right side I’ve added a door in place of a window that matches the one on the left side. This has been such an easy and fun project to build with Ara’s fantastic veideo tutorial. If you like what you see, I suggest that you give it a try!
One thing I wanted to retain with this build is Ara’s philosophy of using materials you have on hand and building with inexpensive materials. It’s this thought that made me choose to work with cardstock, kraft board, and patterned cardstock, to finish the inside of the room. it’s been a hot minute since I’ve used these materials on a mini build and I had forgotten how much fun it is! Everything I’ve used was from my craft room or outside of the house.
I’m thinking that this is the first time I’ve built an entire structure with matboard and I was a bit unsure how it would work. Hapily, it was super easy to work with and paints up well as you can see from the ceiling beams. It’s also a very sturdy material giving you a sound structure when finished.
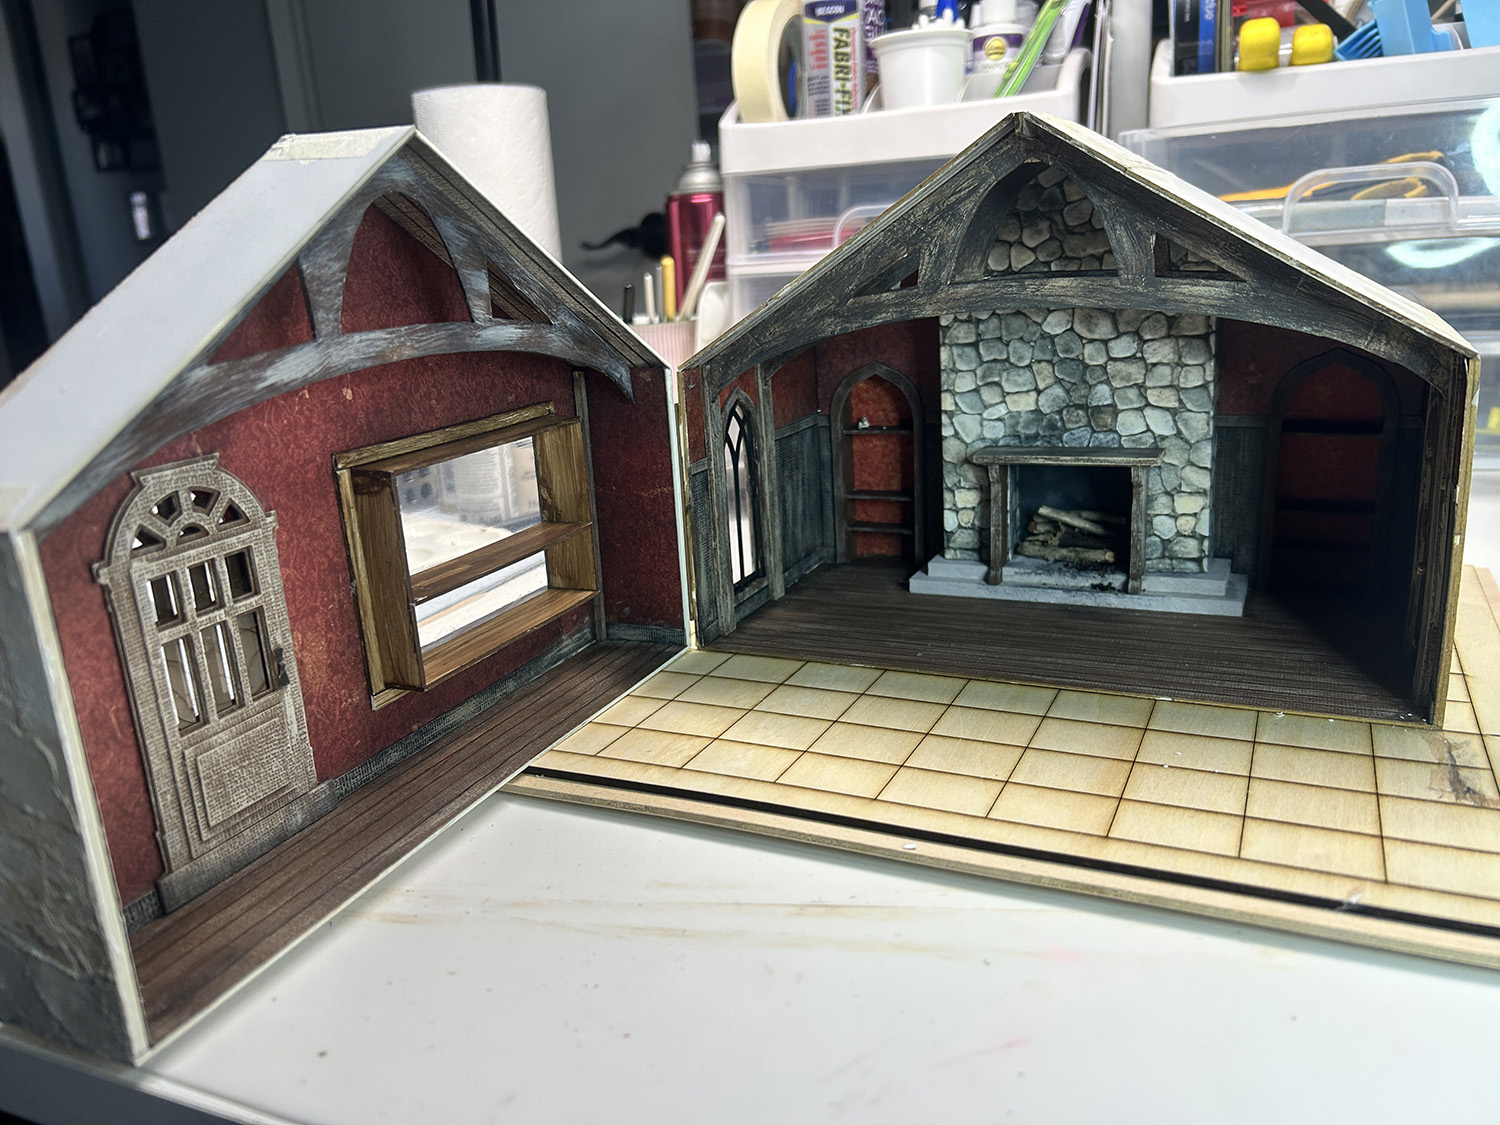
A Scribe tool was used on the matboard to create grooves in the material and to make the wood appear old. By looking at the ceiling image below, you can see that you can score the matboard with a score-board to quickly create the look of wood planks. I’ve used acrylic paint in black, coffee bean, and country twill on all of the pieces that should look like wood.
For the fireplace I’ve used some stone printed paper with Paper Glaze on top of each stone to create a dimensional effect. If you look under my “Tutorials” section you can see how I did this.
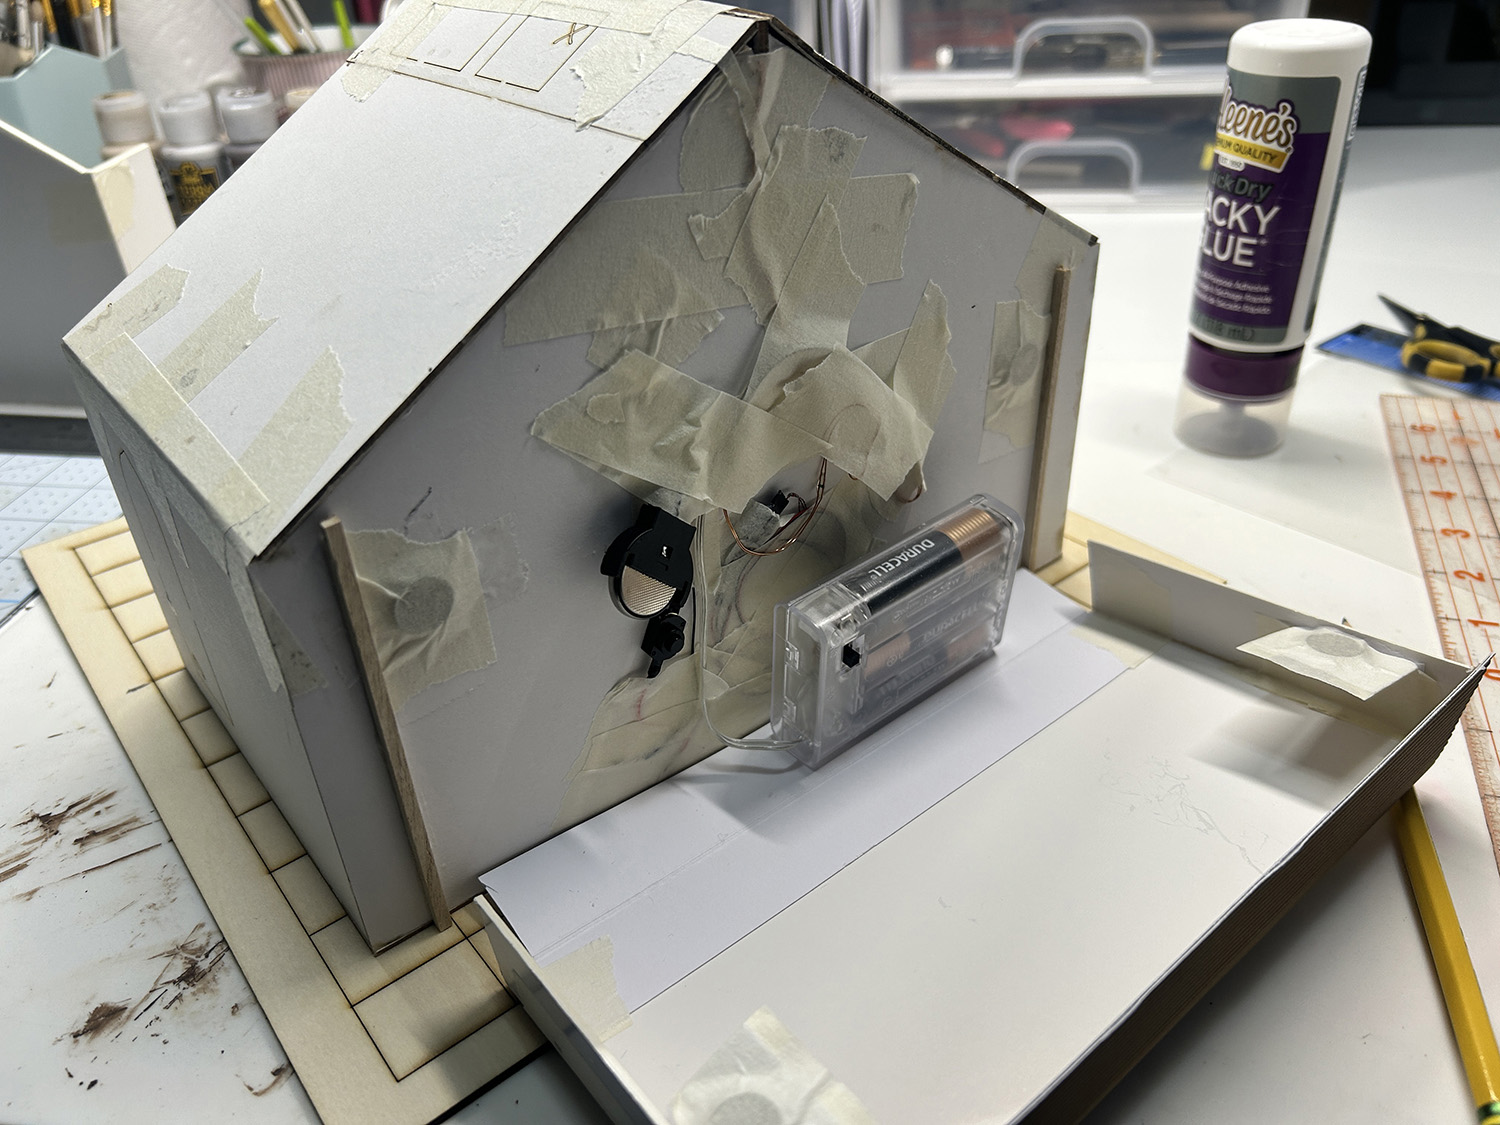
Using Ara’s suggestion, I’ve lit the inside of the bookcases and the room with fairy lights. These are hidden behine the back wall, along the backside of the ceiling beams, and out the back of the room. I will create something along the back side later on to hide the battery pack for the lights. The fireplace was lit by using a Fireplace light kit from Evans Designs. Just another super easy way to have a glowing fireplace!
At this point, the inside is pretty much finished. I started this project with the thought of creating a shop of some type, and while that is still the plan, I caused a hiccup for myself. There was going to be a waiting or sales counter area room added off to the right of the structure, where the door was. That has now changed to adding a front section to the room with a larger shop window and door instead.
This new section will be created with the same materials I’ve used so far and will be hinged to the existing room front to swing open, revealing the inside. The following information and images show how this part was constructed. For now . . . back to work!
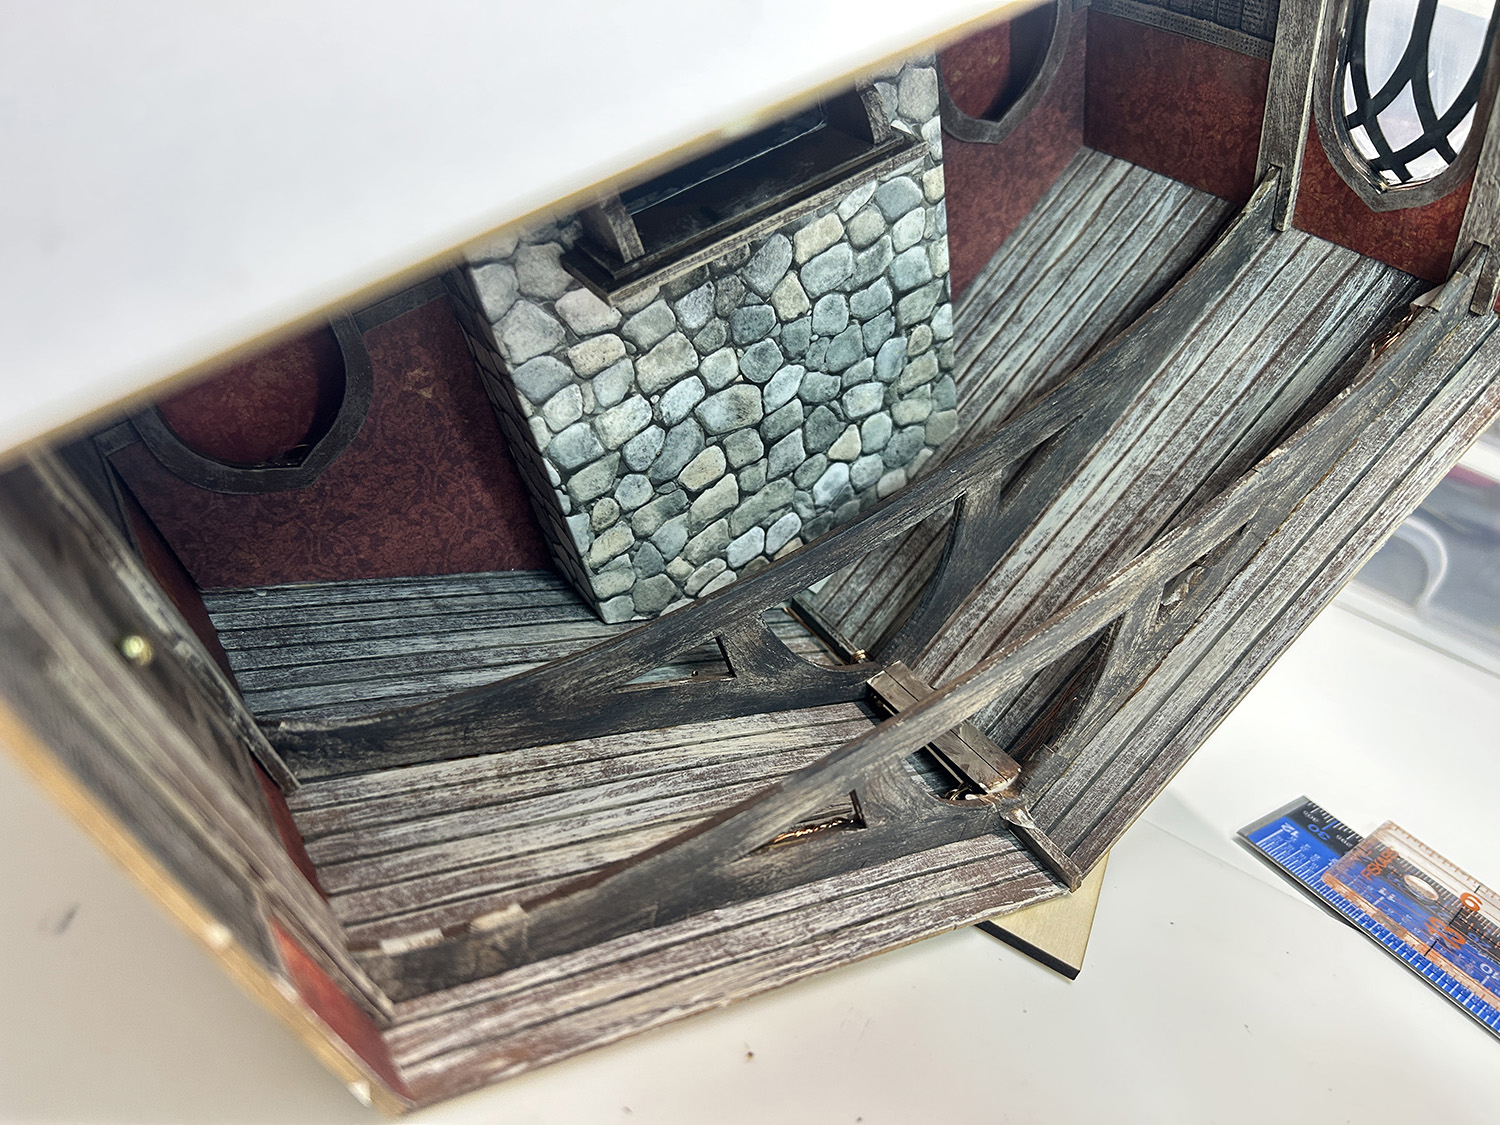
As you can see in the above images, I’ve created a hinged back room to hide all of the light wires. The wall is held on with a paper hinge and magnets. The structure has also been glued to a wood base that will be landscaped eventually.
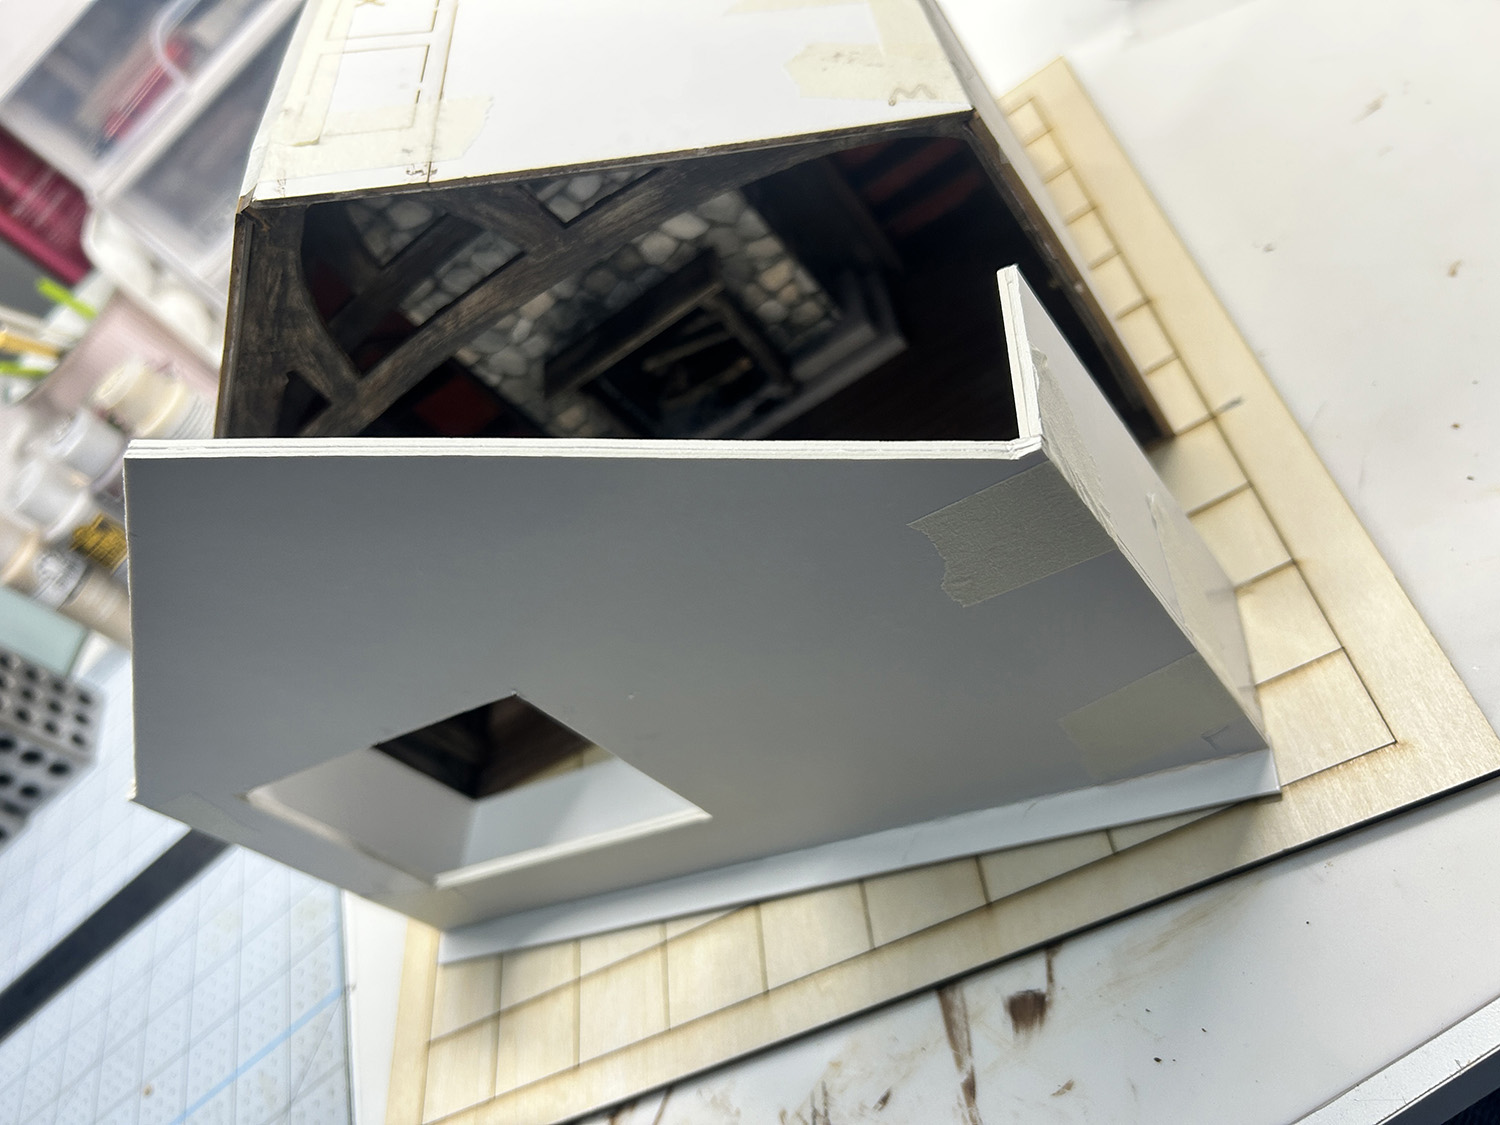
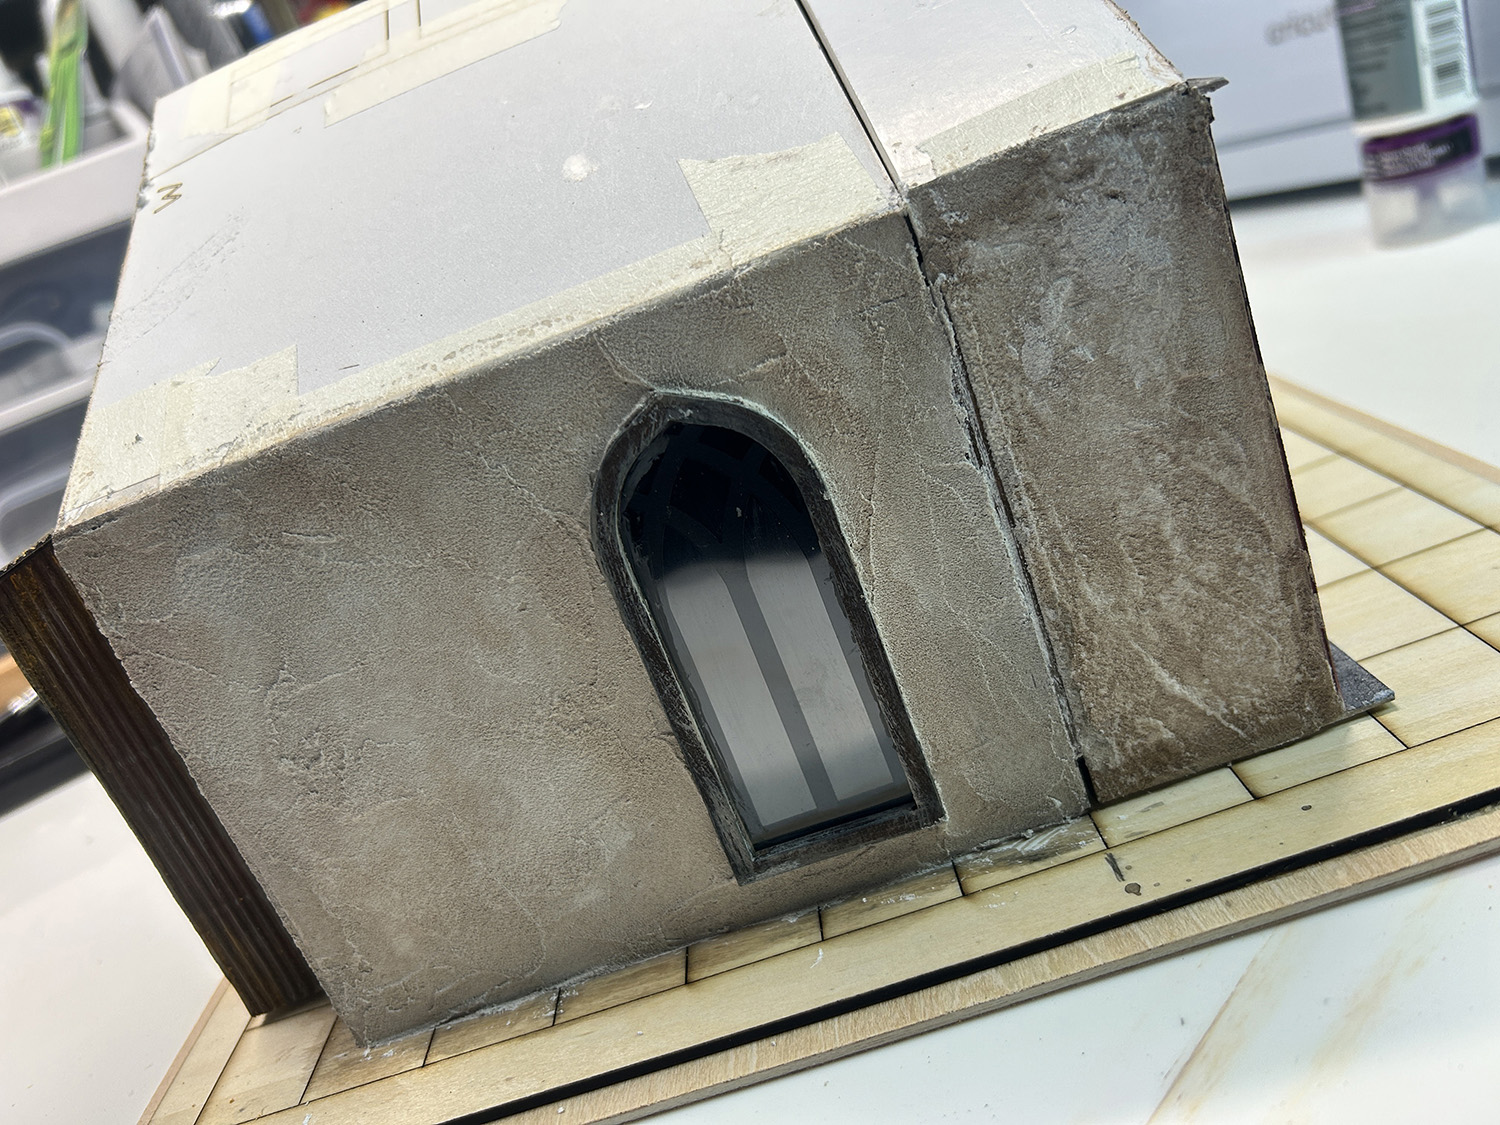
Now back to the front and the room extension. You can see how I’ve built the extension below. This will be attached to the existing room with small metal hinges so that the front can swing open to view the inside. A roof will also be added to this extension, and I will need to figure out how that will work with shingles. You can also see the opening created for a larger shop window. Notice how I forgot to cut the opening for the door! I’ll be doing that next.
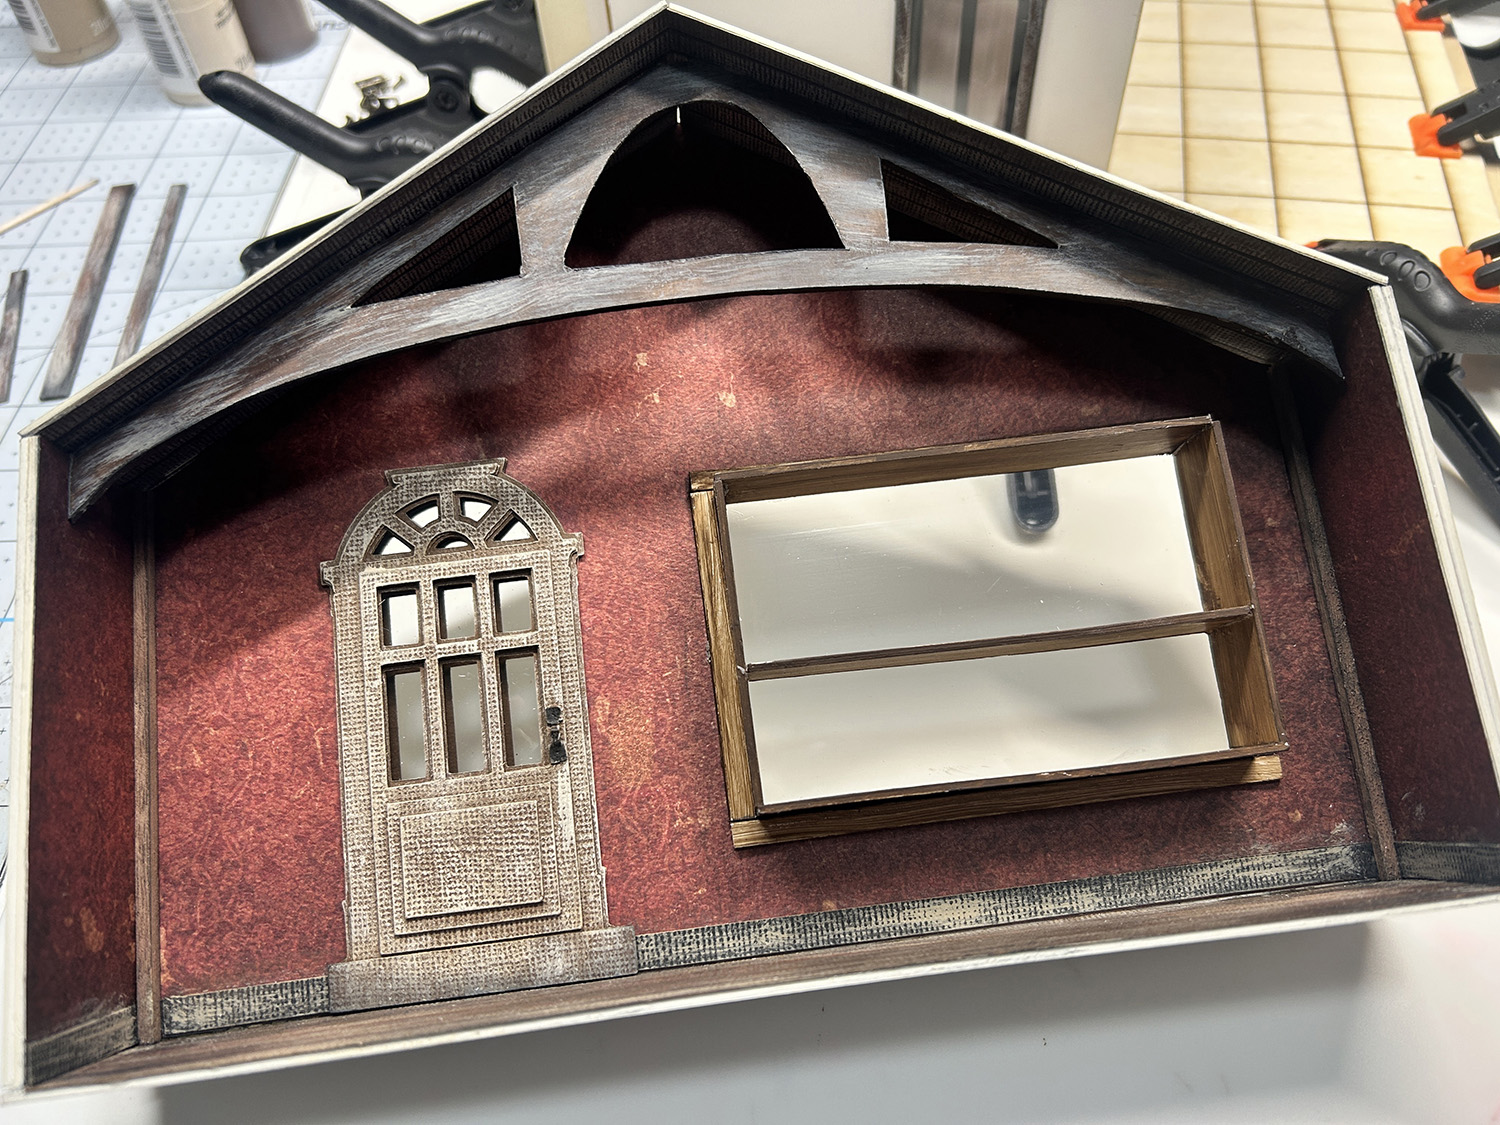
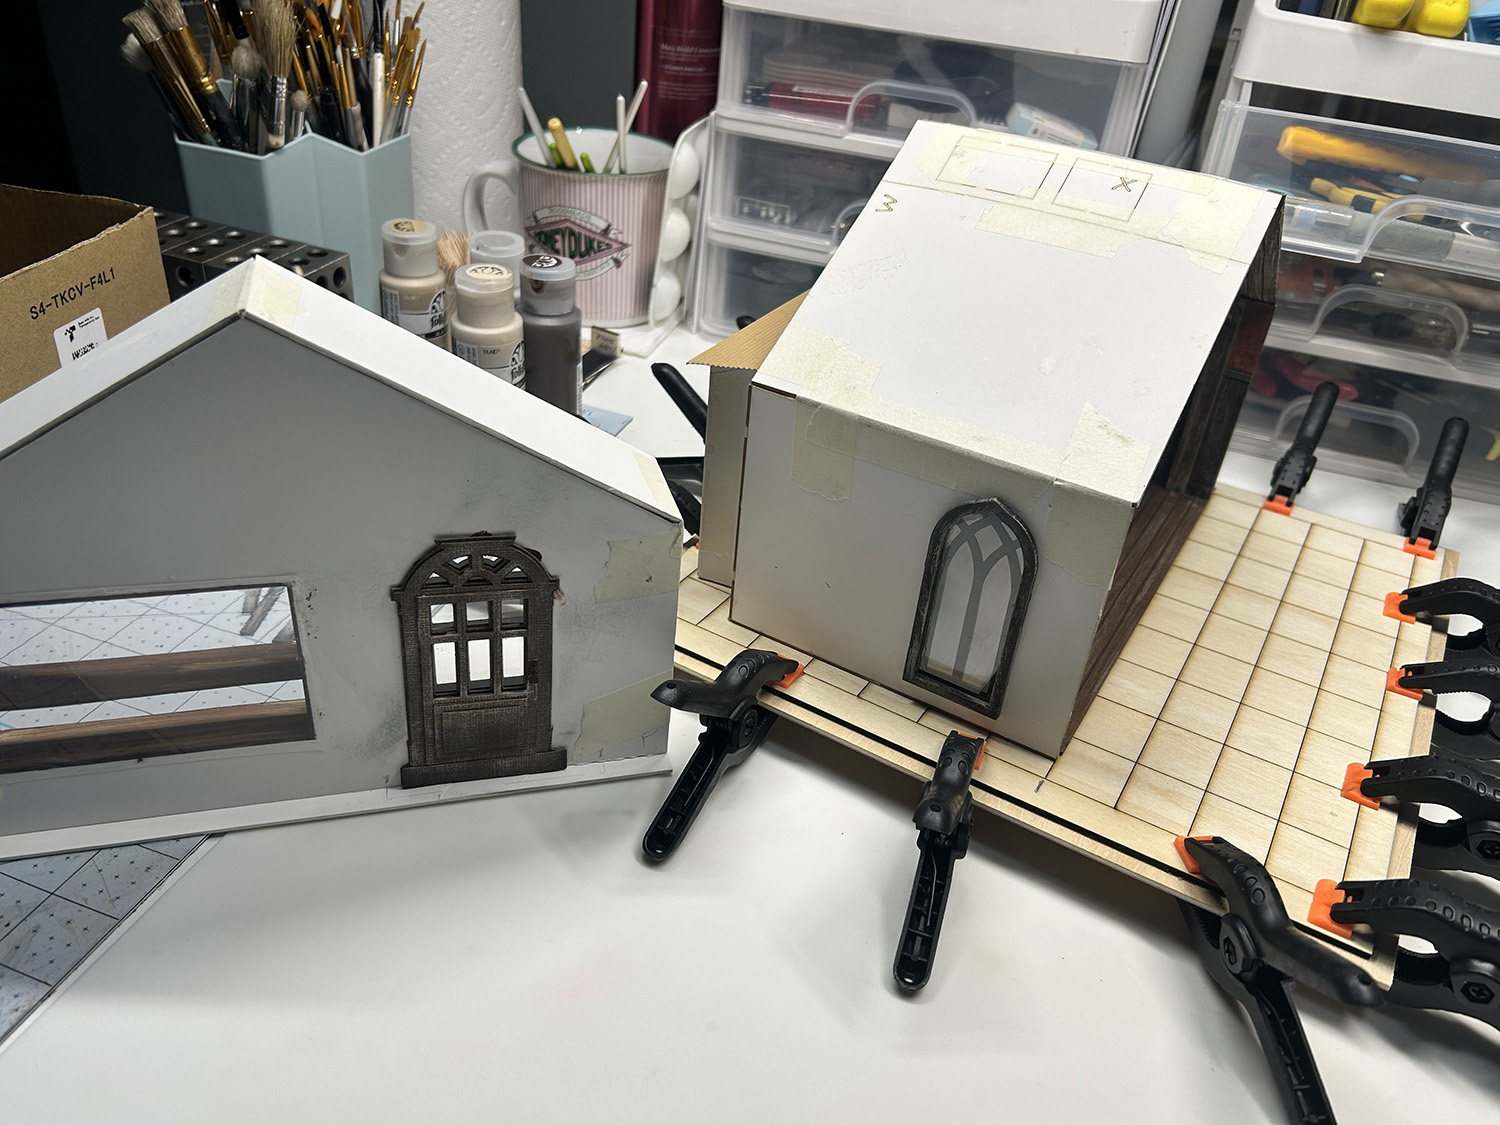
Here is a look at the finished inside of the extension. I’ve used the sheet the beams were in to create an additional beam for the extension. The doors – inside and outside – were created with several layers of brown cardstock. The window display shelves were created with mat board. You can see the outside door in the second photo. Now it’s time to work on the outside of the project, which will require a lot of little pieces.
I’ve decided to use some leftover wood bases for this project, covering them with ground materials at the end of the build. This is also the time to think about the hinges and how or when to attach them. More on that in a minute.
In researching some old English shops, I’ve decided to use cardstock layers to cover the front side of the structure as if it were painted wood. The remainder of the exterior will be either brick or plaster.
The shop front . . .
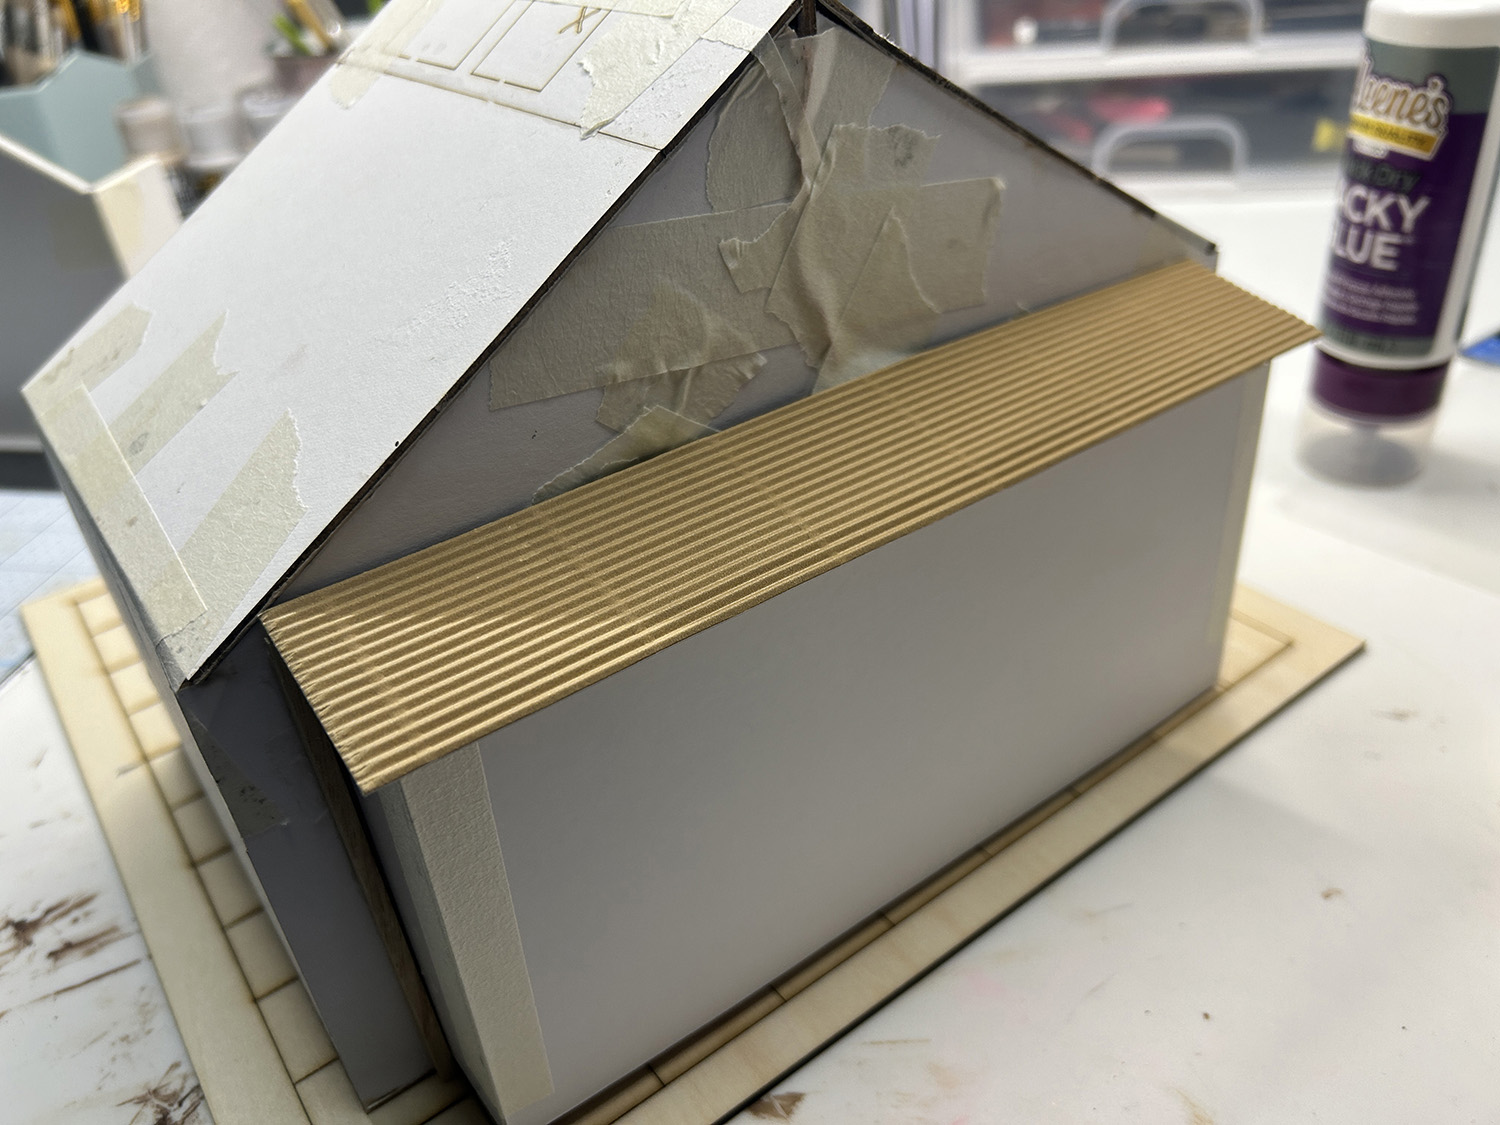
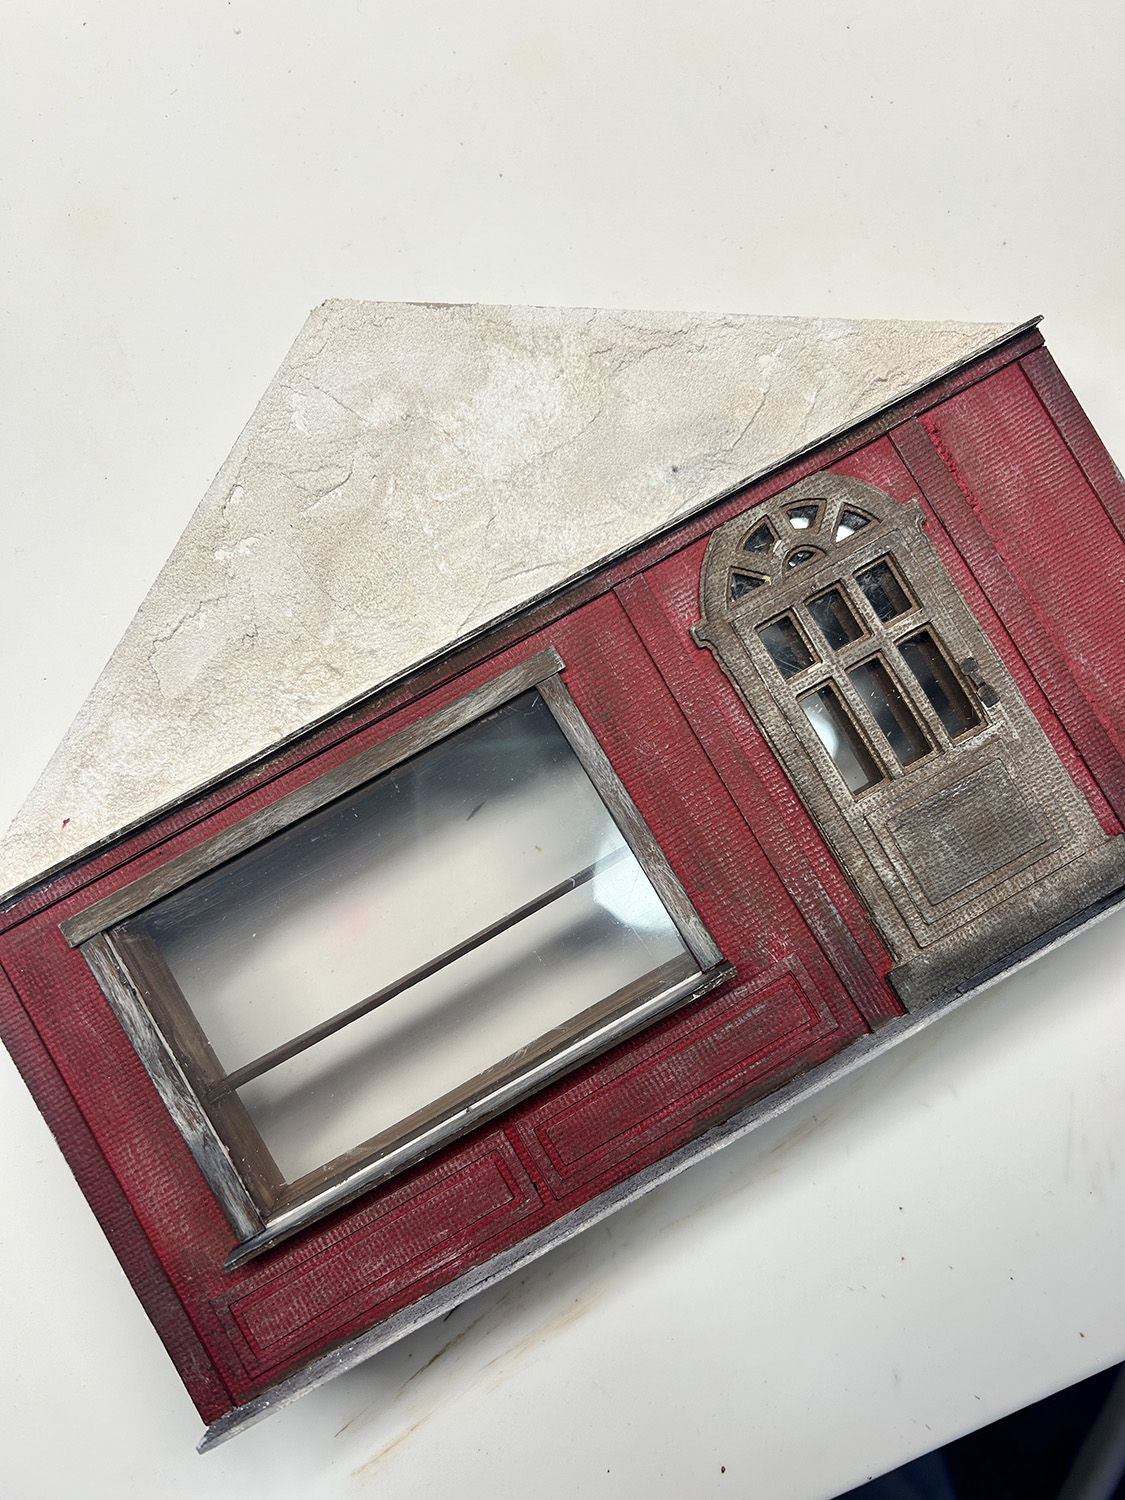
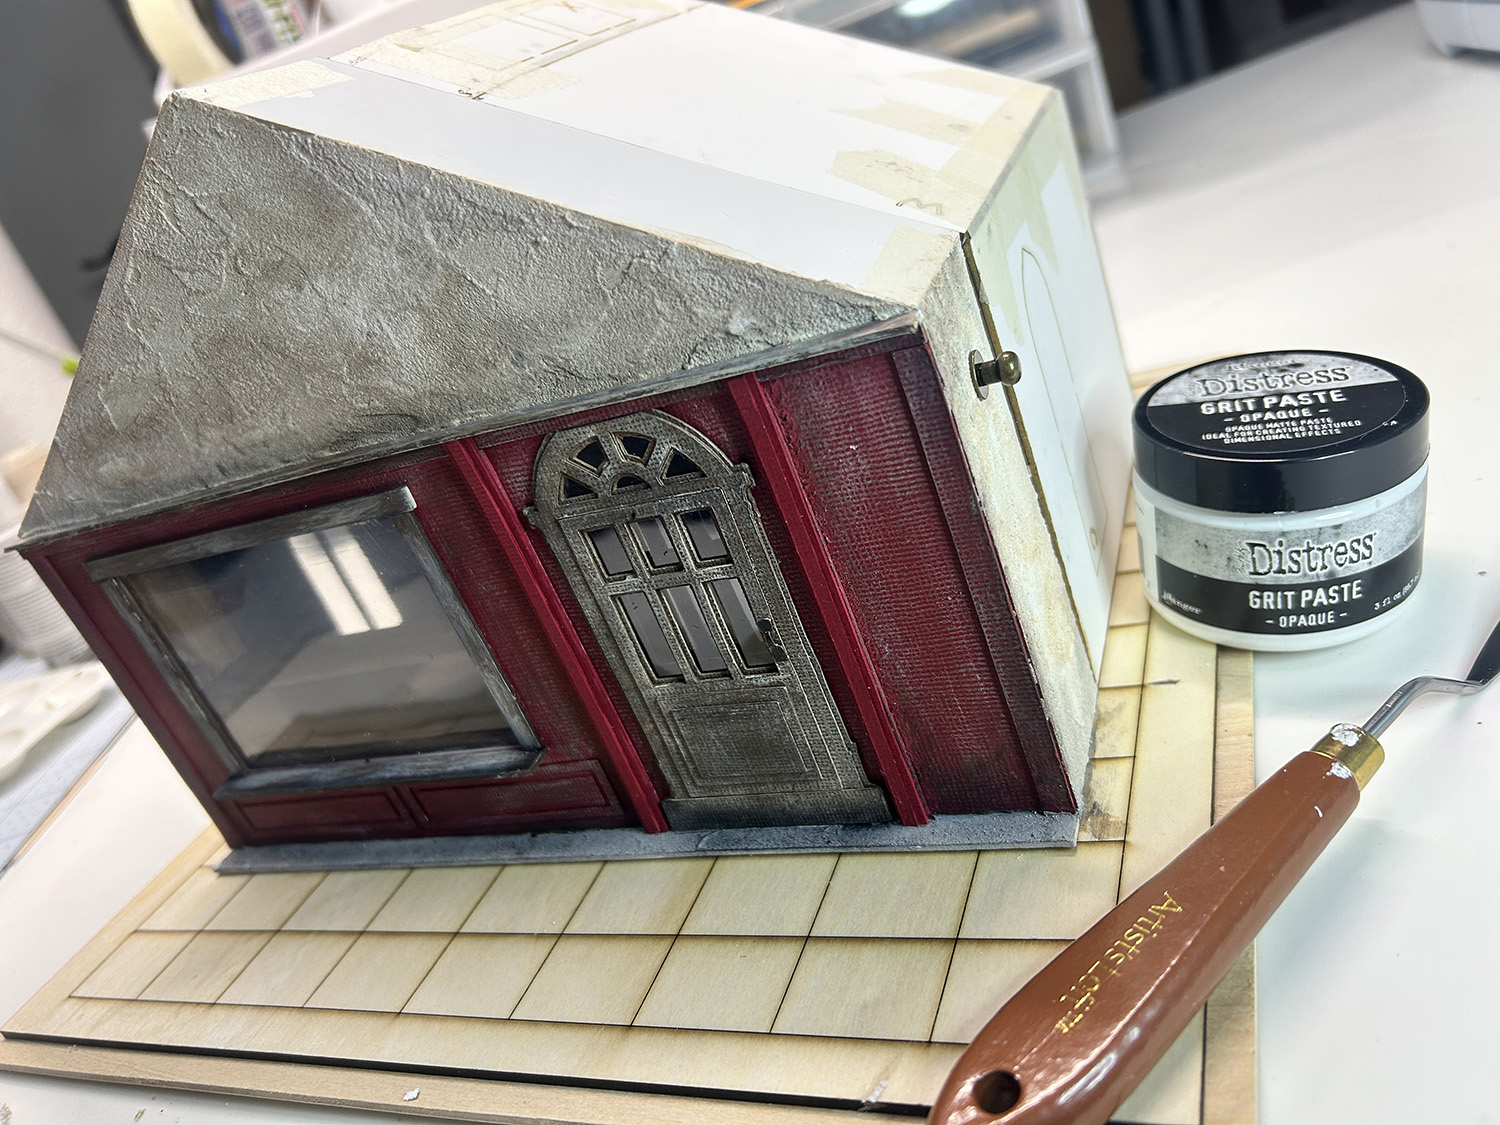
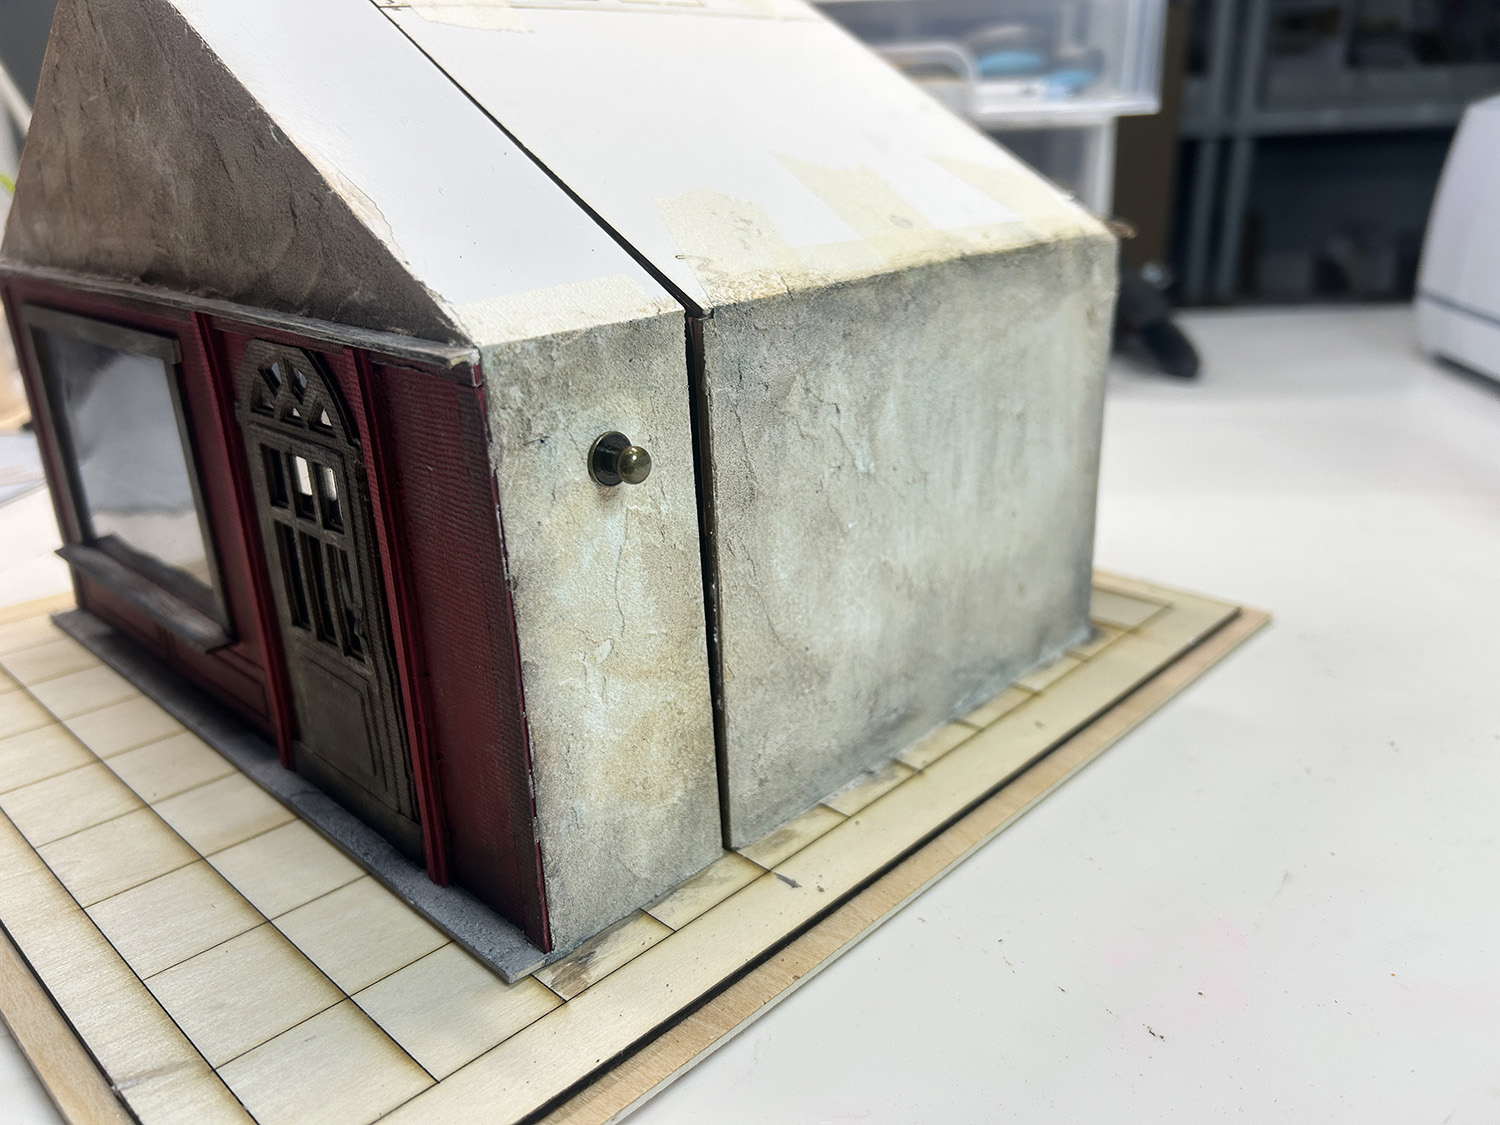
I’m using AC Textured Cardstock in Rouge color for the front exterior. The wood areas will cover from the bottom up to the roof line only. I will tone down the red color by dry-brushing it with coffee bean and linen folk art acrylic paint, then lightly brushing on some black soot distress ink on top. Ranger Grit Paste was applied to the top section with a long, flexible palette knife and left to dry. Once the paste was dry, I added a light brown wash of coffee bean paint mixed with water (more water than paint). The long strip at the bottom of the structure was painted with Folk Art Terra Cotta paint in Cool Concrete color. I love this paint for creating sidewalks, brick, stone, and more!
For the hinges, I decided against using metal ones and instead used a cardstock strip as a long hinge. Since this front section will not be opened and closed frequently, the cardstock hinge should last a long time and can be easily replaced if needed.
Lastly, I will apply the grit paste to the left and right sides of the front structure, let them dry, and use the same procedure to age the sides as I did for the top area.
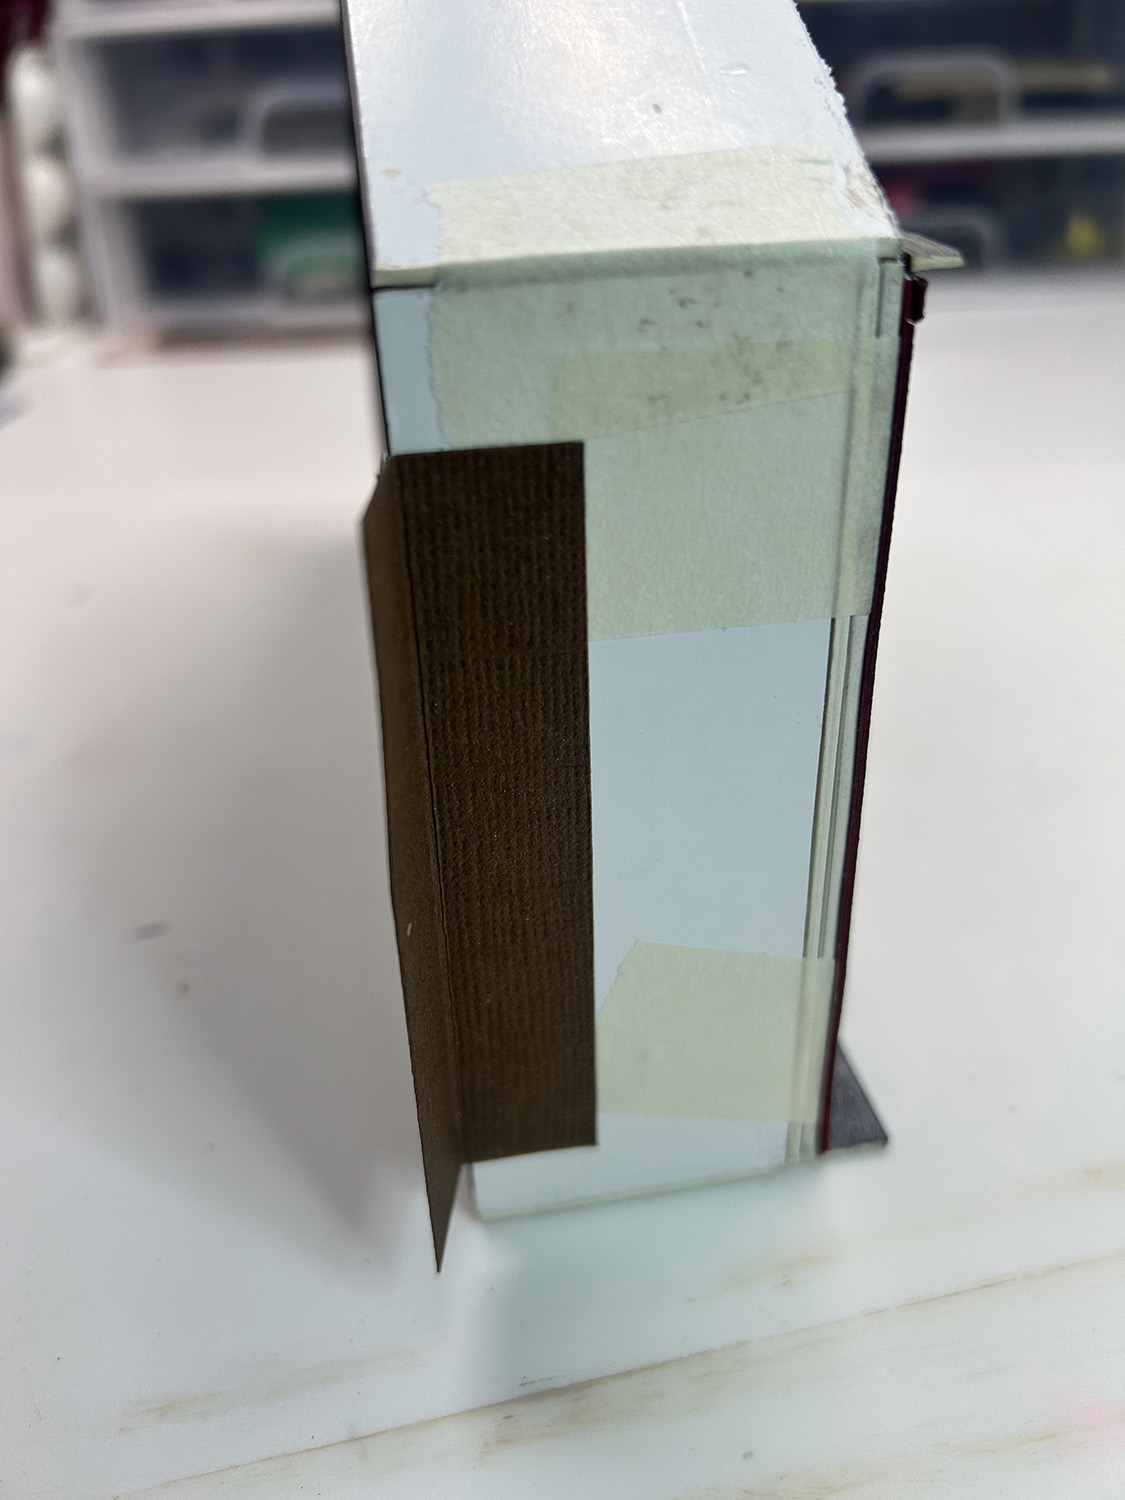
When this has all dried, I will attach the other side of the hinge to the main structure and finish all sides with the grit paste as I’ve done on the front section.

On the right side of the front section, I’ve added a Tim Holtz metal knob. This can be used to open and close the front while also serving as a place to hang a sign from.
Here you can see how well the cardstock hinge works! Now I will cover the remaining structure side walls with the grit paste and let it all dry before continuing on with the roof.
But first, I’m finishing up the “storage area” where all of the lighting is hidden. I wanted this to look like it was made of corrugated metal that was very old and rusty. I wonder if I should have added a faux door to it? Let me know what you think by leaving a comment below.
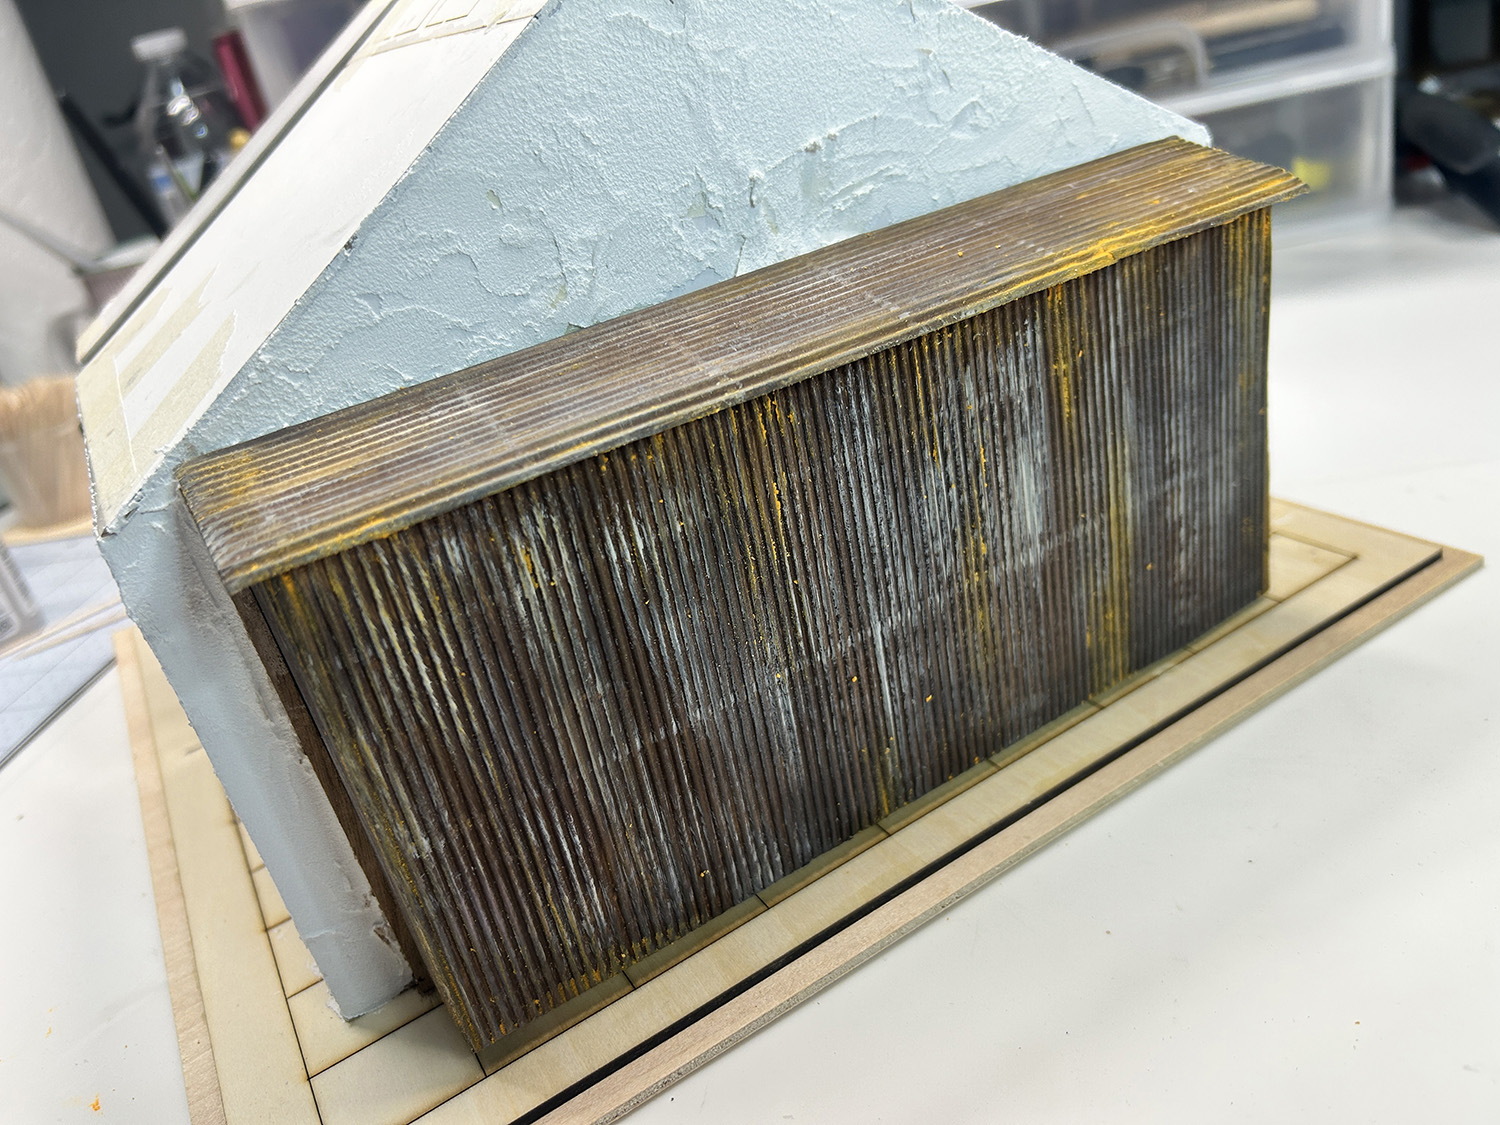
I’ve finished all of the side walls in the same manner as before. This is a combination of a brown wash, some lightly brushed on distress ink in Vintage Brown and Black Soot. I just keep playing around with the three mediums until I have a look that I like.
I’m still thinking of a way to possibly hide the area where the two sections connect. Not sure if it’s possible, but I keep thinking about it. Please leave a comment below if you have any ideas for me on this!!!
On to the roof . . .
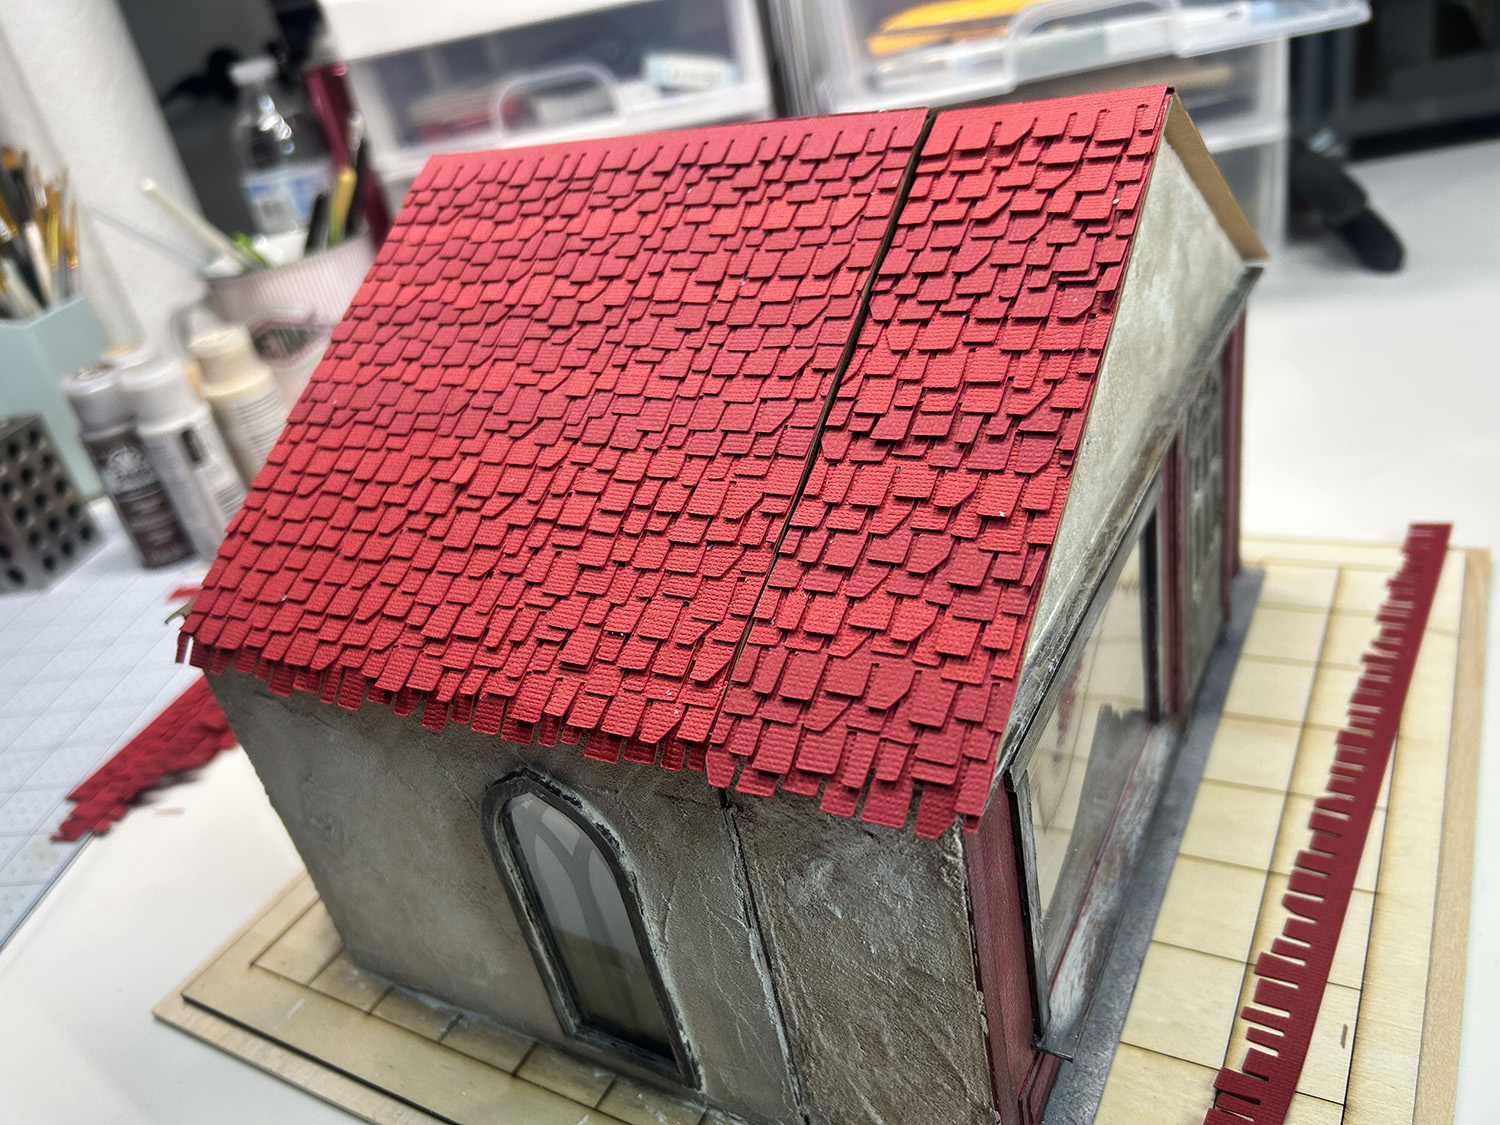
I have been making shingles from cardstock with my Cricut machine for years. Not only do you not have to do the cutting or buy expensive shingle packs, but you can make them in any color you like. It doesn’t matter what color of cardstock you start with or even if you use the same color for all of the shingles, because you can paint them any color you like! You can either use whatever you have on hand and paint the finished roof with the color of your choice, or you can use the color of cardstock that you want the roof to be and then dry-brush the roof in various other colors. For this project, I started with red cardstock for the shingles and dry-brushed them when the roof was finished.
I do sometimes have shingle packs in my shop here, but I plan to add the SVG files for various styles to my “Freebies” page in the future. So do check that out if you are interested in trying this!
Still not happy with the uneven roof, but for now I’m leaving it as is in hopes I will come up with a solution at some point.
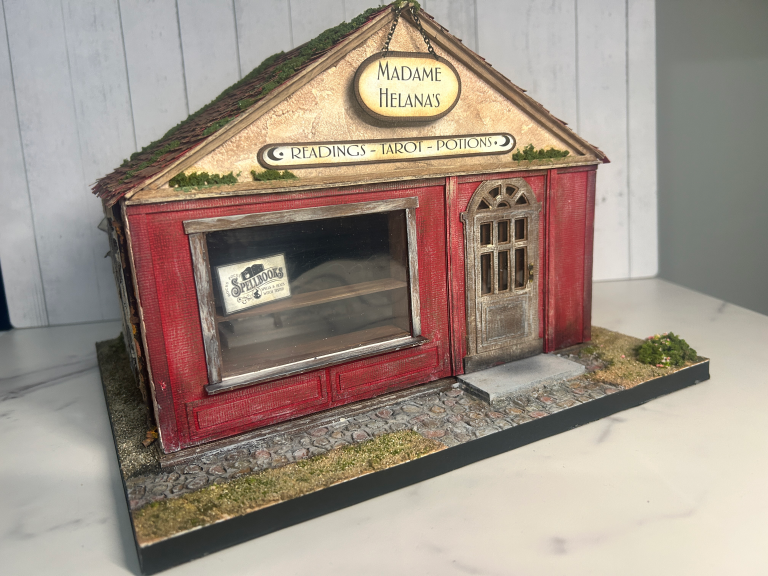
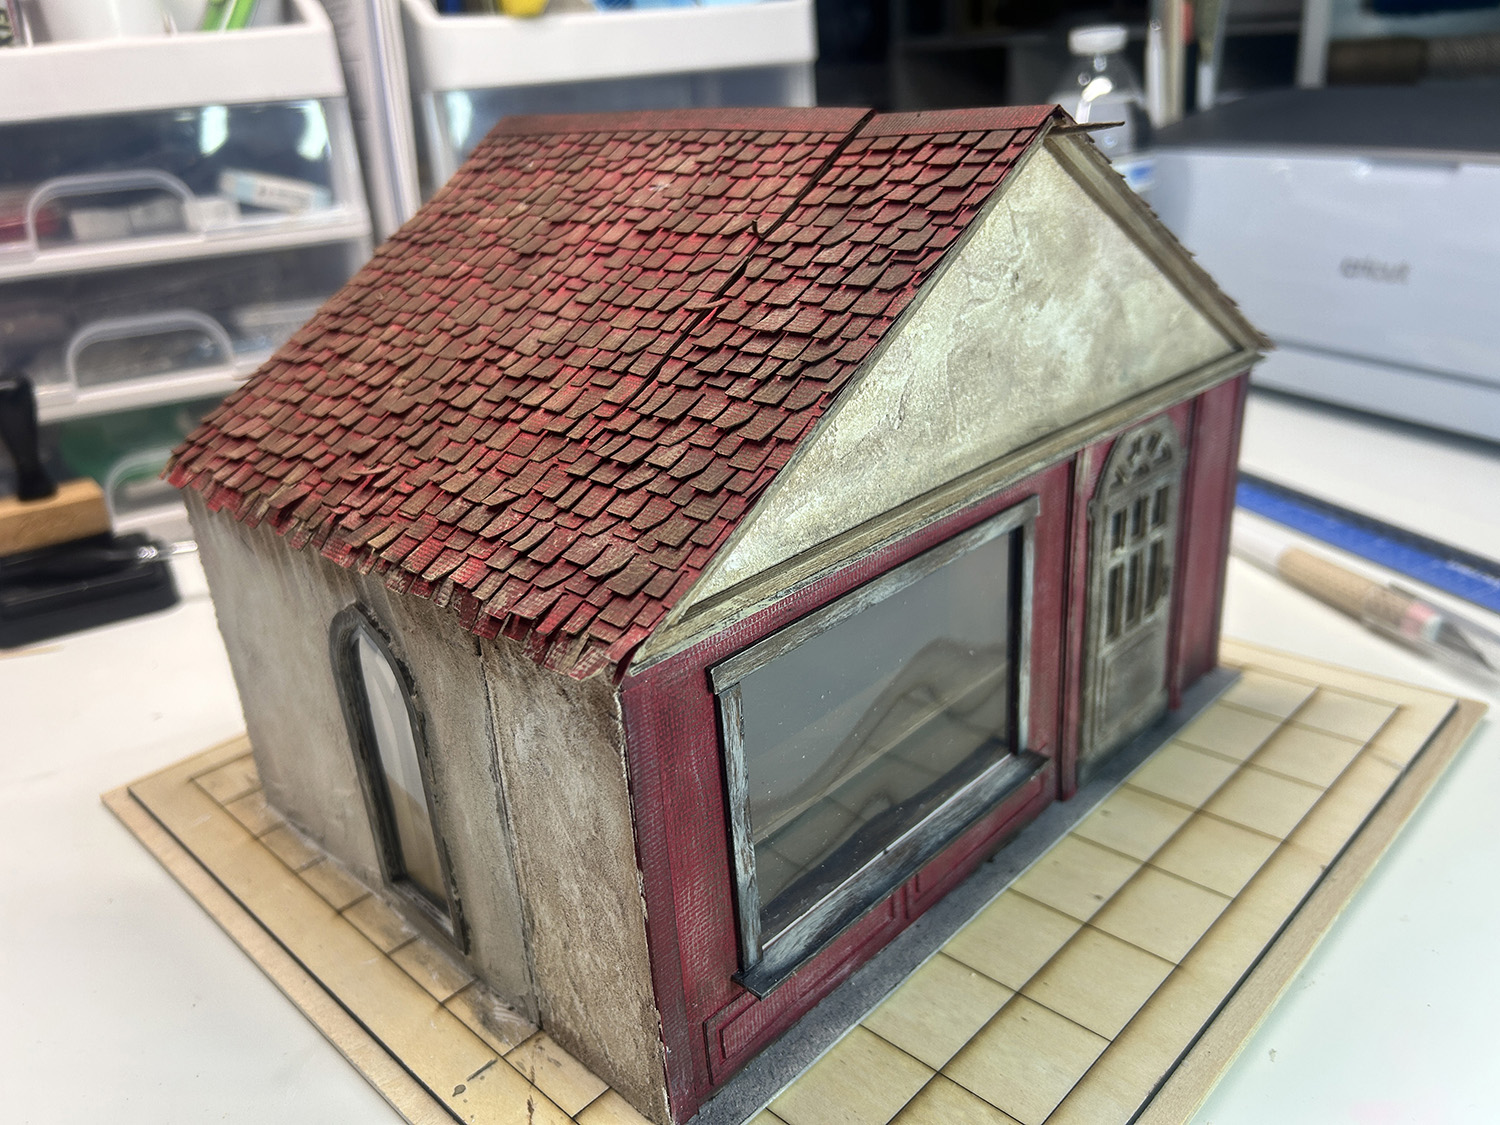
And here is the roof in its final stage after painting. I also added some square dowel wood trim around the top plaster area of the front and back sides. The toothpick at the top will eventually hold a hanging sign.
So this is the basic construction of Ara’s Fireplace Room with the two additions I’ve added. I’ve had such fun working on this kit, and it’s a fantastic design, just as it was created, as a roombox! I do hope that you were encouraged to visit Bentley House Minis and pick up this kit to try for yourself!!! i promise you won’t regret it.
I have to stop for a bit and take care of some other things, but I will post Part 2 when I start work on the shop signs and inside furniture. Be sure to sign up for my newsletter to get notice of all new posts, freebies, and videos as they are released.
Teri